 |
| 3 | ||
 | ||
| Civic and Environmental Education (CEE) training course Teacher’s Guide The publication is created within the European project "ECO-CIVIC Wareness" (ECA project). It is the result of the work of four organizations: Prosveta-Sofia Foundation - Bulgaria, Instituto Politecnico de Santarém (IPS) - Portugal, Antalya Provincial Directorate of National Education (APDNE) – Turkey and Foundation for Environmental Education (FEE) – Latvia. The project is implemented within the Erasmus program according to Grant Agreement No. 2023-1-BG01-KA220-SCH-000160813 signed between Prosveta-Sofia Foundation (project coordinator) and Human Resources Development Center (Erasmus National Agency for Bulgaria). Authors: © Ass. Prof. PhD Silviya Tsvetanska, Petya Yordanova. (for Prosveta-Sofia Foundation - Bulgaria) © Ana Da Silva, Ana Torres, Bento Cavadas, Jose Maurício Dias ( for Instituto Politecnico de Santarém - Portugal) © Pinar Bayram, Sema Aykuş (for APDNE - Turkey) © Daniels Truksans (for Foundation for environmental education - Latvia) Editor: Elena Lazarova The publication is available here. The images and graphics used are open and premium licensed by Shutterstock and original images of the partners. Reproduction is authorized provided the source is acknowledged. Publisher: © Prosveta-Sofia Foundation, Sofia, Bulgaria ISBN ??? (pdf) This publication reflects the views only of the author, and the Commission cannot be held responsible for any use which may be made of the information contained therein. | ||
| 4 | ||
| | ||
| 5 | ||
| | ||
| 6 | ||
| | ||
IntroductionWelcome to this comprehensive training course manual on Civic and Environmental Education for primary school students. As educators, you play a crucial role in shaping the minds and hearts of the next generation. This manual is designed to equip you with the tools and knowledge necessary to teach young learners about essential topics such as children's rights, the value of diversity, identity, active citizenship, and pressing environmental issues like biodiversity loss, climate change, and environmental pollution. In today’s rapidly evolving world, it is more important than ever to foster in students a deep understanding of their rights and responsibilities, while also nurturing their sense of identity and belonging. Our collective future depends on cultivating informed, empathetic, and proactive citizens who not only appreciate the richness of human diversity but also are prepared to take meaningful action in response to environmental challenges. Children’s Rights: Every child deserves to know their rights and understand how to advocate for them. By teaching about children's rights, we empower students to voice their concerns and contribute positively to their communities. This segment of the course emphasizes the importance of awareness and respect for these fundamental rights, which underpin a fair and just society. The Value of Diversity and Identity: Embracing diversity and fostering a strong sense of identity are key components of social harmony. In this course, we will explore strategies to help students recognize and celebrate their own uniqueness and that of others. By promoting inclusivity and mutual respect, we lay the groundwork for a more cohesive and understanding society. Active Citizenship Skills: Citizenship is more than just a label; it’s an active and engaged role in one’s community. We will delve into practical ways to teach students how to participate in civic life meaningfully, from understanding democratic processes to contributing to the life of their school and class – their small community. These skills are vital for preparing students to be responsible and proactive members of society. Environmental Awareness: The health of our planet is inextricably linked to the well-being of its inhabitants. This manual addresses critical environmental issues, including biodiversity loss, climate change, and pollution. Through engaging activities and discussions, we aim to instill in students a sense of stewardship and a commitment to sustainable practices. It is our responsibility to guide them in understanding the impact of human actions on the environment and to inspire them to take part in its preservation. Each topic of this manual is crafted with age-appropriate materials and interactive methodologies designed to engage young minds. We encourage you to approach these topics with sensitivity and enthusiasm, fostering an environment where students feel safe to ask questions, express their thoughts, and develop their understanding. By the end of this course, you will be equipped with the knowledge and skills to inspire a new generation of informed, compassionate, and proactive citizens. Together, we can make a meaningful impact on our students’ lives and, consequently, the world around us. Thank you for your dedication to this vital aspect of education. Your commitment to nurturing the minds and hearts of future generations is invaluable. Sincerely, Elena Lazarova Project administrator Prosveta-Sofia Foundation | ||
| 7 | ||
| | ||
Instructions to the teachersDear Educators, The “ECO-CIVIC Awareness” project was developed as an effort to equip you with skills and ready-to-use teaching resources to inspire a new generation of informed, compassionate, and proactive citizens. Using the training course lesson plans will teach students to know and respect other people’s rights, to value every member of society as a human being, how to participate and actively contribute to school life, to become aware of the consequences of our actions on the environment and how to act to save the earth. Together, we can make a meaningful impact on our students’ lives and, consequently, the world around us. The training course is addressed to students aged from 7 to 11 years old. This is the time when they start school where they spend a lot of time, so interventions such as this one can have an actual impact. Being educators you are given the opportunity to be flexible, deliver the knowledge and play a crucial role in the development, progress and successful completion of the training course. The key elements that can guarantee the successful implementation of the trainings are numerous, and they are all equally worthy – your knowledge about and your firm belief in the project ideas, the training you received, your skills to provide positive emotional atmosphere in the classroom during the training sessions and during everyday teaching, your skills to promote mutual respect among students, encouraging their equal participation and involvement as a way to ensure the effectiveness of the project. By joining the project you join a large international team of like-minded professional whose main objective is to enhance the development of children’s skills and self-esteem, which originate from their own personal skills. This way you will help students to develop a positive attitude and behavior towards the diversity of personalities and ideas in the world. In the CEE training course toolkit you will be introduced to new teaching methods and methods typical for non-formal education. Using them in class may be stressful at the beginning. The following words of advice could significantly help you in order to properly implement the trainings.
You may be puzzled and worried by the fact that the use of active learning methods causes mess and you feel you are losing control of the class. You must bear in mind that applying new teaching methods presupposes a different kind of control. When students work with a variety of methods it is natural that the teacher is not continuously in direct contact with them. The general intervention strategy must be clear and you should be able to intervene when necessary. Consider the sufficiency of time made available for each training resource, as well as the appropriateness of the space you have in the classroom for applying the specific method (size, furniture arrangement and proximity to other classrooms). Last but not least: Relax and have fun! After all this is what Non-formal Education and Teaching is about! | ||
| 8 | ||||||||||||
| | ||||||||||||
Class preparation for the training course and the training sessionsThe HOPES&FEARS/ GROUP CONTACT session is to be held at the beginning of the school year prior to the planned training sessions making use of the resources in the Teacher’s Toolkit. Hopes & Fears / Group Contract>
| ||||||||||||
| 9 | ||||||
| | ||||||
| ||||||
| 10 | ||
| | ||
Opening a training sessionWe all know that if you eager to do an activity and start doing it with positive expectations, the outcomes are far more likely to be better and the intervention – to be more efficient. Students may come to class either with great interest, or not be interested at all. Sometimes the teacher may face notable resistance if he/she begins directly with the planned theme. The students in the class may at first need to calm down or to be stimulated. There is a series of methods that can be used to start a training session:
| ||
| 11 | ||
| | ||
| NON-FORMAL EDUCATION Teaching methods In European projects – particularly within the frame of Erasmus - it is preferable to apply non-traditional teaching methods, which create a pleasant atmosphere in the class and turn learning into an interesting experience. In order to choose a method we have taken into consideration the aims of the resource. An appropriate method encourages students to identify situations in the reality of daily life and it gives them the opportunity to discuss issues as seen from their perspective. To ensure success of the method it is necessary to prepare it in the right manner. This manual consists of 38 resources distributed in three modules: Children’s Rights - Human Rights; Diversity and Social Inclusion; and Identity, Active Citizenship and Social Involvement. Each training resource consists of two tools: (a) Non Formal Education (NFE) Tool and (b) Digital Tool (DT). The NFE tool describes the “exercises” (activities) which should be utilized with the group. The DT is an extra tool which is to be used to enrich the NFE tool. Depending on the resource, the DT could be used either prior, during or after the implementation of the activities. The NFE tools used are somehow “repeatable”; the same tool (method) can be used in a variety of resources. The same principle accounts for the DT’s. The methods (NFE tools), which are applied in the present toolkit, are described below:
It has been established that team work in small groups of 4-6 students is a very effective working method. In small groups students have the opportunity to acquire knowledge, to comprehend and apply such knowledge while shaping attitudes and making choices. By discussing, participating and communicating in the group, students can develop and exercise appropriate skills. Organizing the class into small groups can be achieved in different ways: The educator explicates an activity and students shape small groups of 4-6 persons in which they practice different activities.
The educator introduces the topic, students discuss it in groups and present their conclusions to all members of the class. Students could work individually and afterwards discuss their conclusions in their group. By discussing in the class, an issue is raised and students are divided into small groups in order to discuss and propose solutions.
| ||
| 12 | ||
| | ||
| 2. Brainstorming
Brainstorming is a creative method aiming at expressing a variety of ideas. It can be applied for several reasons; most commonly it is used in order to cover as many aspects of the topic under discussion as possible. Brainstorming does not mean simply asking for ideas from others. For an effective brainstorming session there are a few rules to be followed:
Brainstorming is quite simple to utilize. The educator writes the topic or question on the blackboard, then explains the rules to the class setting a time limit, e.g. 5 minutes. Students are asked to begin. The educator writes the ideas on the blackboard quickly. If there is a gap established, the educator can fill it in his/her ideas. Depending on the ideas, they could be categorized, i.e. a few ideas could fall under the same “major” category. The next step is to process the ideas and move on to action. In some cases it may be necessary to ask students to specify some ideas. At this stage some ideas can be clarified, evaluated, chosen and ranked. This procedure is necessary in order to differentiate the ideas, i.e. if there is no differentiation during acceptance of ideas, there will probably be the impression that all ideas are equal and acceptable.
| ||
| 13 | ||
| | ||
| 3. Role-playing games
In role-playing games a certain situation is carried over from the real world into the frame of the role-playing game. Role-playing games are useful when we wish to analyze certain behaviors or to test new or alternative behaviors within a controlled and safe framework. In order to use the role-playing games it is necessary to have a warm and open-minded atmosphere in the class. It is important that all participants are aware of the meaning of the role-playing games and that they agree on certain basic rules in order to work together in a structured manner. Therefore, the educator has to explain in brief the methodology of the role-playing games and further on, the class has to set some rules for the students playing the roles, and for the students watching the performance, before the game starts. Then, the topic is defined as a certain situation and the participating characters are described in detail in order to help all participants to understand their roles. The different scenes should not last longer than a few minutes. Students, not participating actively in the role-playing game, function as observers and they are the audience. The educator acts as the coordinator or “director” and he/she is responsible for planning, carrying out and evaluating the activity.
| ||
| 14 | ||
| | ||
| 6. Case study
A case study (UNSW Australia) is an account of an activity, event or problem that contains a real or hypothetical situation. Case studies can be used in order to help students understand how the complexities of real life influence decisions. A common case usually:
A case study is given to students as an example in order for them to implement an exercise, while at the same time trying to focus on the issue described.
In guided drama students are presented a case as far as general settings and characters are concerned. They are guided through the framework of the plot by receiving descriptions of planned events (meetings) and of their tasks in the respected meetings (messages). They are encouraged to step in the shoes of the characters and, keeping to the provided information, are free to decide on the story, i.e. details of the plot, characters’ speech, etc. The printed information is distributed to the students shortly before the events; students read it and plan their actions and speech right away, similarly to ‘speed dating’ techniques.
A mind map (Wikipedia) is a diagram used to visually organize information. A mind map is often created around a single concept, drawn as an image in the center of a blank page, to which associated representations of ideas such as images, words and parts of words are added. Major ideas are connected directly to the central concept, and other ideas branch out from those. Mind maps can be drawn by hand, either as "rough notes" during a lecture, meeting or planning session, for example, or as higher quality pictures when more time is available.
| ||
| 15 | ||
| | ||
|
9. Blue skies thinking | ||
| 16 | |||||
| | |||||
The more ideas, the better; strive for:
10. Snowballing Snowballing enables participants to think about their own responses and gradually reach out to those around them to consider the thoughts of others on an issue. How to do snowballing? The teacher asks a question and/or poses a scenario and gives the participants a few moments to reflect. Then, participants are asked to turn to the person next to them and discuss their thoughts. Depending on the activity, the teacher may ask participants to prioritize their ideas, come to consensus on their top priorities, etc. (allow several minutes). Then, each pair turns to another pair and discusses their thoughts. | |||||
| 17 | ||
| | ||
USE OF DIGITAL TOOLS
| ||
| 18 | ||
| | ||
EVALUATIONEvaluation is the process of estimating the effectiveness of a training course and it should be an integral part of every training and learning procedure. Evaluation deals with:
Evaluation activities are carried out in order to examine:
What is to be evaluated?
Evaluation methods and strategiesEvaluation of the CEE training course created by the ECA project will be carried out by both teachers and students through:
| ||
| 19 | ||
| | ||
Professional skills of teachersTeachers are tasked with creating a memorable educational impact, and that requires a variety of both hard and soft skills. So, being and educator, you should make sure you understand well some of the most important teaching skills. This chapter covers some of the must-have professional skills of a teacher, which are mentioned later in the lesson plans.
Simply understanding the subject material is useless if you can’t communicate it in a way that engages students and is easy for them to understand. Types of communication skills:
| ||
| 20 | ||
| | ||
Bibliography
| ||
| 21 | ||||||||
| | ||||||||
| Energizers
 * The suggested energizers are different and some of them could take longer, but, as a rule, they are expected to last only a couple of minutes. With the preparation and the time needed to launch and do the described energizers, this is estimated to last 5 minutes. | ||||||||
| 22 | ||
| | ||
| Energizers |  1 - Break the Circle 1 - Break the Circle The teacher assigns randomly a number to each student, depending on the group size, i.e. for 20 students, numbers 1-4 are ok, so each group has 5 people (groups could be synthesized by the students with the same number, i.e. all having been assigned number ‘1’ or by students where each one has his/her own unique number 1-4; similarly and more fun is grouping by ingredient for a Greek salad, where every student is i.e. ‘tomato’, ‘cucumber’, ‘onion’, ‘oregano’, etc.) Once the groups have been formed, they make circles and the teacher randomly picks a number (or an ingredient) to step out of the circle and try to break in, while the others remaining are instructed to not let go of their hands no matter what. This can be repeated once more with another number stepping out. | |
| Energizers |  2 - Moo!!! 2 - Moo!!! The teacher assigns randomly in a piece of paper (turned upside down on their desks) each student with farm animal, i.e. ‘cow’, ‘horse’, ‘sheep’, ‘rooster’, etc. Once the students are informed of their animal role, they are instructed to walk around the room acting like the animal they are assigned (i.e. making its sound), in order to find their kind. | |
| Energizers |  3 - Amoeba 3 - Amoeba An evolution game! Everyone starts off as an amoeba, with the purpose of evolving to a human. All students walk around acting like an amoeba and when they meet with another amoeba, they play one round of rock/paper/scissors. Whoever wins evolves into a worm. When two worms meet they play again rock/paper/scissors and whoever wins turns into a wasp, but whoever loses goes back to becoming an amoeba. This continues until one becomes human. The evolution stages are: amoeba à worm à wasp à chicken à monkey à human. | |
| Energizers |  4 - Human chain 4 - Human chain Everybody stands up in a circle. They close their eyes and start moving towards the middle of the circle, holding their hands up. Whoever they touch with their hands, they hold and do not let go, so they make a knot. Then the facilitator asks the students to open their eyes and try to untangle themselves (make a circle) without letting go of their hands. | |
| Energizers | 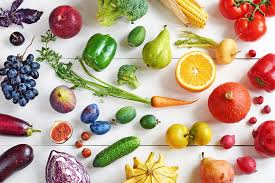 5 - Fruit and vegetables 5 - Fruit and vegetables Students stand in a circle and the teacher distributes randomly pictures of fruits and vegetables (Handout 1, NS_grade1) among students. The teacher puts the two big posters from handout 1 (p.1&2) in opposite corners of the room (poster 1 Fruit; Poster 2 Vegetables). Step1: On ‘Go!” each student goes to the poster where he/she belongs to considering the picture he/she has received. Step2: On ‘Circle’ students make a circle again and exchange picture cards by handing their card to the student standing on their right. The game continues with Step 1, etc. | |
| 23 | |||||||||||
| | |||||||||||
| Energizers |  6 - Keep walking 6 - Keep walking The teacher instructs the students to walk in different manners covering the whole rook, i.e. walk like you are very happy, walk like a very heavy elephant, walk like you are 80 years old, walk like it’s raining cats and dogs, walk like a toddler, etc. | |
| Energizers |  7 - Connecting eyes 7 - Connecting eyes Participants stand in a circle. Each person makes eye contact with another person across the circle. The two walk across the circle and exchange positions, while maintaining eye contact. Many pairs can exchange at the same time, and the group should try to make sure that everyone in the circle is included in the exchange. Tip: Begin by trying this in silence and then exchange greetings in the middle of the circle. Variations: If the teacher considers, knowing the class atmosphere, that some students might be left not participating, i.e. they try to make eye contact but nobody responds to them and they have no chance to move from their initial position, the moderator could divide the class in 2 groups and introduce a competitive element – after the activity each group will be marked on the ‘team spirit thermometer’ (which could be printed on a A4 paper and the teacher marks the degrees with a marker). The more people you have left not participating in the ‘eye contact’ activity – the lower the degrees to be marked on the thermometer. | |
| Energizers | 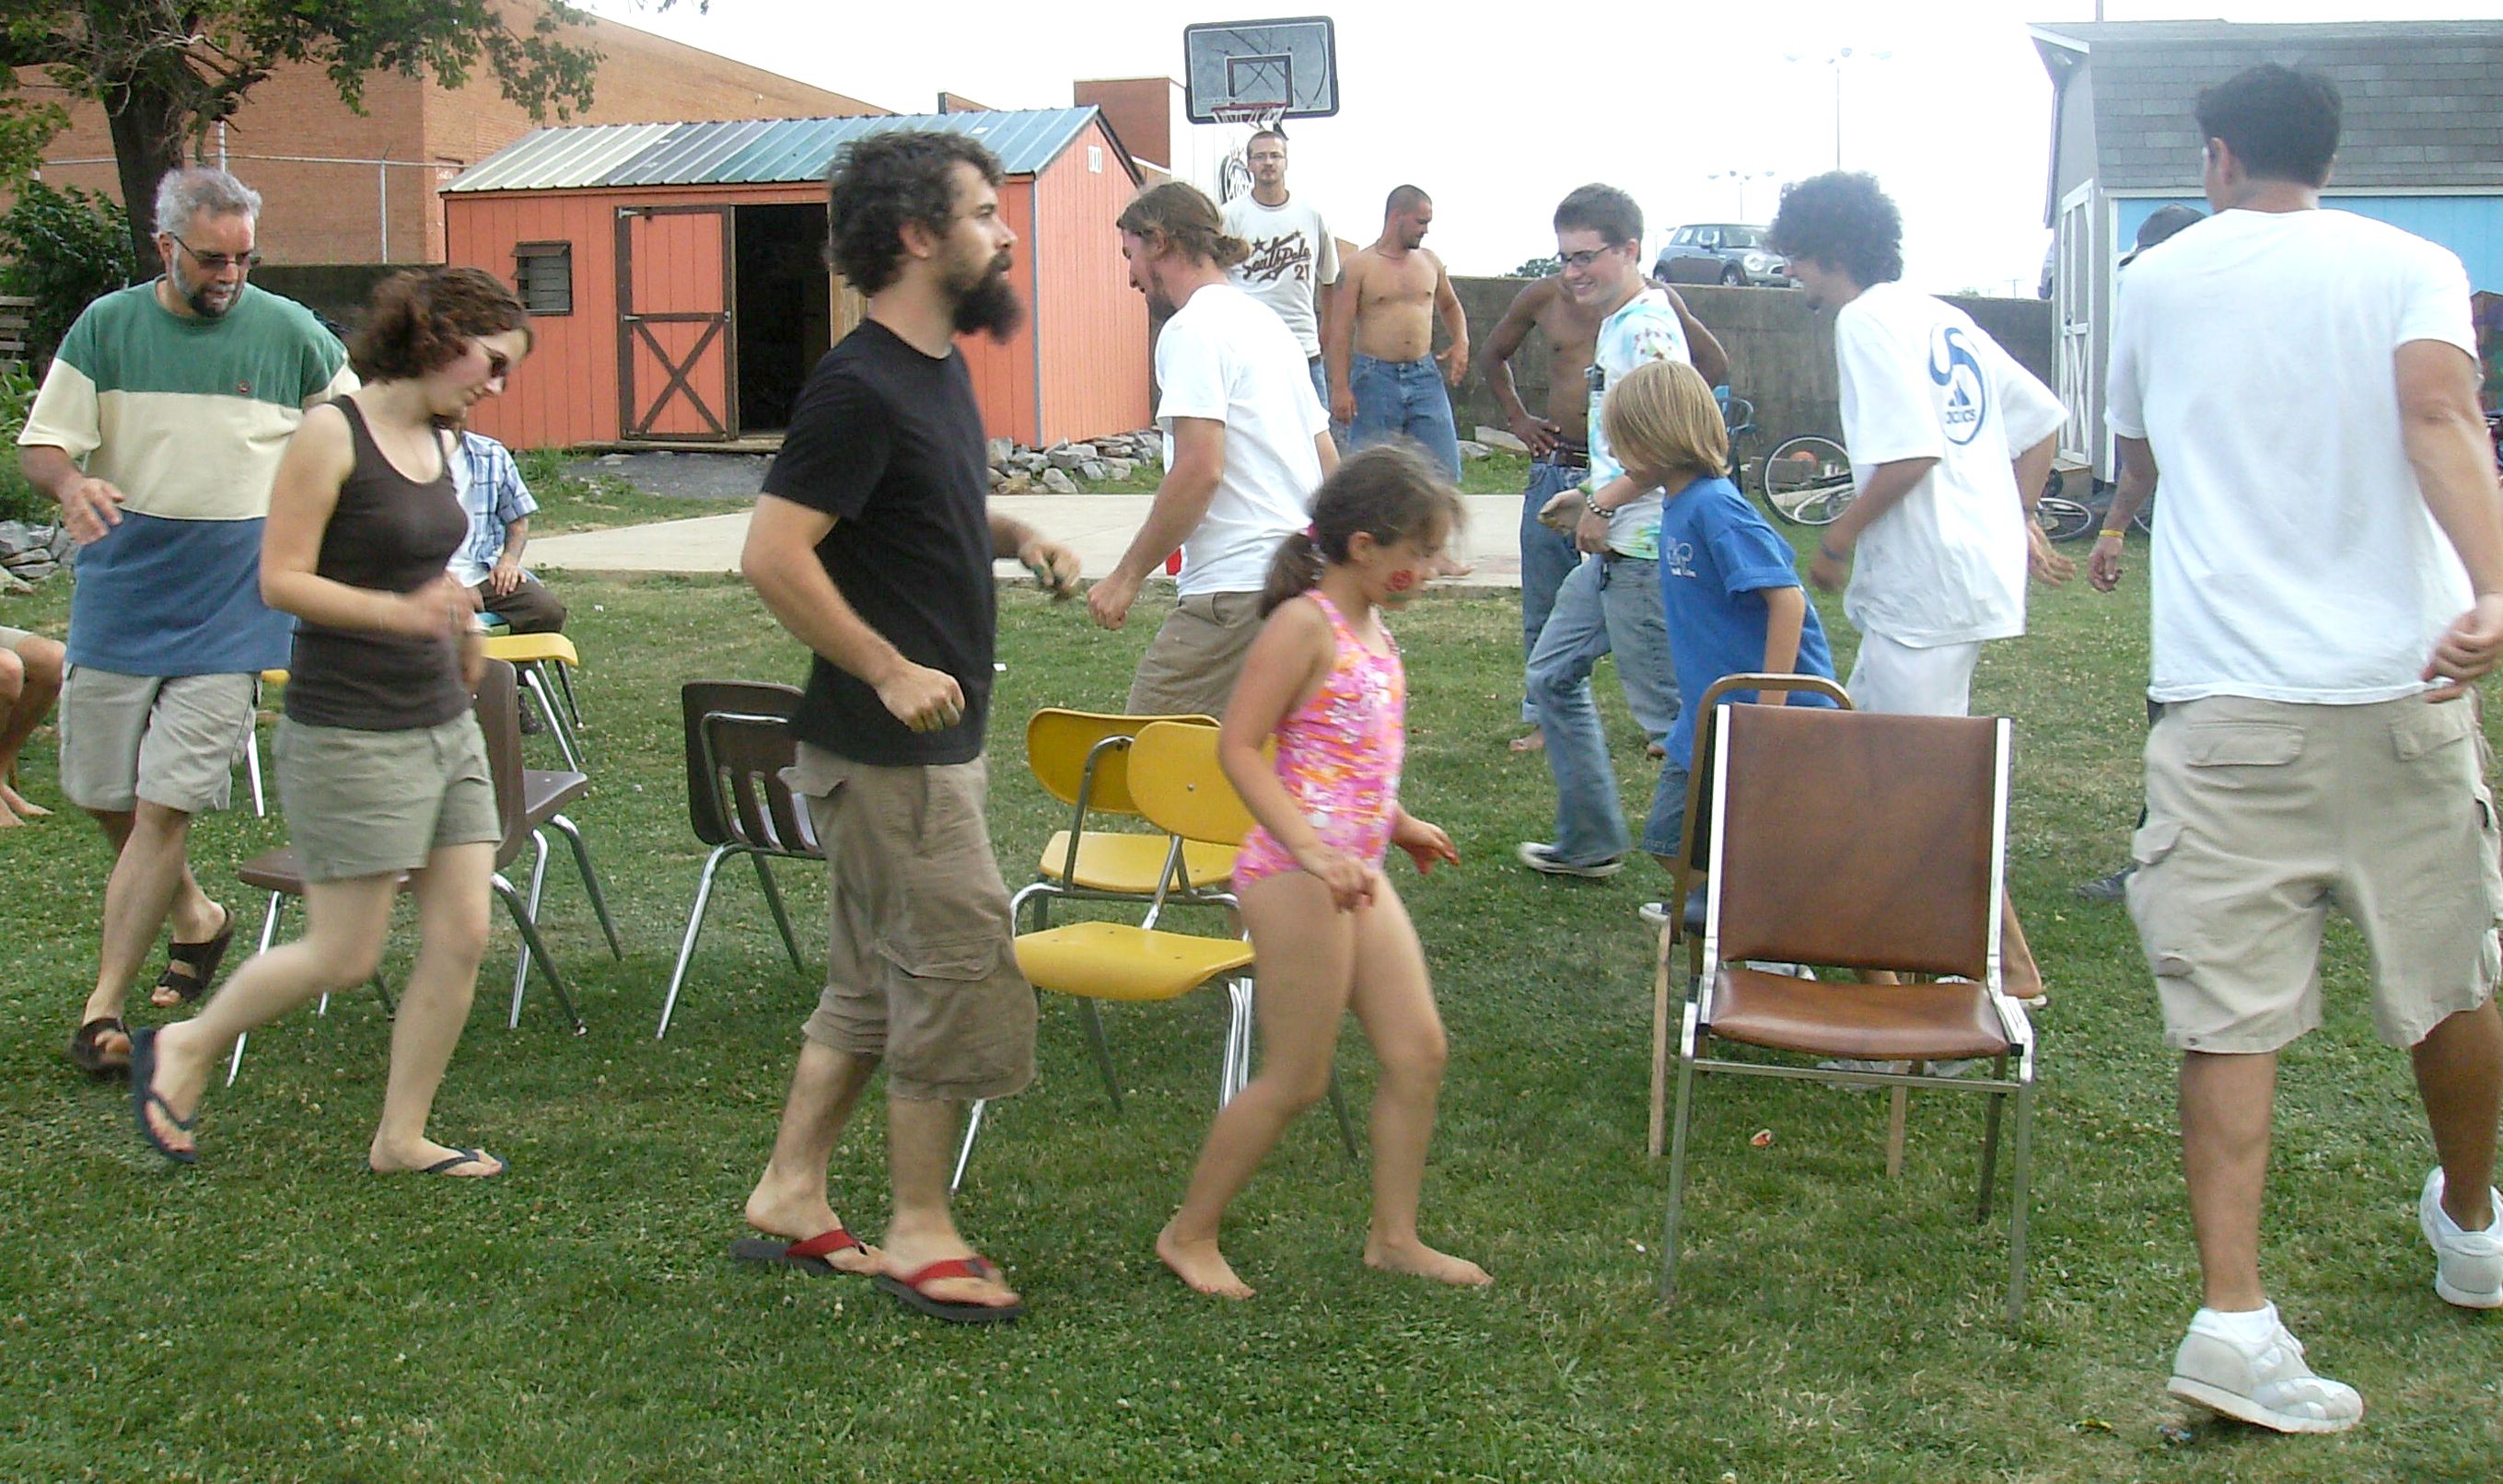 8 - Find another seat: 8 - Find another seat: Have the students sit on chairs in a circle, with the number of chairs being one less than the number of students. The student without a chair stands in the middle and tells their name. Then the student calls out a characteristic or a colour, or type of clothing, e.g. “Everyone wearing orange!”. All participants who are wearing orange must get up and find another seat, but not the one immediately to their right or left. The student in the middle races to find a seat and the person left standing becomes the next caller in the middle. | |
| Energizers |  9 - Balloon pop 9 - Balloon pop Have everyone form a circle. Instruct the participants to put one piece of information about themselves, e.g. I have 2 sisters, or my mother is called Samy, on a small slip of paper, fold it, and put it in a blown up balloon. Throw the balloons in the middle of the circle and then have people take turns popping a balloon, reading the piece of paper, and guessing to whom the information applies. Participants could wander round the room asking ‘yes/ no’ questions to the other participants but not exactly the statement from the paper slip, e.g. they cannot ask “Have you got 2 sisters? But could ask “Have you got sisters?” and then “Have you got more than 1 sister?’, “Have got less than 3 sisters?”, etc. Game finishes when all participants have identified the author of the paper slip they have. *Note: this exercise should be used if there is enough time. | |
| 24 | ||||||||||||||
| | ||||||||||||||
| Energizers |  10 - Rope game 10 - Rope game Have the participants stand on the middle of a space cleared of desks, chairs, etc. Divide the room in a way that allows them easily to move from one half of the room to the other, e.g. by placing a long piece of rope on the floor. The teacher stands at one of the ends of the rope and calls out a characteristic, or a colour or a letter, e.g. “Everyone having blue eyes!”; “Everyone having 3 brothers”, “Everyone whose name begins with B”, etc. and points to the part of the room where the participants wearing orange/ having 3 brothers/ having B names have to move to. All participants who are wearing orange/ having 3 brothers/ having B names move to the respective part of the room; the ones who are not , have to go to the other part. Questions have to be constructed so that the class does not divide in groups having comparatively equal number of students, i.e. one of the groups should consist (in most cases) of one, two or few students. Debriefing: Participants are asked to share how they felt when they were part of a big group; and when they were standing alone (or were part of a very small group); what did they feel of themselves (as part of a small/ big group), and what their feelings were towards the group they were not part of. | |
| Energizers |  11 - Alphabetical order 11 - Alphabetical order Students make a circle with the chairs, take off their shoes and get on the chairs (one per person - the circle needs to be as close as possible). Standing on the chairs and just moving from one to another one without getting off, students have to arrange themselves in alphabetical order according to their name. As soon as they are ready, teacher will check if they are right; if not they continue until they are right. | |
| Energizers |  12 - Body spelling - Body geometric shapes 12 - Body spelling - Body geometric shapes Option 1 The teacher asks students to write their names in the air using different parts of their body, for example, using their hand, leg, lbow, or nose, etc. Optional: If time allows the teacher could ask to the class to spell out some words reproducing the letters with their bodies. Students can collaborate all together or can create different groups. Option 2 Task: Draw a geometric shape in the air using different parts of your body - hands, legs, elbows, noses, etc. Option 3: Task: Work in groups of 2, 3 or more students to make a geometric shape with your bodies. | |
| Energizers |  13 - Simon says 13 - Simon says Teacher tells the group that they should follow instructions when he/she starts the instruction by saying “Simon says...”. If the teacher does not begin the instructions with the words “Simon says”, then the group should not follow the instructions! The teacher begins by saying something like “Simon says clap your hands” while clapping their hands. The participants follow. The teacher speeds up the actions, always saying “Simon says” first. After a short while, the “Simon says” is omitted. Those participants who do follow the instructions anyway are ‘out’ of the game. The game can be continued for as long as it remains fun. | |
| Energizers |  14 - I am going on a trip 14 - I am going on a trip Everyone sits in a circle. Start by saying “I’m going on a trip and I’m taking a hug”, and hug the person to your right. That person then has to say “I’m going on a trip and I’m taking a hug and a pat on the back”, and then give the person on their right a hug and a pat on the back. Each person repeats what has been said and adds a new action to the list. Go round the circle until everyone has had a turn. | |
| 25 | ||||||||||||||
| | ||||||||||||||
| Energizers |  15 - Animal roundup 15 - Animal roundup The teacher tells to the class to silently think of an animal. Then he/she tells to the group that without talking, they need to arrange themselves on a line from largest to smallest animals. Group members can only make gestures and the noise of their animal. After they have finished, teacher ask to the students to say the animal they were supposed to be to see if the order is correct. | |
| Energizers |  16 - Back to back 16 - Back to back Participants find a pair of similar size and weight. They sit on the floor, back to back with their pair. They hold their arms. They have to get up, while keeping the arms and backs together. After trying once-twice with their pair they switch pairs. They can repeat this process with other pairs for a few times. | |
| Energizers |  17 - Toaster or Rock Star 17 - Toaster or Rock Star The group starts in a circle with one person in the center. The person in the center points at someone in the circle and says “Toaster” or “Rock star”.
| |
| Energizers |  18 - Mosquito game 18 - Mosquito game The group stands in a circle and the facilitator tells a story about a plague of mosquitoes and that everybody has to kill the mosquitoes so as they don’t get malaria. The facilitator puts up a mosquito on the head of a person who must lower in order to avoid the mosquito. The two persons next to that person must clap their hands above his/her head to kill the mosquito, but the mosquito escapes and it goes on. When the group is already doing the game well and quickly, the facilitator will add more mosquitoes until it is almost impossible for the group to catch as many mosquitoes. | |
| Energizers |  19 - Grab the finger 19 - Grab the finger In a circle, place right finger on next person s left palm. Try to grab a finger before yours gets grabbed. After doing several times switch; place left finger on next person s right palm and repeat the process for a few times. | |
| 26 | |||||||||||||||||||||||||||||||||||||||||||||||||||||||||||||||||||||||||||||||||||||||||||||||||||||||||||||||||||||||||||||||||||||||||||||||||||||||||||||||||||||||||||||||||||||||||||||||||||||||||||||||||||||||||||||||||||||||||||||||||||||||||||||||||||||||||||||||||||||||||||||||||||||||||||||||||||||||||||||||||||||||||||||||||||||||||||||||||||||||||||||||||||||||||||||||||||||||||||||||||||||||||||||||||||||||||||||||||||||||||||||||||||||||||||||||||||||||||||||||||||||||||||||||||||||||||||||||||||||||||||||||||||||||||||||||||||||||||||||||||||||||||||||||||||||||||||||||||||||||||||||||||||||||||||||||||||||||||||||||||||||||||||||||||||||||||||||||||||||||||||||||||||||||||||||||||||||||||||||||||||||||||||||||||||||||||||||||||||||||||||||||||||||||||||||||||||||||||||||||||||||||||||||||||||||||||||||||||||||||||||||||||||||||||||||||||||||||||||||||||||||||||||||||||||||||||||||||||||||||||||||||||||||||||||||||||||||||||||||||||||||||||||||||||||||||||||||||||||||||
| | |||||||||||||||||||||||||||||||||||||||||||||||||||||||||||||||||||||||||||||||||||||||||||||||||||||||||||||||||||||||||||||||||||||||||||||||||||||||||||||||||||||||||||||||||||||||||||||||||||||||||||||||||||||||||||||||||||||||||||||||||||||||||||||||||||||||||||||||||||||||||||||||||||||||||||||||||||||||||||||||||||||||||||||||||||||||||||||||||||||||||||||||||||||||||||||||||||||||||||||||||||||||||||||||||||||||||||||||||||||||||||||||||||||||||||||||||||||||||||||||||||||||||||||||||||||||||||||||||||||||||||||||||||||||||||||||||||||||||||||||||||||||||||||||||||||||||||||||||||||||||||||||||||||||||||||||||||||||||||||||||||||||||||||||||||||||||||||||||||||||||||||||||||||||||||||||||||||||||||||||||||||||||||||||||||||||||||||||||||||||||||||||||||||||||||||||||||||||||||||||||||||||||||||||||||||||||||||||||||||||||||||||||||||||||||||||||||||||||||||||||||||||||||||||||||||||||||||||||||||||||||||||||||||||||||||||||||||||||||||||||||||||||||||||||||||||||||||||||||||||
| Energizers |  20 - Chief of clan 20 - Chief of clan Everyone stands in a circle. One participant closes his/her eyes or steps out of the room. He/She will have to guess who is the chief of the clan. One participant volunteers to be the secret Chief (quietly, so the "guesser" can't hear anything). The chief begins an action such as snapping fingers, patting the tummy, or slapping knees, and everyone in the circle imitates him/her. The guesser returns to the room and tries to figure out who the chief is. As the guesser looks around, the chief changes the action avoiding being detected. | |
| Energizers |  21 - Name game with balls 21 - Name game with balls Students stand in a circle. The teacher gives a ball to one of the students. He/she holds the ball, then says the name of another participant and passes them the ball. After a few passes, the teacher adds one more ball in the game, and then – another one. This way there will be 2/3/4 balls in the air at a time and all participants will be calling each other’s names | |
| Energizers |  22 - Names and adjectives 22 - Names and adjectives Participants stand in a circle; they think of an adjective to describe character or how they are feeling. The adjective must start with the same letter as their name, for instance, “I’m Maria and I’m merry”. Or, “I’m Alexander and I’m amazing.” As they say this, they can also mime an action that presents the adjective in a meaningful way. (N.B. In the national language versions of the TM there should be used popular names for the country and relevant adjectives in the respective language). Variation (use if time allows): The game could also be used a memory game (concentration game) to check if the rest of the group has remembered the ‘name-adjective’ pairs. After several rounds (each participant repeating his name and adjective, the teacher/ a game master, checks if the group remembers the ‘names-adjectives’ fixed pairs by saying the name of one of the students, e.g. ‘Maria’; Maria steps forward to the middle of the circle and the rest of the group are expected to come up with the adjective previously linked to the name by saying “Maria is merry”. If they cannot guess, the participant in the circle (Maria) might mime again the adjective as a tip. | |
| Energizers |  23 - Emotions Games 23 - Emotions Games Materials required:
Move the tables and chairs around the classroom, so the students can sit in a circle. The game begins with a ball being thrown to a student, at this point the leader who has got the 5 cards (one for each emotion), raises a card; the child who has received the ball must talk about a situation that triggers the emotion that the leader has raised. The ball is then thrown to another classmate and so on until all the students have received the ball and all of them have had a chance to talk about an emotion. The ball can only be thrown once to each student. The game ends when all students have received and thrown the ball and all of them have spoken about an emotion. | |
| Energizers |  24 - I need more space! 24 - I need more space! Split students in groups of 5 (or 6). In each group assign consecutive numbers to its members. Ask the groups to make circles and randomly pick a number – all students who have been assigned to this number have to step in the circle and squat. The other members of the group are clustered tightly around the squatting student. He/she tries to stand up and make the others let him have more space around him, but they stand very close and do not allow him/her to have more space and move freely around. | |
| Energizers |  25 - The mirror game 25 - The mirror game The game begins with the room cleared of tables and chairs. The students start by team up in pairs and stand in front of each other. They agree who starts the game, who plays the mirror and who plays the person. The game begins to the sound of a song chosen by the leader. The person will start to move and the "mirror" will have to follow him/her, immediately repeating the person's movements. When the leader stops the music, they swap places and the person who was the "mirror" becomes the person and vice-versa. | |
| Energizers |  26 - Empathy game 26 - Empathy game Students get into a circle with sheets of paper and coloured pencils in the centre of the room and all students are invited to express, through colour, an emotion or feeling, by using different colours and painting them on the sheet of paper. When they have finished colouring, all the students show the sheet of paper and explain what that colour represents at that moment. If it is something negative, the classmates must voluntarily offer him/her other colours that transmits a positive emotion, that represents something positive. The aim of the game is that everyone feels free to share a feeling and receive peer support if needed. | |
| Energizers |  27 - Power ON – Power OFF 27 - Power ON – Power OFF Play any relaxing piece of music and instruct students: Sit back and rest. You can sit on the floor with your legs out straight and your back - leaning against something. Or you can sit in your chair, with your legs long, your feet flat on the floor while you lean against the back of your chair. Or stand up. Get comfortable. We’re going to turn on the energy in our bodies. And then we’re going to turn it off. Let’s begin with the toes. Wiggle your toes to wake them up. Ready? Tighten your toes, like you’re making a fist with them. Try to only turn on the power in your toes, and let all other areas of your body rest. Breathe in while they are tight. And then when you breathe out, turn the energy off. Let your toes rest. Again. Breathe in and turn the energy on in your toes...just your toes. Breathe out to turn it off and let the tightness go. Now, let’s give your legs a chance. Turn on the energy in your legs, straighten them. Make tight, tense muscles. Now breathe in to add even more energy. Exhale and let go. Legs go soft. Power goes off. Let’s do one more round with legs. Ready? Start breathing in, turn the energy on, legs are working hard, tight, tense. Then turn that energy off, breathe out, relax, soften the muscles. You’re in control. Now your hands. Make fists and inhale as you turn your energy on, and then let’s exhale and rest. Turn it all off. Add your arms this time. They can be straight or bent. Make fists, arms get tight, energy ON, breathe in. Breathe out and let go. Energy OFF. Arms and hands one more time. Turn it on while you breathe in, and turn it off with an outbreath. And finally, we’re going to try the whole body. If you want, add your face muscles too - crinkle up your eyes, your lips, your cheeks. Ready? Breathe in and turn on your whole body’s energy...toes, feet, legs, hands, arms, face. Feel the energy in your body. It’s ON! And now turn it all off while you breathe out slowly. Relax. The energy’s off. See if you can stay still, just for a while. Energy’s off. Notice how the different parts of your body feel, now that you’ve practiced being in control of your own on and off switch. | |
| Energizers | 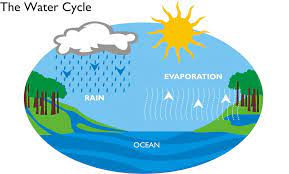 28 - Water cycle 28 - Water cycle Explain to the kids the process of the water cycle (evaporation, condensation, precipitation) in simple terms. Play some music and have the kids dance around the play area. When the music stops, call out one of the water cycle stages. When a stage is called out, the kids must quickly freeze in place, acting out the corresponding stage (e.g., spinning to represent evaporation or forming a group to mimic precipitation). Continue playing the music and calling out stages intermittently. | |
| Energizers | 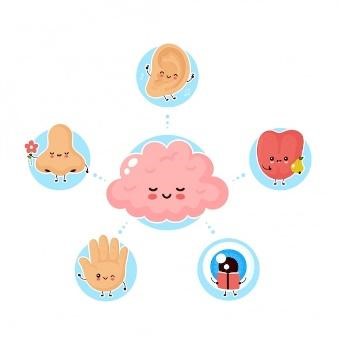 29 - Brain Gym 29 - Brain Gym 1. Ask students to rub their stomach with their left hand in a clockwise direction and at the same time rub the top of their head with their right hand in a counter clockwise direction. 2. After a few seconds ask them to keep going and to begin tapping their right foot. 3. Ask students to close their eyes and imagine that they are eating ice-cream. 4. Have them imagine they see a monkey riding a bike. 5. Finally have them say “Save our planet!” | |
| Energizers | 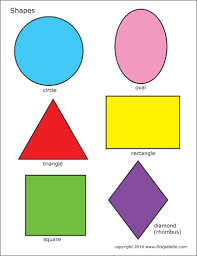 30 - Find the figure 30 - Find the figure Option 1 Divide the class into several groups. Each group gets 1 set of the shapes and explanatory texts (Annex 1) - cut out separately each statement that describes the shape. The task of each group is to match the statements with the images of the shapes. When the groups are ready, check if the task was competed correctly. This exercise serves both to energize the students at the beginning of the lesson and as a transition to the topic of the lesson. Working time – 8 min. Option 2 Rearrange the tables (or desks) so that students can move freely around the room. Place the images from Annex 1 in the corners of the classroom. Allow each child to pick up a card with a description of a geometric figure. The task is to get as quickly as possible to the place with the geometric figure that corresponds to the description of the card. This exercise serves both to energize the students at the beginning of the lesson and as a transition to the topic of the lesson. Working time – 3 min. | |
| Energizers | 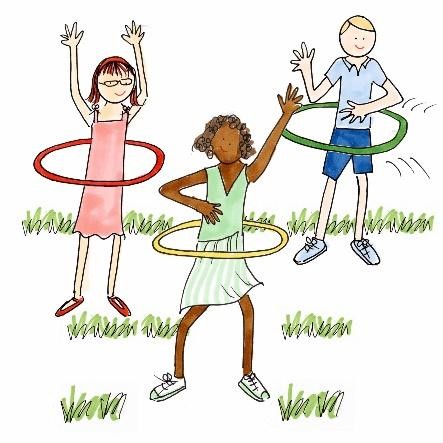 31 - Racing for resources 31 - Racing for resources Part 1 Place several hula hoops on the ground (approx. one hoop for every 3 students). Hula hoops represent the natural resources available for all the Earth’s inhabitants. Explain to students that they represent all the living things on our planet. They can choose what they want to represent (a human, an animal, a plant). Students start walking around and when the teacher claps his/her hands, everybody dashes to a hula hoop so that they can survive (the hula hoops are their homes, with everything they need to survive). Only three students can be in one hula hoop (because the hula hoop provides resources for only 3 living beings). Because the hula hoops are more than needed, everyone is expected to have landed in one. The teacher could comment “Did everyone make it safely? Our planet is a wonderful place. Lots of space and room for everyone!” Part 2 Ask students to get out of the hoops and scatter in the room. Place the Racing for Resources cards (Annex 4) face down on a table and ask one of the students to pick up one card and read it aloud. All the students for whom the statement is true have to raise their hands. Possible scenarios for the next steps Scenario 1 (all the green cards): the card reads “You use your own grocery bags when you go shopping in the supermarket.” The students who do that raise their hands and the teacher counts them. If the number is more than 50% of the students, no further actions follow, and the teacher asks somebody to pick up another card. Scenario 2 (all the yellow cards): the card reads “You leave the lights on when you leave the room.” The students who do that raise their hands and the teacher counts them. If the number is more than 50% of the students, the teacher takes away one hula hoop because this is an example of a human action that depletes natural resources or is bad for the Earth. Continue the game in the same way until all cards have been read, removing a hula hoop each time if more than 50% of the students have raised their hands when the yellow cards have been read. Finally, the teacher claps his/her hands and students have to fit in the available hula hoops. If the number is the same, everything is fine, and this is the result of the responsible behaviour of the students. If the number of the hoops is smaller, some students will stay outside because their habitats have disappeared due to the bad habits. | |
| Energizers |  32 - Animal fact hunt 32 - Animal fact hunt Write down facts about endangered species and their habitats on separate index cards. Include a mix of positive and negative facts (e.g. "The giant panda eats mostly bamboo." or "Polar bear population is threatened by melting sea ice.") Hide index cards around the classroom or outside in a designated area (depending on weather and space). Divide students into 2 teams. Explain that they are going on a scavenge hunt to learn about endangered species and their habitats. When teacher gives signal, each team will work together to find one hidden index card. Set a time limit for the scavenger hunt. (around 3-5 minutes) Once a team finds a card, they must read the fact and then perform a movement that represents the fact (e.g. If the fact is about flying animal, they might flap their arms like wings.) When all of the teams come back, they present the fact and movement. | |
| Energizers |  33 - Broken telephone 33 - Broken telephone
The activity can be repeated several times changing the last person in the line who starts the game. | |
| Energizers |  34 - SPELL THE WORD 34 - SPELL THE WORD Ask eight people from the first row to come to the front of the room and stand in a straight line facing the rest of the class. Distribute the letter cards – E S R R C E U O (RESOURCE), one to each participant. Ask each person to hold his/her letter card above her head, so the class can see it easily, but the holder doesn’t know which letter he/ she is holding Explain that the letters spell an 8-letter word. Ask the students from the audience to give directions to the letter holders to rearrange them in the correct order in order to spell the word correctly. (Examples: Anya, (who is holding letter E) move to the end of the row; Peter, (who is holding letter R) move to the font of the row, etc.) When the word is spelled correctly, ask everyone to read it aloud. | |
| Energizers |  35 - Water - Soil - Air 35 - Water - Soil - Air Students stand in a circle as shown in the photo. When they hear the word Water, they have to make 2 jumps forward without breaking the circle; Soil is for making 1 jump backwards and Air stands for making a complete turnaround (360ᵒ). | |
| Energizers |  36 - Tag of Rights 36 - Tag of Rights Gather the children in a large open space, such as a playground or gymnasium. Explain that as they play tag, whenever someone is tagged, they must freeze and shout out a right that all children have, such as the right to play, learn, or be safe. Choose one child to be “it” first. That child will run to tag other children. When a child is tagged, they freeze in place and clearly state a child right. Once they have stated a right, they unfreeze and join in the game to tag others. The game continues with children spreading awareness of different rights with each tag. | |
| Energizers |  37 - Freedom Freeze Dance 37 - Freedom Freeze Dance Have the children stand in an open space where they have room to dance. Play upbeat music and encourage the children to dance in any way they feel comfortable. At random intervals, stop the music. When the music stops, all children must freeze in their current pose. When they freeze, select one child to share a thought on why playtime is important. Restart the music and repeat the process, allowing different children to share each time. | |
| Energizers |  38 - Balloon Keep-Up 38 - Balloon Keep-Up Inflate a balloon and gather the children in a circle. Explain that the balloon represents the right to play and that they must keep it in the air to symbolize keeping this right alive. The children will use their hands to keep the balloon from touching the ground. If the balloon falls to the ground, the group must start again and discuss what they can do to better support each others rights. Challenge the children to keep the balloon up for as long as possible, working together as a team. | |
| Energizers |  39 - The Weather Forecast 39 - The Weather Forecast The teacher explains that they will play a game. Each student will get a chance to act out a type of weather, and the rest of the class will mimic their actions. The teacher starts the activity by announcing a weather condition, for example, "It is raining cats and dogs." The teacher demonstrates the actions that represent this weather (e.g., mimicking holding an umbrella, dodging raindrops, etc.). The class follows along, mimicking the teacher's actions. After a short duration (about 30 seconds), the teacher says "Stop." The teacher then selects a student to choose and act out another weather condition. The chosen student announces their weather condition, such as "The wind is blowing hard." The student demonstrates actions for this weather (e.g., swaying side to side as if being pushed by the wind). The rest of the class follows along, mimicking the student's actions. After another 30 seconds, the teacher says "Stop" and selects a new student. This process continues until several students have had a turn, ensuring that the activity remains dynamic and engaging. | |
| Energizers |  40 - Word chain relay race 40 - Word chain relay race Divide students into two or more teams and have them line up facing the front of the class. Choose a starting word (e.g., "apple"). On your signal, the first person in each team shouts out a new word that starts with the last letter of the previous word (e.g., "elephant"). The race continues with each team member taking turns to call out a new word that follows the chain. The team that gets stuck or repeats a word is out. The team that keeps the chain going the longest wins! | |
| Energizers |  41 - Human knot 41 - Human knot Have students stand in a circle with their arms outstretched. Instruct them to grab the hand of someone not directly next to them. This will likely lead to a tangled mess of arms! The challenge is for the students to work together, without letting go of hands, to untangle themselves and form a circle again. Encourage communication and problem-solving as they work through the knot. In case of lack of time, give them a time frame, for example, 3-5 minutes. | |
| Energizers |  42 - Create a word! 42 - Create a word! Ask seven people from the first row to come to the front of the room and stand in a straight line facing the audience. Distribute the letter cards, one to each participant. Ask each person to hold their letter card above their head, so that the audience can read it easily. Explain that the letters spell a seven-letter word. Ask members of the audience to call out directions to the letter holders to rearrange them in the correct order to spell the word. (Examples: The person with the letter E, please move to the beginning of the word. The person with the letter D, move to the end.) Ask the letter holders to follow the directions from the audience. Give some hints to speed up the process, if necessary. When the word is correctly formed, ask everyone to read it aloud at the count of three. Thank the letter holders, collect the cards, and send them back to their seats. Lead a round of applause for the entire group for solving the anagram quickly. | |
| Energizers |  43 - Flower power relay race 43 - Flower power relay race Prepare:
Divide students into teams of 6-8 students. Each team gets one of the flowers. Hold your flower picture up high! When the music starts (or I say go!), the first person from each team runs with their flower picture. Run all the way around the marker on the floor, then come back and pass the picture to the next student. That person then runs with the flower picture! The first team to have everyone run around the marker wins! | |
| Energizers |  44 - Newspaper mimic 44 - Newspaper mimic The children move freely, to the sound of music, with a sheet of newspaper in their hand. At a certain point, the educator interrupts the music and says the name of a school subject (mathematics, language, history, natural sciences, music, painting, sports, etc.) and each child puts the sheet on the floor and stands on it making a gesture that represents an action related to the subject. With this activity, children develop balance and imagination. (5 minutes). | |
| Energizers |  45 - The rope game 45 - The rope game Divide the children in 2 groups. The children from one group line up parallel to a rope that is put on the ground, the children from the other group line up on the other side of the rope, facing the other children. | |
| Energizers |  46 - Find the colour 46 - Find the colour The children are placed in a semi-circle. The educator stands in front of them and says the name of a fruit or vegetable and the children have to try to touch something that has that colour in the room where they are (it could be the clothes they are wearing or those of other people, objects, equipment, etc.). If they don't know the fruit or vegetable, they can't move and wait to see the colour.. Before moving on to the next fruit/vegetable, the educator shows a colour picture of the vegetable or fruit. Then moves on to another vegetable or fruit. This energiser helps to develop motor coordination; spatial-temporal orientation; (re)cognition of food and colours. Use some food items that are going to be used to make paint, in the activity described below. If there are children with hearing impairment, the educator can show the drawing of the fruits and vegetables while orally mentioning them. If there are children with visual impairment, they can use plasticine to model the shape of some fruits or vegetables that are suggested. (5 minutes). | |
| Energizers |  47 - The orquestra leader 47 - The orquestra leader The children make a queue. When the music starts playing, the "leader" of the queue starts walking, making sounds/rhythms that are imitated by the whole queue. When the music stops, the the child in front moves to the tail of the queue and the next child takes over. The group can be divided in 2 queues. (5 minutes) | |
| Energizers | 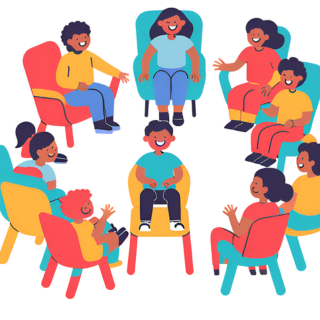 48 - Musical chairs 48 - Musical chairs Arrange the chairs in a circle, with the backs facing outwards. Make sure there's enough space between the chairs for people to walk around comfortably. Choose upbeat and lively music for the game. Once the music starts, players walk or jog around the circle of chairs. When the music stops abruptly, everyone needs to find a chair to sit on as quickly as possible. The player who doesn't find a seat is eliminated from the game. After each round, remove one chair from the circle. The game continues with the remaining players and one chair less, making it more challenging to find a seat as the game progresses. The last player remaining who manages to find a seat when the music stops is the winner of the game! | |
| Energizers | 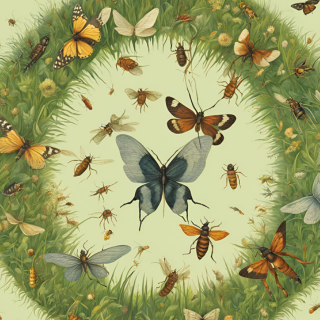 49 - Room full of insects 49 - Room full of insects Students circle up and the teacher stands in the middle. Teacher shows all of the given movements and students have to repeat and memorize them. Movements: Butterfly flight: Raise your arms gently above your head and slowly flap them forward and back. Grasshopper jump: Bend your knees and jump into the air, extending your arms forward. Ant crawl: Crawl on the floor on your hands and knees. Bee flight: Run in a circle, flapping your arms like wings. After that teacher calls out an insect and everyone has to repeat them. If some of the students make a mistake, they have to take the seat. | |
| Energizers | .png) 50 - “This or that” 50 - “This or that” All students stand in a column one behind the other. The teacher makes an offer to the students: "Zero waste or gardening?". Those students who support the "Zero Waste" movement go to the right, and those who are passionate about gardening go to the left. After that, the teacher invites one to two students to explain why they made that choice. After they have given their explanations, everyone forms a column again. The teacher asks the next question and the students again make their choice and stand on the appropriate side. Other options: Cooking class or gardening class? Herb gardening or vegetable gardening? Plant a tree or set up a bird feeder? Private car or take public transportation? Nature walk or go by bike? Host a clothes swap or set up a neighborhood compost bin? Shop in bulk or shop at a local farmer’s market? Buy second-hand clothing or buy new sustainable clothing? | |
| Energizers | .png) 51 - Mystery Freeze Dance 51 - Mystery Freeze Dance Play upbeat music and have students dance around the room. Periodically, pause the music and shout out a category (e.g., blue things, animals that fly, numbers less than 10). Students must freeze in a position that represents the category until the music starts again. This is a fun way to get students moving and thinking creatively. | |
| Energizers | 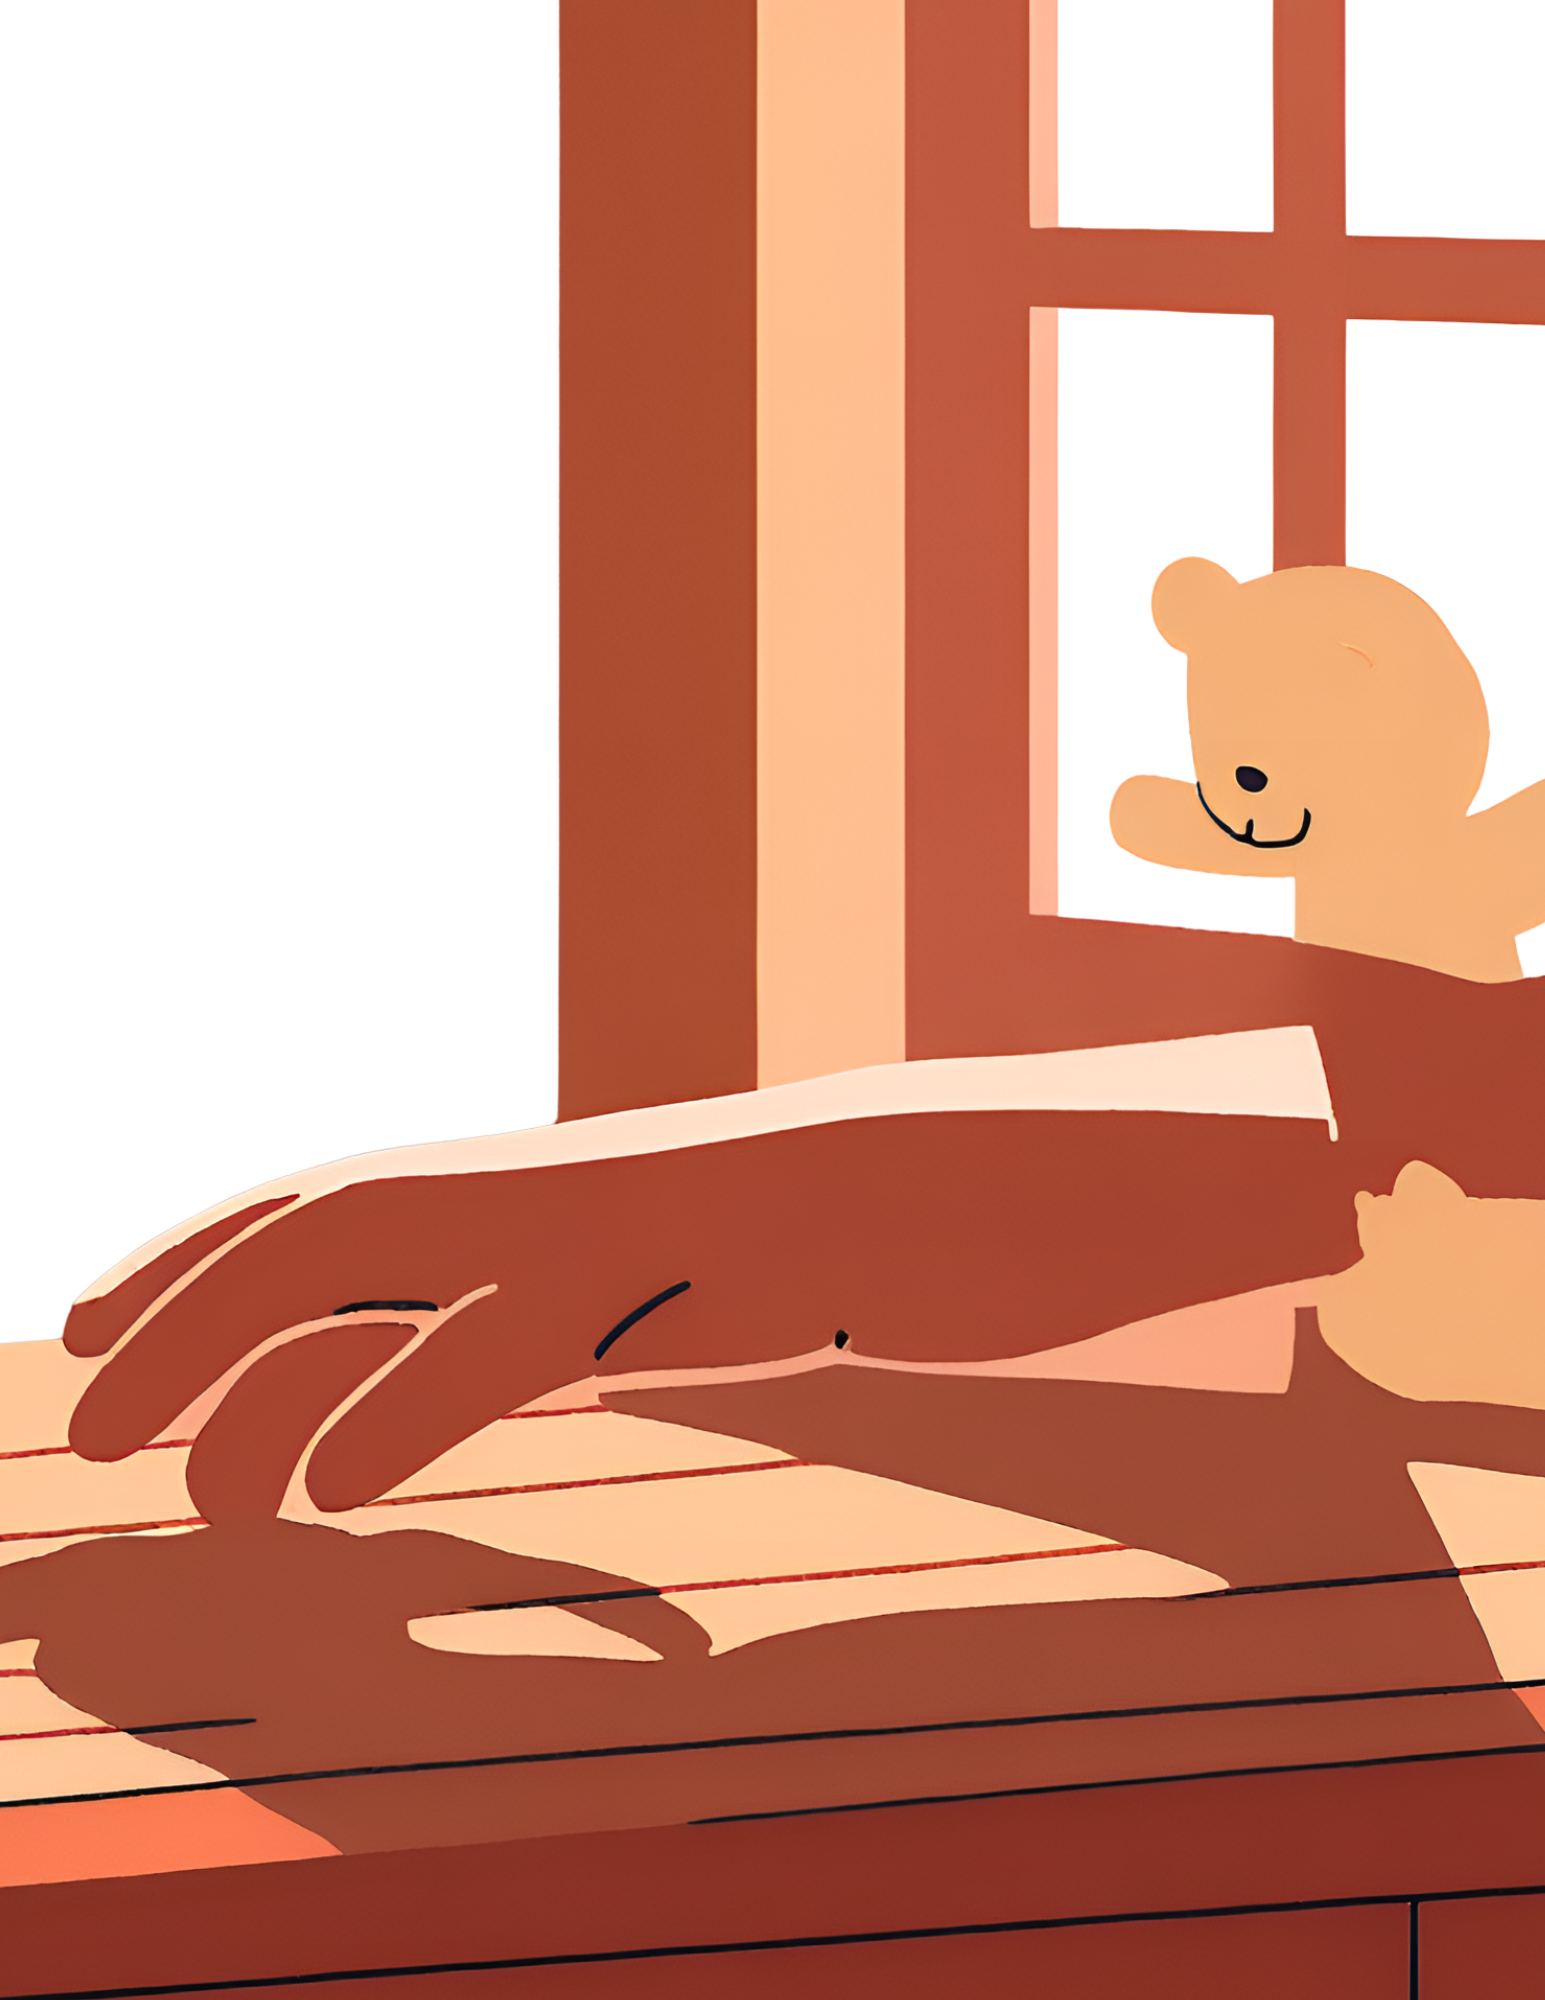 52 - Touch! 52 - Touch! Begin by having the teacher call out something that each participant has to touch! An example might be “touch blue”, “touch something warm” or “touch something soft” This might be something on their desk, an item of clothing, or something they have to go and find on their bookshelf. The last person to find an object then has to select the next attribute. If you want to make it more difficult, you can mix the specifications of an attribute, for example “touch something blue and old” or “touch something red that you can eat .” Variations If you want to make this energizer a little competitive, give participants only fifteen seconds to find an object and ask them to sit down for those players who don't find one in time. The last remaining player wins. | |
| Energizers |  53 - Guess the animal 53 - Guess the animal Students should be organized in pairs. One student from each pair observed a card with an image of an animal. That student should mimic movements and sounds of the animal while the other student tries to identify the animal. Then, the students should switch roles. Preparation: The teacher should prepare cards, each featuring a different animal. Choose animals that are familiar to the students. Two animal cards are distributed to each pair of students, by the teacher. Teacher can also use an app, such as Wheel Decide®, to distribute the animals to the students. | |
| Energizers |  54 - Pushed the balloons 54 - Pushed the balloons With this dynamic, students will understand that in real life we need to work together to keep the air clean, prevent pollution from spreading and take care of our health and well-being.
| |
| 27 | ||||||
| | ||||||
| Relaxing Exercises
|  * The suggested relaxing exercises are different and some of them could take longer, but, as a rule, they are expected to last only a couple of minutes. With the preparation and the time needed to do the relaxing activities and to end the lesson, this is estimated to last at most 5 minutes. | |||||
| 28 | ||
| | ||
| Relaxing Exercises |  1 - Guided fantasy 1 - Guided fantasy Students are asked to close their eyes (if comfortable) and, with the guidance of the facilitator, slowly imagine a scene of the past or future event. More and more details are used to describe the event with all senses and thoughts. A suggested brief script could be à Begin by breathing slowly and deeply… Think of yourself in a place where you feel relaxed and at ease… Create all the details in your mind, what do you see… what the sounds are like, the smells and colors of this special place… Are there any people …? | |
| Relaxing Exercises |  2 - Progressive muscle relaxation 2 - Progressive muscle relaxation To release tension from head to toe, students are asked to close their eyes (if comfortable) and focus on tensing and relaxing each muscle group for two to three seconds each. The teacher guides the students; he/she asks them to start with the feet and toes, then move up to the knees, thighs, rumps, chest, arms, hands, neck, jaw, and eyes—all while maintaining deep, slow breaths. Kelly Roper | |
| Relaxing Exercises |  3 - Guided breathing 3 - Guided breathing Teacher asks the students to close their eyes (if comfortable), inhale for a count of four, then exhale for a count of four (all through the nose, which adds a natural resistance to the breath). Then, with one hand on the chest and the other on the belly, the students can take a deep breath in through the nose and exhale through the mouth, ensuring this way that the diaphragm (not the chest) inflates with enough air to create a stretch in the lungs Jordan Shakeshaft | |
| Relaxing Exercises |  4 - Visualization using color/soothing sound 4 - Visualization using color/soothing sound Facilitator asks the students to imagine a favorite color that makes them feel peaceful and safe. They keep their imagine taking in that color with each breath and sending it throughout their entire body as they exhale. They continue until they visualize being filled with their special, relaxing color. The same exercise can be performed using soothing sound or aroma. Also, it is more effective if relaxing music is used. Kelly Roper | |
| Relaxing Exercises |  5 - Use a word that describes their feelings/thoughts 5 - Use a word that describes their feelings/thoughts Students are asked to close their eyes (if comfortable) for a minute and think of a word that describes their feelings/thoughts after finishing the resource. Then the students open their eyes and one by one say their word to the classroom | |
| 29 | ||||||||
| | ||||||||
| Relaxing Exercises |  6 - Bee breathing 6 - Bee breathing The teacher instructs the students to get in a comfortable position to practice bee breathing. They have to imagine that they are sitting on a leaf or a flower petal, to sit straight and allow the leaf or petal to gently support them. The teacher gives students the following instructions: Breathe in, allowing the air to just gently come in through your nose, filling up your lungs. As you breathe out, buzz like a bee. See how long your buzz can last. See how far your bee is going to fly before sitting down and resting again. Buzz. Buzz. Buzz. On the next breath, see if your bee can fly with a loud, strong buzz. On the next breath, see if your bee can fly with a soft buzz. When the exercise is finished, the teacher gives time for a short discussion: Does it feel different with a strong or a soft buzz? How does your body feel? Optional (use if time allows): After breathing practice, draw a picture of a bumblebee and the leaf or flower that you were “sitting on” in your imagination. This picture can be used as a relaxation practice reminder. When you see the picture, practice being like a Bee on a leaf and practice a Bee breath. | |
| Relaxing Exercises |  7 - Strong as a tree 7 - Strong as a tree All students spread out in the room. With their feet firmly planted on the ground, they pretend they are trees that are slowly swaying back and forth with a breeze. The movements become stronger as a storm approaches. The students try to make their movements as strong as possible, but remember to keep their feet on the ground. Slowly the wind dies down and the trees can rest. | |
| Relaxing Exercises | 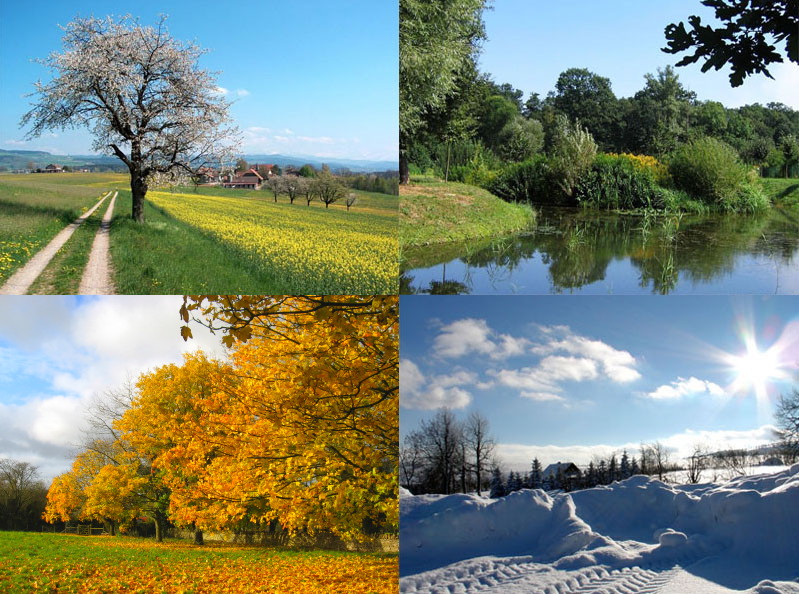 8 - Seasons of the year 8 - Seasons of the year during the seasons of the year. Winter: the plants are small, weak and are crunched together on the ground. Spring: through the stronger sunshine, the plants grow slowly and slowly rise. Summer: through the warm sun, the plants slowly open their arms, the flowers open their blooms are stand up straight. Autumn: the sun rays become weaker. The plants begin to slowly shrivel, the blooms and leaves begin to fall away. | |
| 30 | |||||||||||
| | |||||||||||
| Relaxing Exercises | 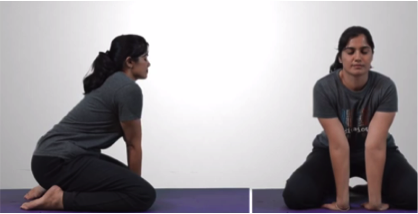 9 - Lion's breath 9 - Lion's breath Lion’s breath is a playful way to release and relax into more peaceful feelings. The trainer tells students that they are going to do a breath called the lion’s breath in order to let go of feelings or thoughts we no longer want. This breath is very helpful in getting those ideas out of us and pushing them far away. Instructions
| |
| Relaxing Exercises |  10 - Mountain range 10 - Mountain range Stand side by side in a line, in mountain pose, your feet hip-width apart. Each foot must touch the foot of the person on each side. Walk (as a group) across the room without separating their feet from your partner’s. Variation: Ask the students to walk on their toes. | |
| Relaxing Exercises |  11 - Breathing exercise 11 - Breathing exercise Teacher asks students to make a circle and do the following exercises, repeating each one few times and alternate them. Teacher can also add new ones. Breathing in raise your arms above your head and say “Elevator Up!” Breathing out, float your arms back down to your sides, saying “Elevator Down.” Repeat. Take three quick breaths in while wiggling your nose. Wiggle your nose on each breath in. Then wiggle your nose on each breath out. Hold your hand in front of your nose and hiss hiss hiss while breathing out. | |
| Relaxing Exercises |  12 - Warm back 12 - Warm back A piece of paper is stuck to each student’s back and they are given a pen. The paper is already prepared. Each piece of paper says: “I like………..”. Slow music is played and the students walk around and write characteristics about the person whom they like on the paper. Each child is allowed to look at the paper at the end and take it home. | |
| 31 | ||||||||||||||
| | ||||||||||||||
| Relaxing Exercises | 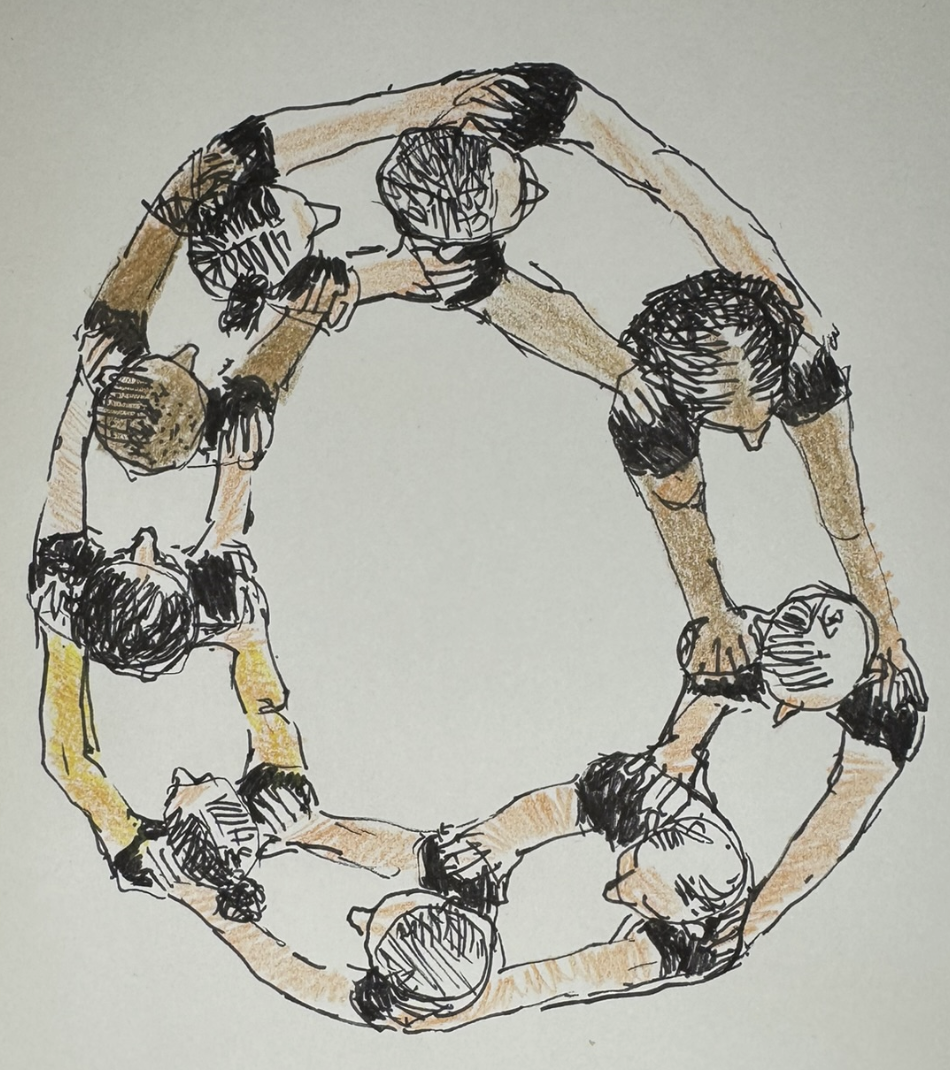 13 - Body massage 13 - Body massage The students stand in a circle: they need to follow all the movement the teacher does and massage themselves. The teacher starts to massage different parts of his/her body, starting from the head till the feet (it’s better if they take off their shoes). The teacher explains how the massage needs to be done, if delicate or more energetic. Optional: The teacher can also ask to the students to massage another classmate. | |
| Relaxing Exercises |  14 - Give me your energy 14 - Give me your energy Students stand in a circle. The teacher launches the activity pretending he/she is holding a ball in his/her hands and passes it to the student on his/her right; the student does the same, passing it to his/ her neighbour, etc. The game continues until the ball comes back to the teacher. The ball needs to be passed in a gentle way, as it is very precious. In the second round, the teacher passes the ball to the students on the left making a gesture and a sound. Students are expected to do the same until everyone has touched the ball at least once. The ball can be passed around in different ways (with a kick, or a kiss, or a blow, etc.), pretending it becomes bigger or smaller depending on the will of the students. | |
| Relaxing Exercises |  15 - Moving like a toy 15 - Moving like a toy The teacher uses a magic word to change the students into many string-loaded (wind-up) toys. At the teacher’s signal, the toys start to move across the class, as many robots, to get their sits. They have to move more quickly at the beginning and then gradually more and more slowly, because their charge is finishing. Some of them will be frozen in the middle of the room, and the teacher has to give their cranks one more turn to help them reach their seats | |
| Relaxing Exercises |  16 - Pass the face 16 - Pass the face It is like the game "telephone" but instead of passing a word or sentence around the group, participants pass a facial expression. | |
| Relaxing Exercises |  17 - Circle massage 17 - Circle massage The group forms a circle and faces one direction. Each participant places his/her hands on the shoulders of the person in front of her/him. Each person then gives the person who is in front a shoulder massage. The person being massaged can give a feedback. After a few minutes, the group turns the other way so that the person who has been making the massage is then receiving it in return. | |
| 32 | |||||||||||||||||||||||||||||||||||||||||||||||||||||||||||||||||||||||||||||||||||||||||||||||||||||||||||||||||||||||||||||||||||||||||||||||||||||||||||||||||||||||||||||||||||||||||||||||||||||||||||||||||||||||||||||||||||||||||||||||||||||||||||||||||||||||||||||||||||||||||||||||||||||||||||||||||||||||||||||||||||||||||||||||||||||||||||||||||||||||||||||||||||||||||||||||||||||||||||||||||||||||||||||||||||||||||||||||||||||||||||||||||||||||||||||||||||||||||||||||||||||||||||||||||||||||||||||||||||||||||||||||||||||||||||||||||||||||||||||||||||||||||||||||||||||||||||||||||||||||||||||||||||||||||||||||||||||||||||||||||||||||||||||||||||||||||||||||||||||||||||||||||||||||||||||||||||||||||||||||||||||||||||||||||||||||||||||||||||||||||||||||||||||||||||||||||||||||||||||||||||||||||||||||||||||||||||||||||||||||||||||||||||||||||||||||||||||||||||||||||||||||||||||||||||||||||||||||||||||||||||||||||||||||||||||||||||||||||||||||||||||||||||||||||||||||||||||||||||||||
| | |||||||||||||||||||||||||||||||||||||||||||||||||||||||||||||||||||||||||||||||||||||||||||||||||||||||||||||||||||||||||||||||||||||||||||||||||||||||||||||||||||||||||||||||||||||||||||||||||||||||||||||||||||||||||||||||||||||||||||||||||||||||||||||||||||||||||||||||||||||||||||||||||||||||||||||||||||||||||||||||||||||||||||||||||||||||||||||||||||||||||||||||||||||||||||||||||||||||||||||||||||||||||||||||||||||||||||||||||||||||||||||||||||||||||||||||||||||||||||||||||||||||||||||||||||||||||||||||||||||||||||||||||||||||||||||||||||||||||||||||||||||||||||||||||||||||||||||||||||||||||||||||||||||||||||||||||||||||||||||||||||||||||||||||||||||||||||||||||||||||||||||||||||||||||||||||||||||||||||||||||||||||||||||||||||||||||||||||||||||||||||||||||||||||||||||||||||||||||||||||||||||||||||||||||||||||||||||||||||||||||||||||||||||||||||||||||||||||||||||||||||||||||||||||||||||||||||||||||||||||||||||||||||||||||||||||||||||||||||||||||||||||||||||||||||||||||||||||||||||||
| Relaxing Exercises |  18 - Making room 18 - Making room Participants are asked to raise their arms with palms facing up, imagining that they are pushing up the ceiling and are asked do a lot of strength in that direction to increase the space of the room where they are. Then they are asked to turn the arms down with palms facing down thinking that they are pushing down the floor. They are asked to push away the walls turning their left arm and palm to the wall on their left and their right arm and palm to the wall that’s on their right. | |
| Relaxing Exercises | 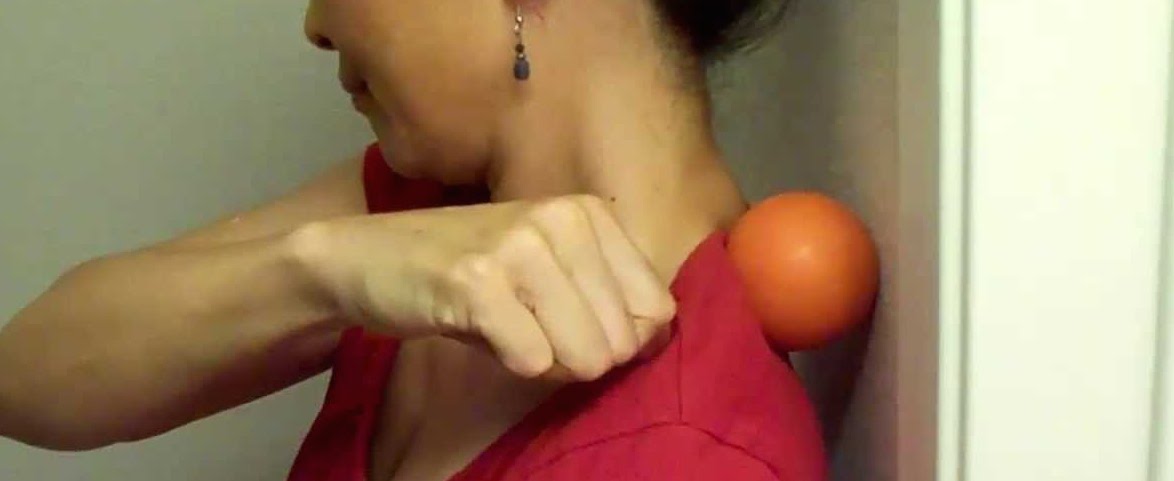 19 - Massage ball 19 - Massage ball One ball is given to each participant and, following the rhythm of a soft music, they place the ball between their back and a wall. They bend their knees slightly to relax the legs and better place their back. Then they move their body from top to bottom and from right to left and vice versa, moving the ball around their back. When making movements of their body, they will notice some more tense (and sometimes painful) spots. When they notice this they should stop and stay quiet keeping their back against the wall, making the desired pressure and holding for a while. Variation: Do not use the wall. Participants work in pairs and one holds 1 or 2 balls in their hands and makes the massage to the other and then they switch. | |
| Relaxing Exercises | 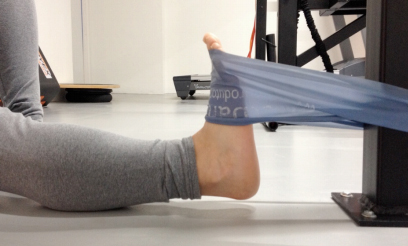 20 - Holding legs 20 - Holding legs Participants work in pairs. And you can put a quiet and relaxing music (or sounds like water falling down, sea waves, etc.). Half of the participants are asked to lie down face up, eyes closed, with their left leg extended on the floor and their right leg elevated. Another participant stands up and loops a towel around the heel of the other’s right foot and holds the ends of the towel in his/her hands, and makes soft and gentle movements (upwards and downwards, and sidewards) while the other totally relaxes his/her leg. Then they repeat the same process with the left leg. Then the participants switch roles. | |
| Relaxing Exercises |  21 - How do I feel today? 21 - How do I feel today? The proposal is that each child should draw his or her face according to the emotion he or she is feeling at that moment: happiness, sadness, anger, fear and calmness. | |
| Relaxing Exercises |  22 - Relaxing Song 22 - Relaxing Song Use of mimed song accompanied by a musical backing, sung/recorded by the pupils themselves. (cf. video on .https://youtu.be/9TEdEKKkUWw ) | |
| Relaxing Exercises | 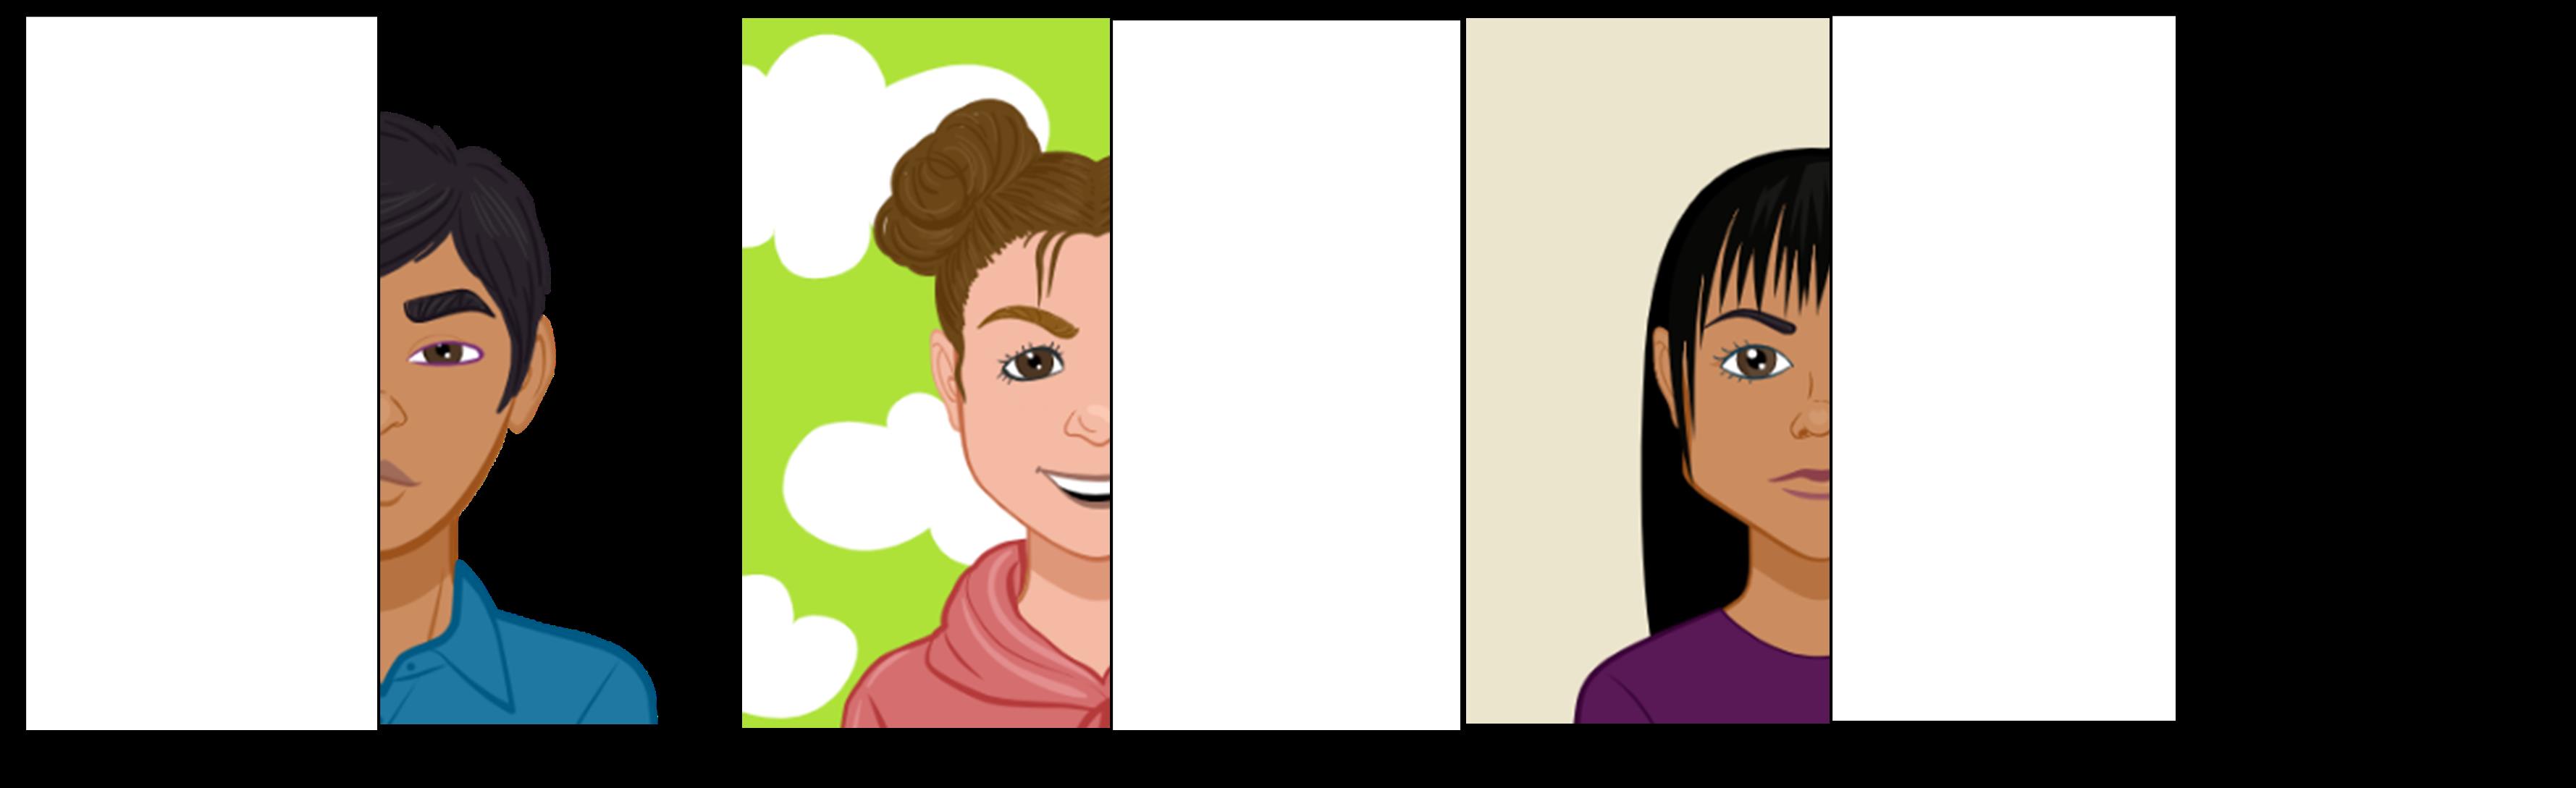 23 - Guess who? Draw your partner 23 - Guess who? Draw your partner With the Avatars distributed randomly on a table, the students are invited to get one of their classmates' Avatars, which they have to complete, trying to understand whose half of the Avatar they have to complete and silently draw the missing half to the sound of a calm song chosen by the leader. As the students finish, they go to a board and place the completed Avatar with reusable, malleable white adhesive putty. The whole class observe and the challenge is to try to guess to whom the avatars belong to. | |
| Relaxing Exercises |  24 - The Pot of Calmeness 24 - The Pot of Calmeness We call "the pot of calmness" to a jar in which we put water, liquid silicone to give density to the content and glitter of different colours. The construction of the jars is done in advance by the students and they can remain in the classroom to be used at other times when the call for relaxation and calmness is necessary. Each student gets his/her jar, shakes it and observes the movement. Afterwards, the group talks about what is observed: that the glitter represents the students’ emotions that they shake and stir until they are calmed down. This activity is ideal for fostering reflection. The simple act of watching the glitter moving slowly will help the students to relax. | |
| Relaxing Exercises | 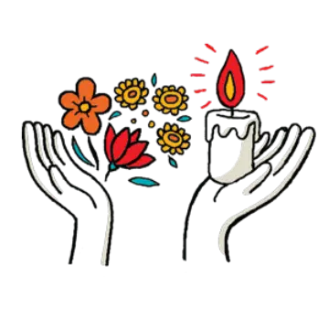 25 - Flower and Candle 25 - Flower and Candle This is a simple relaxation technique that encourages deep breathing. Pretend you have a nice smelling flower in one hand and a slow burning candle in the other.
| |
| Relaxing Exercises |  26 - Raindrops 26 - Raindrops Close your eyes and imagine that you are a water drop that falls in the ocean when it is raining. Imagine how you can return to the cloud due to the water cycle process. | |
| Relaxing Exercises | 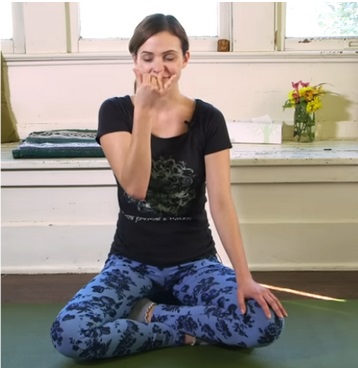 27 - Alternate nostril breathing 27 - Alternate nostril breathing Instructions for students:
The activity helps you to quiet and still your mind. | |
| Relaxing Exercises | 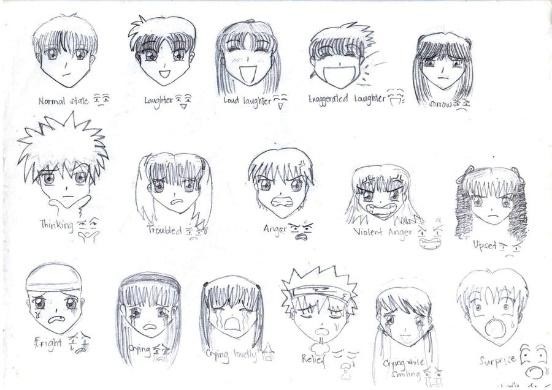 28 - Feelings in one word 28 - Feelings in one word Students are asked to close their eyes (if comfortable) for 30 seconds and think of a word that describes best their feelings/thoughts after finishing the lesson. Then, the teacher asks them to open their eyes and share the word describing their feeling one by one. *Another option is to ask student express the way they feel through a live statue or facial expression. | |
| Relaxing Exercises | Teach students simple yoga poses inspired by animals, focusing on gentle stretches. During this energizer, it is possible to do 4-5 poses. Each pose is held for 15-30 seconds, focusing on breathing and maintain posture. (2 minutes) | |
| Relaxing Exercises |  30 - Grouping 30 - Grouping Teacher asks students to create a circle. Teacher demonstrates the movements of different insects, students try to repeat teacher. Butterfly flight: Raise your arms gently above your head and slowly flap them forward and back. Grasshopper jump: Bend your knees and jump into the air, extending your arms forward. Ant crawl: Crawl on the floor on your hands and knees. Bee flight: Run in a circle, flapping your arms like wings. Now someone from the class has to go in the middle of the circle. With eyes closed, he turns around while pointing on students around. Then he needs to stop by pointing on someone and shout out loud a name of an insect. The student who is pointed at, has to show the movement. If he makes a mistake, he goes in the middle. | |
| Relaxing Exercises | 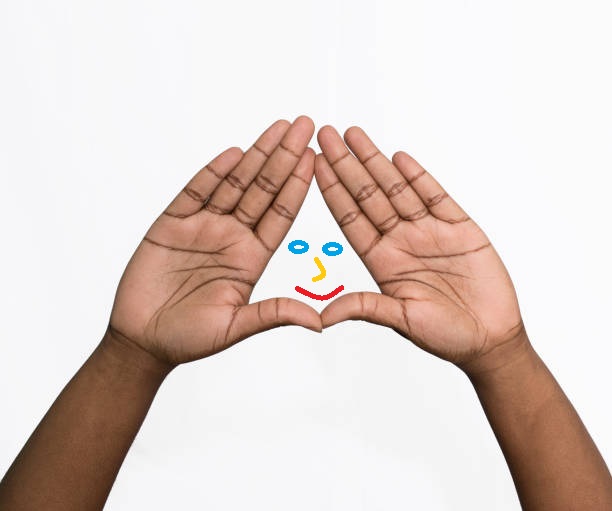 31 - Triangle of friendship 31 - Triangle of friendship Students work in pairs to draw a triangle to represent their friendship. Before starting the work, the teacher demonstrates the steps with one of the children. The two persons in the pair place their hands down with the palms facing the surface of the paper sheet; student 1 uses his/her right hand, and student 2 uses his/her left hand. They join the tips of the thumbs and the forefingers of the left hand of one of the pair with the tips of their thumbs and forefingers and outline the shape of the triangle between the fingers. After that, they can draw eyes, a nose, a mouth and whatever they want to, in order to design a personal symbol of their relationship. | |
| Relaxing Exercises |  32 - Great job 32 - Great job Students form a circle. Then everyone turns right and with the right hand pats the shoulder of the child standing in front saying “You did a great job”. Then all students turn left and do the same with the child standing in front of them. Final step: students stand in a circle facing each other. They put their right hand on their own left shoulder, and their left hand - on their right shoulder; they pat their shoulders saying “I did a great job”. | |
| Relaxing Exercises |  33 - Colour relaxation 33 - Colour relaxation Students are instructed to lie down or sit in a relaxed position and imagine different colours on different parts of their bodies.
Now let your whole body feel happy, peaceful and relaxed. | |
| Relaxing Exercises |  34 - Mindful Breathing 34 - Mindful Breathing Invite the children to sit comfortably in a circle, either on the floor or in chairs. Instruct them to close their eyes and take deep breaths in through the nose and out through the mouth. As they breathe deeply, guide them to visualize a place where they feel happy and safe to play—this could be a playground, a field, or even their own backyard. Encourage them to think about the sounds, smells, and sights in this safe place, reinforcing the calming effect. Continue for several minutes, allowing the children to fully engage with their peaceful play space in their minds. Gradually bring them back to the present moment, reminding them that they can visit this safe place in their minds whenever they need to feel calm and secure. | |
| Relaxing Exercises |  35 - Peaceful Playtime Visualization 35 - Peaceful Playtime Visualization Have the children find a comfortable position to sit or lie down. Begin by guiding them through a few calming breaths to relax. Start describing a peaceful playground scene—mention the gentle sway of the trees, the softness of the grass, and the laughter of friends. Narrate how every child at the playground is playing freely and safely, without any fears or worries. Emphasize that in this place, every child is included in games, and there a sense of happiness and freedom. Allow the children a few minutes to immerse themselves in this visualization, then gently guide them back to the classroom, feeling refreshed and content. | |
| Relaxing Exercises |  36 - Gratitude Circle 36 - Gratitude Circle Gather the children in a comfortable circle. Introduce the concept of gratitude and how feeling thankful can make us happier. Pass around a talking piece; an object that grants the holder the right to speak without interruption. Invite each child to share one thing about playtime they are grateful for while holding the talking piece. It could be a favorite toy, game, or a person they love to play with. As each child speaks, the rest of the group listens attentively. Once everyone has shared, thank the group for their contributions and highlight the shared joy that play brings into their lives. | |
| Relaxing Exercises | 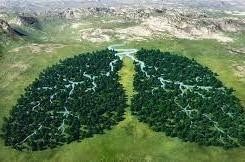 37 - Lungs of the world 37 - Lungs of the world The teacher explains the activity by asking students to imagine that the world has lungs, just like humans. Due to air pollution, these lungs were struggling, but now the pollution has been cleared, and the world can breathe freely again. and this is a moment of relief, happiness, and satisfaction. Students are instructed to imagine they are the world’s lungs and the air is clean. They stand up and start moving freely around expressing how they are feeling (for instance, taking a deep breath, stretching arms wide, smiling, and showing relaxation. | |
| Relaxing Exercises |  38 - Word Chain Relay Race 38 - Word Chain Relay Race This activity gets students moving, thinking creatively and working together. Instructions: Divide students into two or more teams and have them line up facing the front of the class. Choose a starting word (e.g., "apple"). On your signal, the first person in each team shouts out a new word that starts with the last letter of the previous word (e.g., "elephant"). The race continues with each team member taking turns to call out a new word that follows the chain. The team that gets stuck or repeats a word is out. The team that keeps the chain going the longest wins! | |
| Relaxing Exercises |  39 - Sensory scavenger hunt 39 - Sensory scavenger hunt This activity helps students de-stress, use their senses, and connect with their surroundings. Materials: A list of sensory prompts for each student (see below) Instructions: Prepare a list of prompts that engage different senses (e.g., "Find something soft,", "Smell something sweet,", "Listen to a quiet sound"). Distribute the list to each student and instruct them to find something in the classroom or outside (depending on time and space) that fits each prompt. Encourage them to explore the space slowly and mindfully. Once everyone has completed the list, come back together as a class and ask a few students to share your findings. Sensory Prompt Ideas: Sight: Find something red, something shiny, something with stripes. Touch: Find something smooth, something rough, something cold. Smell: Find something that smells like flowers, something that smells like books, something that smells like fresh air. Hearing: Find a quiet place, find a sound outside the window, find a sound you make with your body. Taste (optional): If appropriate, have students bring in a small piece of fruit or another snack to share and describe its taste (sweet, sour, etc.). | |
| Relaxing Exercises | 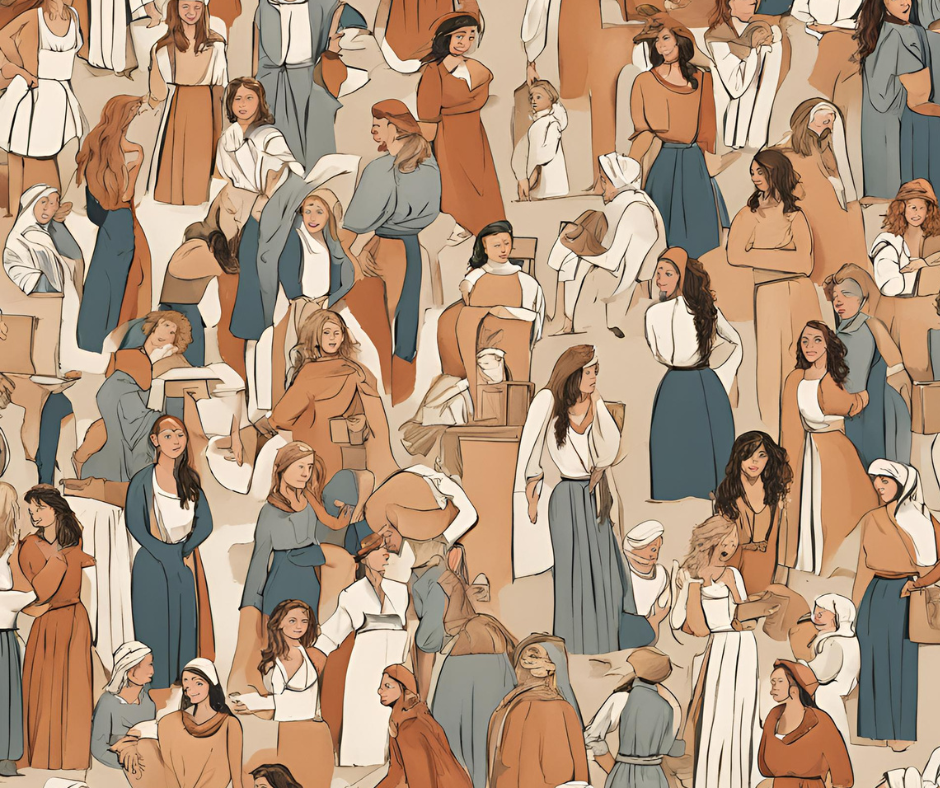 40 - Group story building 40 - Group story building Ask students to sit in a circle. Start a story with a sentence or two. Then, have students take turns adding one sentence each to continue the story. Finish the activity with the last students and ask them to return in their seats. | |
| Relaxing Exercises | 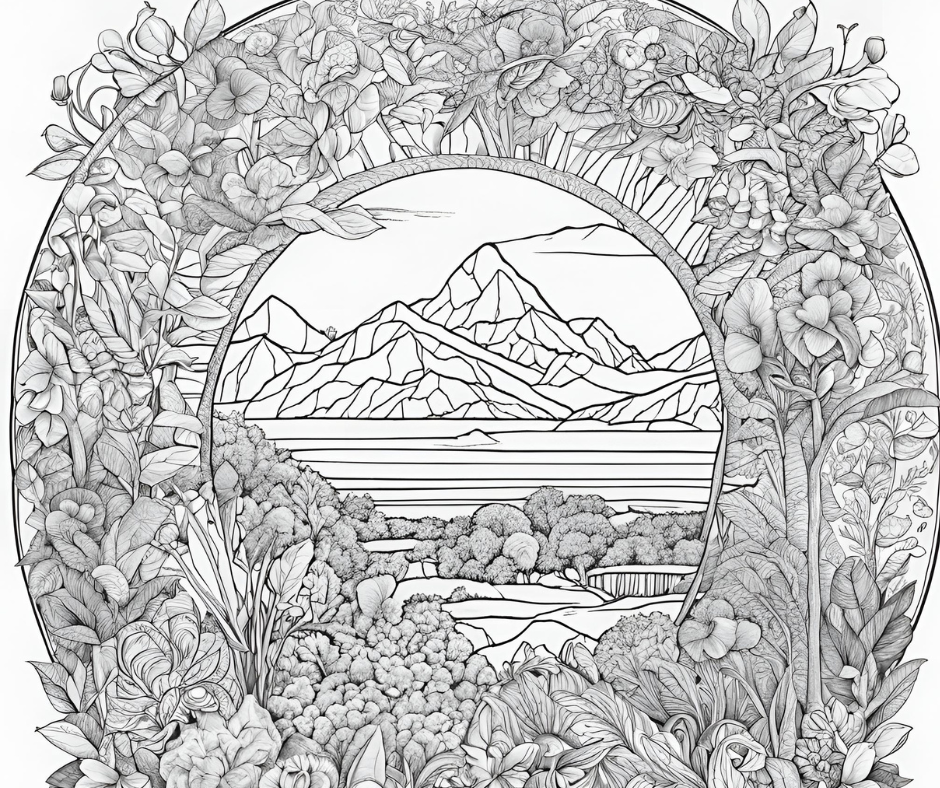 41 - Silent colouring of a drawing. 41 - Silent colouring of a drawing. Ask kids to colour the mandala in the corner of the worksheet. Give them time of 3 minutes and play a peaceful music in the background. | |
| Relaxing Exercises | 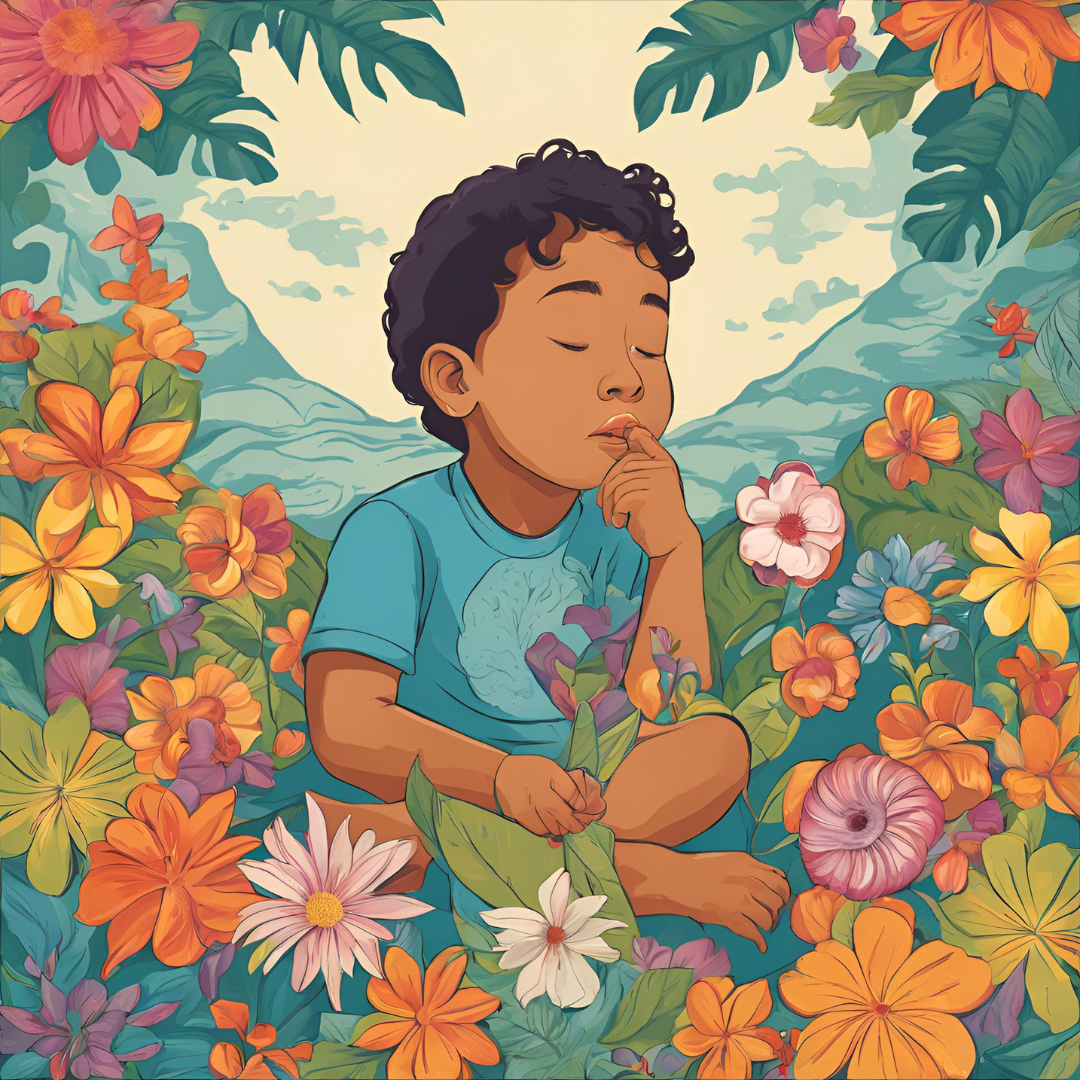 42 - Flower and candle: deep breathing 42 - Flower and candle: deep breathing This is a simple relaxation technique that encourages deep breathing.
Pretend you have a nice smelling flower in one hand and a slow burning candle in the other.
| |
| Relaxing Exercises |  43 - Who's where in the circle? 43 - Who's where in the circle? The children form a circle holding hands and check who is on their right and on their left. The educator plays some calm music and the children let go of their hands and move randomly around the space, within a delimited perimeter. The educator stops the music and the children have to do the same circle again, making sure they hold hands with the same colleagues who were on their right and left in the circle. (5 minutes) | |
| Relaxing Exercises |  44 - Moving like robots 44 - Moving like robots The children are invited to imagine they are robots and move randomly like different articulated human-like robots (with music). (3 minutes) | |
| Relaxing Exercises | 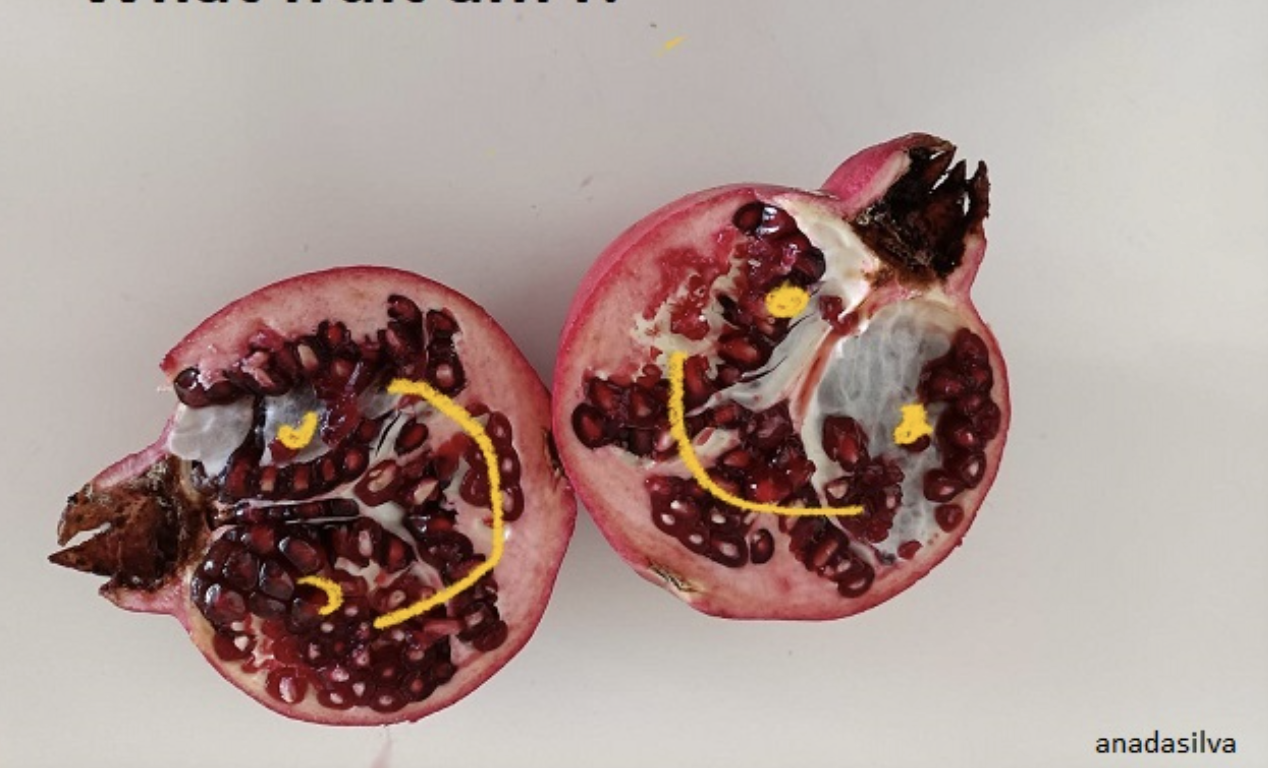 45 - What fruit/veg am I? 45 - What fruit/veg am I? The educator places a sheet of paper on each child's back with the image and name of a fruit/vegetable (orange, lemon, apple, carrot, tomato, etc.), asking the children to move around the room slowly and not to say what is on each other's backs. As they move around the room for 3 minutes, they ask each other yes/no questions to try to guess which fruit/legume they are. They can only ask one question to each child they pass by (like "am I green?", “am I round?”, "am I sweet?", "am I used to make soup?", "am I used to make fruit salad?", etc.) and move to the next colleague. | |
| Relaxing Exercises | 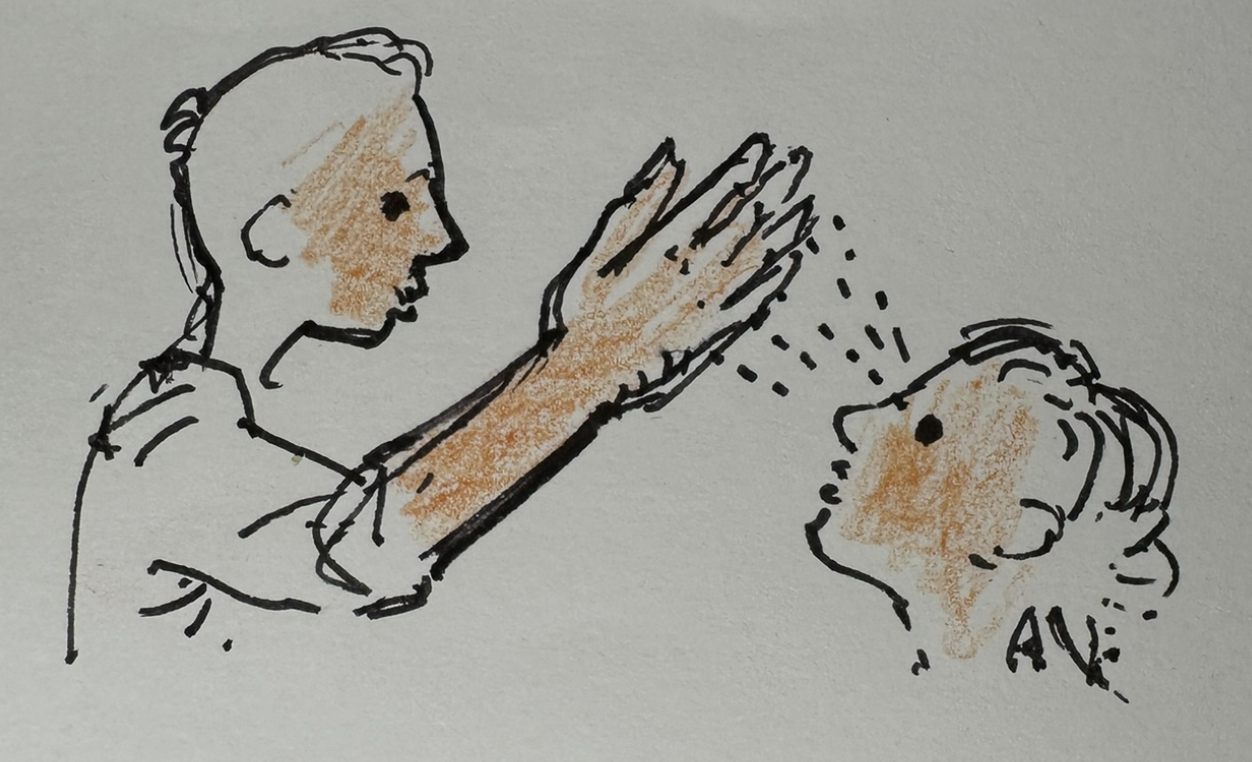 46 - Follow my hand (Hypnosis) 46 - Follow my hand (Hypnosis) In pairs, one child (the hypnotized) follows the hand of the other child (the hypnotizer) around the room (with calm slow music). Then they switch roles. (5 minutes) | |
| Relaxing Exercises | 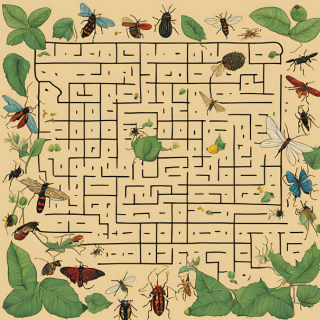 47 - My insect maze 47 - My insect maze The main part of the worksheet will be a maze with a starting point (perhaps an anthill or a flower) and an ending point (maybe a delicious leaf or a cozy cocoon).The maze can be simple with wide paths for younger children or more complex with twists and turns for older children.You can even incorporate insect-themed obstacles like spiderwebs or winding paths through flowers. Briefly explain what a maze is and the goal of finding the way from start to finish. Distribute the maze worksheets and crayons/pencils. Encourage students to start their maze journey. For younger children, demonstrate how to trace the path slowly and carefully, staying within the lines. Explain that it's okay to encounter dead ends. They can simply retrace their steps and try another path. Acknowledge and celebrate each student who completes the maze. | |
| Relaxing Exercises | .png) 48 - “Feeling Time in Stillness: A Relaxing Activity with Closed Eyes” 48 - “Feeling Time in Stillness: A Relaxing Activity with Closed Eyes” Get comfy in your chair, with your back straight and feet on the floor. Now, gently close your eyes. Breathe in deeply through your nose, filling your belly with air. Let it all out slowly through your mouth, like blowing out a birthday candle. Do this a few times, letting any worries float away with each breath. The world around you might have some sounds – maybe a hum from the lights, leaves rustling outside, or even just your own breathing. That's okay, just listen quietly. Imagine you're like a big, beautiful sundial, feeling the time pass by. Maybe you get a little warmer, shift in your seat a tiny bit, or even blink once or twice. Don't worry about counting seconds or minutes. Just relax and let yourself be here, now. When you feel like a whole minute has gone by, open your eyes again. It might be a little more or a little less, that's okay! The important part is feeling calm and peaceful. | |
| Relaxing Exercises | .png) 49 - Breathing exercise “My hand” 49 - Breathing exercise “My hand” With the index finger of the right hand, start to pull from the bottom of the thumb of the left hand to the tip of the thumb (parallel the breath is drawn in), then continue to pull the finger down the thumb (exhale), continue until all fingers are covered. Then they switch hands and pull the index finger of the left hand over the finger of the right hand. Inhale when pulling (driving) the finger up, exhale when pulling down. | |
| Relaxing Exercises | .png) 50 - Set the mood 50 - Set the mood Play calming music to create a peaceful atmosphere in the classroom. Explain the Challenge: Instruct students that they will participate in a "Silent Statue Challenge." Explain that the goal is to focus on their breath and create a feeling of stillness in their bodies.
| |
| Relaxing Exercises | .png) 51 - Rainbow relaxation 51 - Rainbow relaxation This mindfulness practice combines gentle stretching with deep breathing to create a calming and uplifting experience. You'll ask students to imagine painting a rainbow in the sky using fingers as paintbrushes. Ask students to take a comfortable space to move around with your arms extended sideways. Instructions for students:
| |
| Relaxing Exercises |  52 - Relaxing nature 52 - Relaxing nature For a few minutes, students should listen to nature relaxing sounds with their eyes closed, arms crossed on the tables, and heads resting on their arms. Suggestion of nature relaxing sounds: Relaxing Sleep Sounds | Our Green Planet | BBC Earth. Then the teacher should ask students to identify the sounds that they have heard (birds, wind, etc.). | |
| Relaxing Exercises |  53 - Tree Movements 53 - Tree Movements Stretching and Tree Movements - With the children distributed around the room or outside, ask them to stretch upwards as if they were tree branches growing towards the sky. Then ask them to move their bodies from side to side, gently, as if they were trees swaying in the wind. At the same time, ask them to breathe deeply during the movements. This moment of relaxation can be accompanied by background music, such as: Forest Sounds | Woodland Ambience, Bird Song: https://www.youtube.com/watch?v=xNN7iTA57jM Marvin Gaye "Mercy Mercy Me (The Ecology)" 1971: https://www.youtube.com/watch?v=VgJIp-uDIwA). At the end of the relaxation moment, talk about how important trees are for oxygen production and air quality, and therefore for our health and well-being. | |
| Relaxing Exercises | | |
| 33 | |||
| | |||
| Activities
|  | ||
| 34 | ||
| | ||
| CIVIC Awareness topics
| ||
| 35 | ||||||||||||||||||||||||||||||||||||||||||
| | ||||||||||||||||||||||||||||||||||||||||||
| 1 | 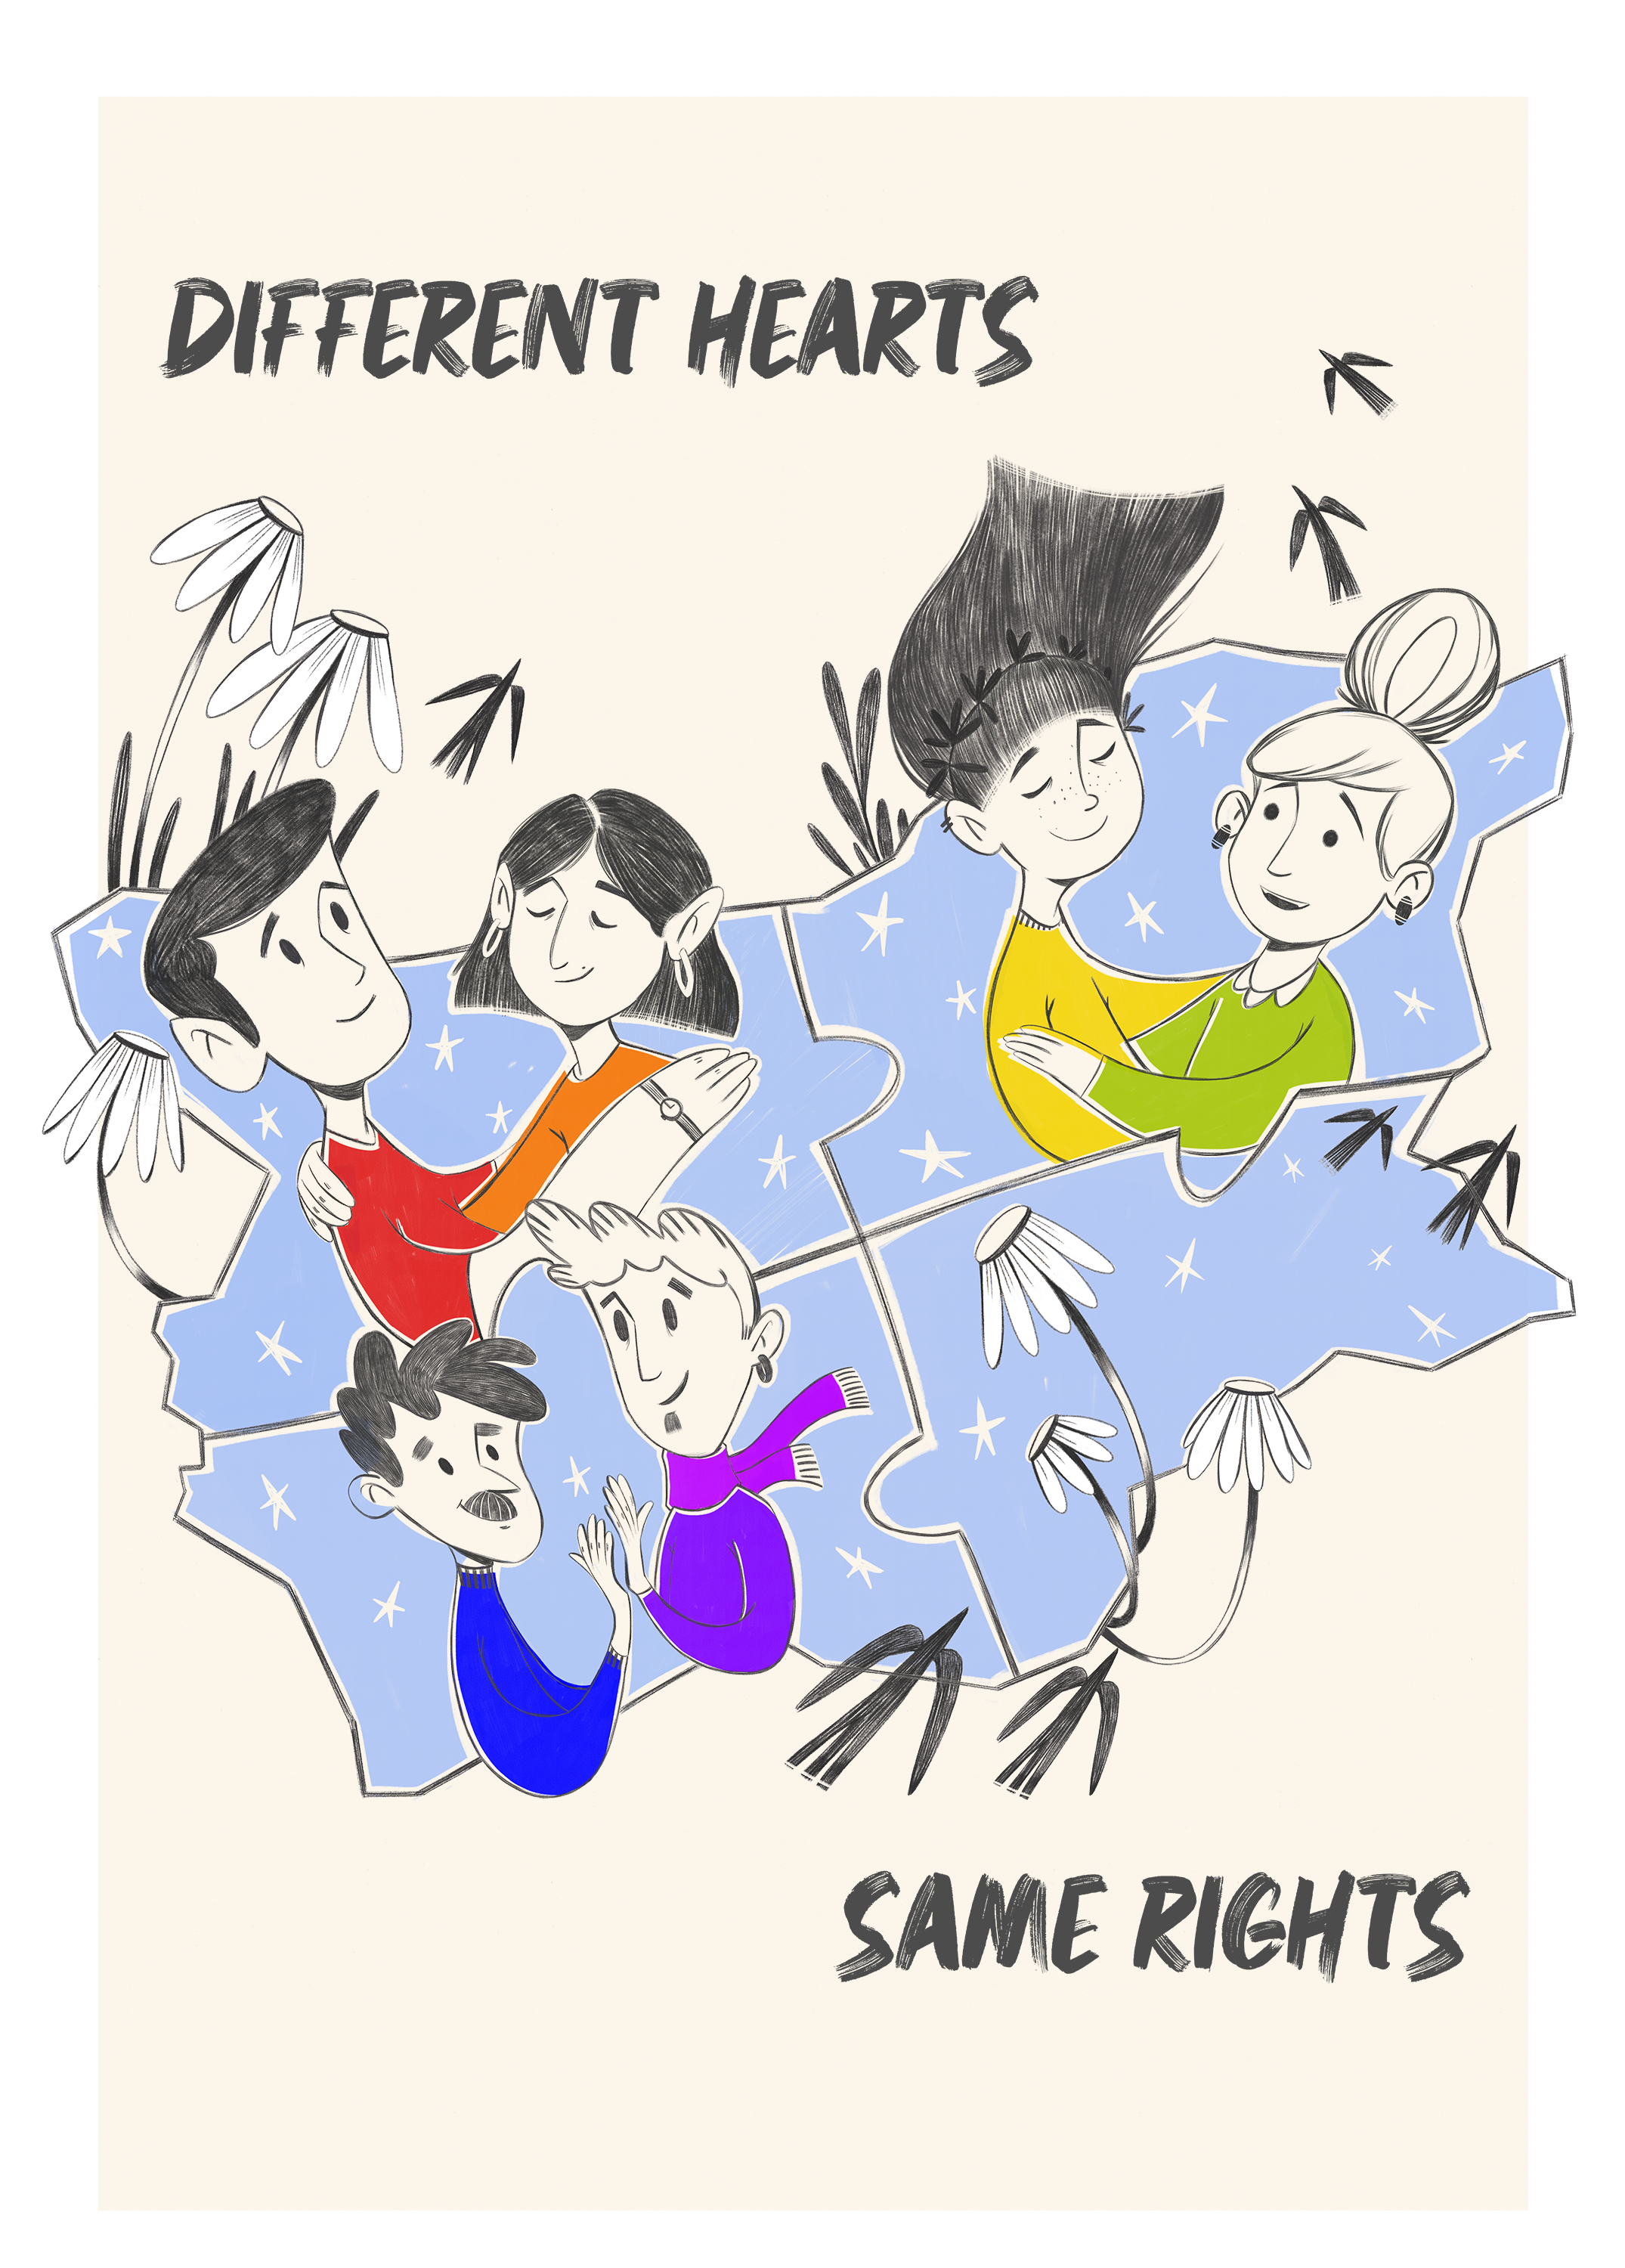 CIVIC Awareness topics / C.A1 Right to learn CIVIC Awareness topics / C.A1 Right to learn | |||||||||||||||||||||||||||||||||||||||||
| Developed by | APDNE | |||||||||||||||||||||||||||||||||||||||||
| 1 | ||||||||||||||||||||||||||||||||||||||||||
| Duration | 65 | |||||||||||||||||||||||||||||||||||||||||
| Energizers | 8 - Find another seat: Have the students sit on chairs in a circle, with the number of chairs being one less than the number of students. The student without a chair stands in the middle and tells their name. Then the student calls out a characteristic or a colour, or type of clothing, e.g. “Everyone wearing orange!”. All participants who are wearing orange must get up and find another seat, but not the one immediately to their right or left. The student in the middle races to find a seat and the person left standing becomes the next caller in the middle. | |||||||||||||||||||||||||||||||||||||||||
| Relaxing Exercises | 10 - Mountain range Stand side by side in a line, in mountain pose, your feet hip-width apart. Each foot must touch the foot of the person on each side. Walk (as a group) across the room without separating their feet from your partner’s. Variation: Ask the students to walk on their toes. | |||||||||||||||||||||||||||||||||||||||||
| Objectives | Students will: · Understand the concept of the right to education. · Recognize the importance of education for everyone. · Discuss how education helps people and communities. | |||||||||||||||||||||||||||||||||||||||||
| Preparation | ||||||||||||||||||||||||||||||||||||||||||
| Work Flow | Step 1: (20 minutes)
Step 2: (20 minutes)
Step 3: (20 minutes)
Conclusion (10 minutes)
| |||||||||||||||||||||||||||||||||||||||||
| Feedback |
| |||||||||||||||||||||||||||||||||||||||||
| Adaptations | For students who may need additional support, pair them with a buddy during the drawing activity.for the step 3 | |||||||||||||||||||||||||||||||||||||||||
| Teacher Skills | · Facilitation: Guiding students through activities and discussions, ensuring engagement and participation. (Step 1) · Storytelling: Using stories to convey messages and morals, stimulating imagination and comprehension. (Step 2) · Creativity: Encouraging students to express themselves through drawing and sharing their thoughts visually. (Step 3) · Questioning Techniques: Using questions to provoke critical thinking and reflection. (Step 2, Step 4) · Reflective Practice: Facilitating discussions that encourage students to reflect on their learning and experiences. (Conclusion) | |||||||||||||||||||||||||||||||||||||||||
| Digital Resources | ||||||||||||||||||||||||||||||||||||||||||
| 36 | |||||||||||||||||||||||||||||||||||||||||
| | |||||||||||||||||||||||||||||||||||||||||
| 2 |  CIVIC Awareness topics / C.A2 My Right to play CIVIC Awareness topics / C.A2 My Right to play | ||||||||||||||||||||||||||||||||||||||||
| Developed by | APDNE | ||||||||||||||||||||||||||||||||||||||||
| 1 | |||||||||||||||||||||||||||||||||||||||||
| Duration | 60 | ||||||||||||||||||||||||||||||||||||||||
| Energizers | 23 - Emotions Games Materials required:
Move the tables and chairs around the classroom, so the students can sit in a circle. The game begins with a ball being thrown to a student, at this point the leader who has got the 5 cards (one for each emotion), raises a card; the child who has received the ball must talk about a situation that triggers the emotion that the leader has raised. The ball is then thrown to another classmate and so on until all the students have received the ball and all of them have had a chance to talk about an emotion. The ball can only be thrown once to each student. The game ends when all students have received and thrown the ball and all of them have spoken about an emotion. | ||||||||||||||||||||||||||||||||||||||||
| Relaxing Exercises | 21 - How do I feel today? The proposal is that each child should draw his or her face according to the emotion he or she is feeling at that moment: happiness, sadness, anger, fear and calmness. | ||||||||||||||||||||||||||||||||||||||||
| Objectives | -Understand the right to play as a fundamental human right. -Recognize the benefits of play for development and well-being. -Learn how to advocate for and protect the right to play. | ||||||||||||||||||||||||||||||||||||||||
| Preparation |
Print Outs: Fact sheets on children’s rights, "Right to Play" pledge cards (ANNEX 3), Reflection Cards (ANNEX 4) | ||||||||||||||||||||||||||||||||||||||||
| Work Flow | Step 1: Introduction to Human Rights and the Right to Play (5 minutes) (ANNEX 1) Begin with a brief overview of human rights, emphasizing the importance and universality of these rights. Introduce Article 31 of the UN Convention on the Rights of the Child, focusing on the right to play, rest, and leisure. Discuss the role of play in learning, development, and well-being, setting the stage for the activities ahead. Step 2: Interactive Story Time (15 minutes) (ANNEX 2) Share a story that illustrates children from various parts of the world engaging in different forms of play. Highlight how play is experienced and valued in diverse cultures and environments. Encourage children to reflect on their own favorite playtime activities and recognize the common joy of play. Step 3: Group Activity – Creating a 'Right to Play' Charter (20 minutes) (ANNEX 3) Divide the children into small groups and provide them with materials to create their own 'Right to Play' charter. Guide them to think about what play means to them, why it's important, and how every child can be ensured the right to play. Encourage creativity and inclusivity, allowing each group to express their ideas through drawings, words, or both. Step 4: Watch a Short Video on the Right to Play Around the World (10 minutes) (see Digital Resources) Show a video (up to 1 min) that depicts children from around the globe engaging in play, highlighting the universal nature of this right. Discuss the video, focusing on the similarities and differences in play activities and environments. Use this as an opportunity to reinforce the idea that every child, regardless of background, has the right to play. Step 5: Discussion and Reflection on What Play Means to the Children (10 minutes) (ANNEX 4) Lead a reflective discussion on the children's own experiences and feelings about play. Continue with the guided discussion as planned, inviting children to share their thoughts on the importance of play and how the lesson has influenced their understanding of their right to play. Use open-ended questions to facilitate a deep conversation about personal experiences with play and the insights gained throughout the activities. After the discussion, introduce the "How do you feel about this lesson?" cards, explaining that each emoji represents different feelings. Give examples to ensure clarity (e.g., happy, excited, thoughtful, surprised). Ask the children to select an emoji card that best represents their feelings about the lesson on the right to play. Discuss how they can support each other's right to play both inside and outside of school. Step 6: Conclusions, Sharing Charter Pledges, and Closing Thoughts (20 minutes) Invite each group to present their 'Right to Play' charter to the class, sharing their insights and commitments. Facilitate a closing discussion on how the children can advocate for and protect their right to play in their communities. Conclude by reinforcing the key messages of the day and encouraging the children to remember the importance of play in their lives and the lives of others. | ||||||||||||||||||||||||||||||||||||||||
| Feedback | Children will fill out a simple feedback form with emoticons to express how the session made them feel about their right to play. (ANNEX 4) | ||||||||||||||||||||||||||||||||||||||||
| Adaptations | For varied abilities, provide alternative methods of expression, such as drawing or using gestures instead of speaking. | ||||||||||||||||||||||||||||||||||||||||
| Teacher Skills | Teaching skills: Introduction and Overview (Step 1): Engaging Introduction - Use storytelling and questioning to capture students' attention and emphasize the importance of human rights and the right to play. Interactive Story Time (Step 2): Storytelling - Utilize expressive storytelling techniques to bring the diverse experiences of children and play to life, fostering empathy and understanding among students. Group Activity (Step 3): Facilitation Skills - Guide group discussions effectively, encouraging all students to participate and ensuring that each group contributes creatively to their 'Right to Play' charter. Watching a Short Video (Step 4): Media Literacy - Help students critically analyze the video content, encouraging them to compare and contrast play activities across different cultures while reinforcing the universal right to play. Discussion and Reflection (Step 5): Questioning Techniques - Use open-ended questions to stimulate meaningful reflections on the importance of play, encouraging students to articulate their thoughts and feelings. | ||||||||||||||||||||||||||||||||||||||||
| Digital Resources | https://www.youtube.com/watch?v=-dGjaTWF3KY ANNEXES FOR TRANSLATION: -ANNEX 1 (UN CONVENTION ON THE RIGHTS OF CHILDREN-attached as word document) -ANNEX 2 (IN POWERPOINT FORMAT-can be translated directly from documents) -ANNEX 3 (CLICK THE LANGUAGE YOU WANT TO TRANSLATE AND PLEASE AFTER TRANSLATION DOWNLOAD THE TRANSLATED DOCUMENT. BULGARIAN-LATVIAN-PORTUGUESE-TURKISH) | ||||||||||||||||||||||||||||||||||||||||
| 37 | |||||||||||||||||||||||||||||||||||||||||
| | |||||||||||||||||||||||||||||||||||||||||
| 3 |  CIVIC Awareness topics / C.A3 The Right to freedom of expression CIVIC Awareness topics / C.A3 The Right to freedom of expression | ||||||||||||||||||||||||||||||||||||||||
| Developed by | PROSVETA Silvia Tsvetanska | ||||||||||||||||||||||||||||||||||||||||
| 1 | |||||||||||||||||||||||||||||||||||||||||
| Duration | 80 | ||||||||||||||||||||||||||||||||||||||||
| Energizers | 8 - Find another seat: Have the students sit on chairs in a circle, with the number of chairs being one less than the number of students. The student without a chair stands in the middle and tells their name. Then the student calls out a characteristic or a colour, or type of clothing, e.g. “Everyone wearing orange!”. All participants who are wearing orange must get up and find another seat, but not the one immediately to their right or left. The student in the middle races to find a seat and the person left standing becomes the next caller in the middle. | ||||||||||||||||||||||||||||||||||||||||
| Relaxing Exercises | 27 - Alternate nostril breathing Instructions for students:
The activity helps you to quiet and still your mind. | ||||||||||||||||||||||||||||||||||||||||
| Objectives |
Students will:
| ||||||||||||||||||||||||||||||||||||||||
| Preparation | Extra reading
https://www.ohchr.org/en/instruments-mechanisms/instruments/convention-rights-child
1. The child shall have the right to freedom of expression; this right shall include freedom to seek, receive and impart information and ideas of all kinds, regardless of frontiers, either orally, in writing or in print, in the form of art, or through any other media of the child's choice. 2. The exercise of this right may be subject to certain restrictions, but these shall only be such as are provided by law and are necessary: (a) For respect of the rights or reputations of others; or (b) For the protection of national security or of public order (ordre public), or of public health or morals.
Art. 13. Children have the right to share freely with others what they learn, think and feel, by talking, drawing, writing or in any other way unless it harms other people. Materials – sticky notes, felt-tip pens, LEGO elements Equipment – laptop and projector Classroom arrangement – arrangement in a circle to enable interaction during group work. | ||||||||||||||||||||||||||||||||||||||||
| Work Flow |
Step 1 (10 min.): Introduction Begin with questions that focus on students' personal experiences and observations: Have you seen people on strike? What do you think when you see people protesting with placards or blocking traffic in the city? Does every person have the right to protest? Do protests bother others or are they useful? Introduce the topic of the lesson - today we will talk more about the right to express our opinion in different ways. Step 2 (15 min.) Video resource 1 The right to freedom of opinion and expression Watch the video, then move on to a discussion on the topic of children's right to freely express their opinion. Discuss with the students what they have seen in the video. Discuss the questions as a whole-class activity:
Step 3 (15 min.) Brainstorming Making a list of ideas for possible ways of expressing one’s opinion. Write the students' suggestions on a flip chart or on the board so they can see them during the brainstorming session. Suggest to students to think of their experiences in expressing an opinion; guide them to think not only about words and oral speech, but also about body language, written expression, expression through the means of art and various forms of art (music, songs, drawings, posters, films, concerts, etc.). Summarize the suggestions and comment on the child's right to express their needs, ideas and experiences. Note two important aspects about exercising this right:
Step 4 (30 min.) Group Work Set different tasks to each group to get more diverse perspectives on the topic. Examples:
It is recommended to provide time for presenting the results of the group work and for feedback to the participants in the groups. Step 5 (10 min.) Conclusions The important message of this lesson is that everyone should feel free to talk about the important things in life and to protest if necessary, but without disturbing others. Respect for the rights of others and to the different opinions is a basic value of modern man in the civil society. If we develop our skills to express ourselves in diverse ways - through words, but also with the language of art, then, we increase the opportunities to influence others and have greater chances to have our position to be understood and taken into account. | ||||||||||||||||||||||||||||||||||||||||
| Feedback |
A colored sticky note is provided to each student with the instruction: "Write at least two ways you can express what you think or feel." On another sticky note students can put down what they liked most about this lesson. The notes are stuck on the wall or on a board in the classroom. If there is enough time, they can be read, commented on and summarized. At the end of the lesson the teacher collects them to check students’ feedback and understanding of the topic. | ||||||||||||||||||||||||||||||||||||||||
| Adaptations |
The activity in Step 4 can be modified according to students' abilities. e.g. the topics could be different - students could talk about their favorite activity, try to convince others of the benefits of healthy foods, talk about practicing a specific sport, etc. The different ways of expressing their opinions can also be chosen considering the complexity of the different ways of expression – they can draw their ideas, make a collage of pictures from old magazines, use Lego elements, choose a suitable video clip or a song, or just talk about the topic. At the discretion of the teacher, all groups may be given the same task. | ||||||||||||||||||||||||||||||||||||||||
| Teacher Skills |
| ||||||||||||||||||||||||||||||||||||||||
| Digital Resources | Video resource 1 The right to freedom of opinion and expression | ||||||||||||||||||||||||||||||||||||||||
| 38 | |||||||||||||||||||||||||||||||||||||||||
| | |||||||||||||||||||||||||||||||||||||||||
| 4 |  CIVIC Awareness topics / C.A4 My Right to privacy and protection from unlawful attacks on my honour and reputation CIVIC Awareness topics / C.A4 My Right to privacy and protection from unlawful attacks on my honour and reputation | ||||||||||||||||||||||||||||||||||||||||
| Developed by | PROSVETA Silvia Tsvetanska | ||||||||||||||||||||||||||||||||||||||||
| Duration | 80 | ||||||||||||||||||||||||||||||||||||||||
| Energizers | 24 - I need more space! Split students in groups of 5 (or 6). In each group assign consecutive numbers to its members. Ask the groups to make circles and randomly pick a number – all students who have been assigned to this number have to step in the circle and squat. The other members of the group are clustered tightly around the squatting student. He/she tries to stand up and make the others let him have more space around him, but they stand very close and do not allow him/her to have more space and move freely around. | ||||||||||||||||||||||||||||||||||||||||
| Relaxing Exercises | 14 - Give me your energy Students stand in a circle. The teacher launches the activity pretending he/she is holding a ball in his/her hands and passes it to the student on his/her right; the student does the same, passing it to his/ her neighbour, etc. The game continues until the ball comes back to the teacher. The ball needs to be passed in a gentle way, as it is very precious. In the second round, the teacher passes the ball to the students on the left making a gesture and a sound. Students are expected to do the same until everyone has touched the ball at least once. The ball can be passed around in different ways (with a kick, or a kiss, or a blow, etc.), pretending it becomes bigger or smaller depending on the will of the students. | ||||||||||||||||||||||||||||||||||||||||
| Objectives |
Students will: ●understand their human rights better and will learn how to act so that their actions don’t limit the rights of others; ●learn how to react when someone interferes in their life, family or home. | ||||||||||||||||||||||||||||||||||||||||
| Preparation | Materials - sticky notes Extra reading https://www.ohchr.org/en/instruments-mechanisms/instruments/convention-rights-child Convention on the Rights of the Child (Children’s version) https://www.unicef.org/media/60981/file/convention-rights-child-text-child-friendly-version.pdf Art. 16. Children have the right to privacy. The law must protect them from attacks on their way of life, their good name, their family and their home. Equipment – laptop, projector. | ||||||||||||||||||||||||||||||||||||||||
| Work Flow |
Step 1 (10 min.): Introduction The teacher introduces students to the topic of the lesson through questions related to their experiences, e.g. Have you ever overheard other students’ conversation or heard something bad being said about a classmate? How did you feel? Do we have the right to interfere in the lives of others? Step 2 (20 min.) Case study Students watch the video showing different situations from school life. Organize a short discussion on the issues presented in the video. Explain to the students the core idea of the right to be protected if someone threatens their integrity and demeans their dignity. Focus students' attention on the case study presented by the last picture in the video. Comment on different options for action in the situation. Encourage students to come up with several options for developing the case study. Another question to discuss is how we can help without hurting and intruding into the privacy and experiences of others. If the student doesn't want to share something or prefers to be left alone, let's respect his right. It is important for students to understand that if they witness rude behaviour and disrespect for the rights of others, they would better respond and speak up against the unacceptable behavior that violates someone's right. Step 3 (20 min.) Discussion Use the video from Resource 2 to practice students' awareness of the right to privacy. Discuss how they perceive what is reflected in the video and what emotions it evokes. Have a class discussion using the following guiding questions:
Step 4 (10 min.): Conclusions We had a lesson about respecting the rights of others and their right for privacy. We understood why it is important not to interfere in the private lives of others, even if we are closest friends. We learned how we can react if we found out that a close friend or a classmate felt bad when others insulted and humiliated him or her. | ||||||||||||||||||||||||||||||||||||||||
| Feedback | Students are provided with coloured sticky notes with the instruction to write one thing they will remember from the lesson. Prior to the lesson the teacher draws a tree (the Tree of Knowledge) on the board or on a flipchart. When students are ready they stick their papers on the branches of the Tree of Knowledge. Provided that there is enough time to develop further their reasoning skills, the teacher could split them in 3 teams and ask the teams to rearrange the papers with the things students identified as interesting and memorable so that the similar ones come together. The activity will teach students to find similarities and differences between ideas. When the teams are ready, they present how they have split the ideas (papers) and describe why they did the devision this way. | ||||||||||||||||||||||||||||||||||||||||
| Adaptations |
Step 1 In case nobody is willing to share because the either didn’t understand what they are being asked, or because they are shy, the teacher could suggest/ modify the question by asking them to share other people’s stories, not their own, or be the first one to share something related to the topic (even though it might not be his/her real experience), e.g. A few days ago, as I was in the dressing room getting ready for my yoga class, I overheard one of the yoga instructors gossiping about my favourite yoga instructor; in fact, it seems she might be speaking the truth. I felt quite uneasy about hearing the conversation and questioned myself if it was OK to talk to my yoga instructor about what I heard so that she could counteract. Step 2 All cases should be related to the specifics of students’ lives. In case the teacher considers there are other situations, not presented in the video, but they are more relevant to discuss with this specific class, he/she could describe the situation and ask the class to talk about it | ||||||||||||||||||||||||||||||||||||||||
| Teacher Skills |
| ||||||||||||||||||||||||||||||||||||||||
| Digital Resources | Resource 1: “At School”https://youtu.be/Yp_PsA0XnjA Resource 2: The Right to privacy https://www.humanrights.com/what-are-human-rights/videos/right-to-privacy.html | ||||||||||||||||||||||||||||||||||||||||
| 39 | |||||||||||||||||||||||||||||||||||||||||
| | |||||||||||||||||||||||||||||||||||||||||
| 5 |  CIVIC Awareness topics / C.A5 My right to education CIVIC Awareness topics / C.A5 My right to education | ||||||||||||||||||||||||||||||||||||||||
| Developed by | IPSantarem - Ana Da Silva, Ana Torres, Maurício Dias | ||||||||||||||||||||||||||||||||||||||||
| Duration | 80 | ||||||||||||||||||||||||||||||||||||||||
| Energizers | 44 - Newspaper mimic The children move freely, to the sound of music, with a sheet of newspaper in their hand. At a certain point, the educator interrupts the music and says the name of a school subject (mathematics, language, history, natural sciences, music, painting, sports, etc.) and each child puts the sheet on the floor and stands on it making a gesture that represents an action related to the subject. With this activity, children develop balance and imagination. (5 minutes). | ||||||||||||||||||||||||||||||||||||||||
| Relaxing Exercises | 43 - Who's where in the circle? The children form a circle holding hands and check who is on their right and on their left. The educator plays some calm music and the children let go of their hands and move randomly around the space, within a delimited perimeter. The educator stops the music and the children have to do the same circle again, making sure they hold hands with the same colleagues who were on their right and left in the circle. (5 minutes) | ||||||||||||||||||||||||||||||||||||||||
| Objectives |
| ||||||||||||||||||||||||||||||||||||||||
| Preparation | Materials and equipments
| ||||||||||||||||||||||||||||||||||||||||
| Work Flow | Step 1 - Introduction: Participation is a UN Convention on the Rights of the Child basic principle. So we suggest that children work in small groups to identify and discuss one particular topic or skill that they would like to develop; and make a film to express some of their educational needs and wishes, and reflect upon why they find it important so as to grow happy and healthy.
| ||||||||||||||||||||||||||||||||||||||||
| Feedback | Use target evaluation technique | ||||||||||||||||||||||||||||||||||||||||
| Adaptations | In case of hearing impairment children, in the energizer and relaxing activity, the educator can make a large broad movement to be seen each time he/she puts on or stops the music.Check the possibility of inviting experts to teach the children the topics they suggested. Ask if children agree to share the films with the parents or legal representatives, and with the experts. If children agree, ask for parents or legal representatives authorisation to send the films to experts. | ||||||||||||||||||||||||||||||||||||||||
| Teacher Skills | Communication: Clear communication is essential for explaining the complex concepts of the UN Convention on the Rights of the Child, providing instructions, and guiding students through discussions and the filmmaking process. Listening and Adaptability: Listening to students’ ideas and adapting to their needs ensures that each child feels heard and supported, especially when discussing personal educational needs and wishes. Creativity and Passion: Encouraging students to express their ideas through creative means, such as a film, requires a teacher who can inspire and foster creativity and enthusiasm in the students. Technical Skills: Since the activity involves using cameras, tablets, or phones to create a film, teachers must have the technical skills to guide students through the filming process and troubleshoot any issues. | ||||||||||||||||||||||||||||||||||||||||
| Digital Resources | Cartoons for Child Rights - Education India: Cartoons for Child Rights - Education India | UNICEF (youtube.com | ||||||||||||||||||||||||||||||||||||||||
| 40 | |||||||||||||||||||||||||||||||||||||||||
| | |||||||||||||||||||||||||||||||||||||||||
| 6 |  CIVIC Awareness topics / C.A6 The Right to privacy CIVIC Awareness topics / C.A6 The Right to privacy | ||||||||||||||||||||||||||||||||||||||||
| Developed by | IPSantarem - Ana Da Silva, Ana Torres, Maurício Dias | ||||||||||||||||||||||||||||||||||||||||
| Duration | 80 | ||||||||||||||||||||||||||||||||||||||||
| Energizers | 45 - The rope game Divide the children in 2 groups. The children from one group line up parallel to a rope that is put on the ground, the children from the other group line up on the other side of the rope, facing the other children. | ||||||||||||||||||||||||||||||||||||||||
| Relaxing Exercises | 44 - Moving like robots The children are invited to imagine they are robots and move randomly like different articulated human-like robots (with music). (3 minutes) | ||||||||||||||||||||||||||||||||||||||||
| Objectives |
| ||||||||||||||||||||||||||||||||||||||||
| Preparation | Extra reading
Materials and equipment
| ||||||||||||||||||||||||||||||||||||||||
| Work Flow | Step 1 - Introduction: The right to privacy and data protection are ensured by the Council of Europe and European Union. Young children are using the internet often sharing personal data either intentionally or unintentionally. This raises significant privacy risks like reputation loss, data exploitation, profiling, identity theft, cyber harassment, and discrimination. Policy makers and academics argue for special protections for children online, reflecting Article 16 of the UN Convention on the Rights of the Child. The EU's General Data Protection Regulation (GDPR) is a response, updating previous legislation to enhance privacy rights in the digital age. The GDPR specifically protects children's data, requiring parental consent and introducing additional safeguards. Artificial Intelligence offers children many opportunities, but it also raises the risk of compromising their rights. Educators should care for a balance between empowering children as AI users and protecting their privacy (need for protection/participatory rights). The Digital Competence Framework for Citizens defines essential knowledge, skills, and attitudes for engaging with digital technologies confidently, critically, and responsibly. (5 minutes) Step 2: The Educator briefly explains the activity, beginning with the outcomes of the rope game (taking into account the answers to the questions). (5 minutes) Step 3: Explain that to have the right to do something means that no one can prevent you from doing that thing. There are rights that give the possibility to do things and others that guarantee our protection and freedom. Our rights to do things are limited by other’s rights to be protected. Rights are guaranteed by laws and the Constitution of a nation. (5 minutes) Step 4: Inform what are rights to privacy in terms of personal information. Personal information allows someone or a company to identify us. Ask the children to write down (or say orally) what is personal information (name, birthday, email address, phone number, email, messages, opinions, habits, IP address, photos, vídeos, etc.). (10 minutes). Step 5: Explain what is AI and that the social networks, search browsers, apps, games, e-commerce websites collect personal information when we use them. (5 minutes) Step 6: Invite the children to discuss, in small groups, why it is important to protect privacy and personal information, and choose a spokesperson to present the ideas of the group (10 minutes) Step 7: Invite each small group to present their ideas to the big group and the educator registers all of the ideas on the board or flipchart. In the end, summarize and underline the main risks. (10 minutes) Step 8: Choose one online app or platform used by the children (according to what they said in the rope game), access the internet and show them the Terms of Service and Privacy Policy, explaining that when they agree (so as they can use the service), they are agreeing to share personal data, and these terms usually tell why our data is being collected, for what, for how long, etc. (10 minutes) | ||||||||||||||||||||||||||||||||||||||||
| Feedback | The boat technique (7 minutes)
Draw a boat on a big piece of paper with the water line and put it on the ground. Print small papers with anchors and small papers with oars. Give each participant a paper with the anchor and a paper with the oars. Tell the participants that the boat represents the activity and ask them to write on the oars paper one thing that helped the boat to move forward (one positive aspect about the activity). Then, ask them to write on the anchor paper one thing that blocked the boat (one less positive or negative aspect about the activity). Invite them to come near the boat and put all the oars papers above the waterline and all the anchor papers below the waterline. The evaluation oars and anchors papers can stay in the room for everyone to read and reflect on the activity. | ||||||||||||||||||||||||||||||||||||||||
| Adaptations | Use AI to translate extra reading documents Collect questions that children may have to explore the answers in a future session. For the evaluation technique, if participants can not write, they can say orally some aspects that they consider more positive (holding the oars paper) or less positive (holding the anchor paper). | ||||||||||||||||||||||||||||||||||||||||
| Teacher Skills | Communication: Essential for explaining the complex concepts of privacy rights, personal data, and AI in a way that children can understand. Critical Thinking: Encouraging students to think critically about their online privacy and the implications of sharing personal data is crucial for their understanding and awareness. Technical Skills: Navigating and explaining online platforms, privacy policies, and how personal data is collected requires technical proficiency to make the activity effective. Listening and Adaptability: Listening to students’ concerns and adapting explanations based on their understanding ensures that the lesson is personalized and relevant. | ||||||||||||||||||||||||||||||||||||||||
| Digital Resources | |||||||||||||||||||||||||||||||||||||||||
| 41 | |||||||||||||||||||||||||||||||||||||||||
| | |||||||||||||||||||||||||||||||||||||||||
| 7 | |||||||||||||||||||||||||||||||||||||||||
| Developed by | Prosveta - Silvia Tsvetanska | ||||||||||||||||||||||||||||||||||||||||
| Duration | 80 | ||||||||||||||||||||||||||||||||||||||||
| Energizers | 10 - Rope game Have the participants stand on the middle of a space cleared of desks, chairs, etc. Divide the room in a way that allows them easily to move from one half of the room to the other, e.g. by placing a long piece of rope on the floor. The teacher stands at one of the ends of the rope and calls out a characteristic, or a colour or a letter, e.g. “Everyone having blue eyes!”; “Everyone having 3 brothers”, “Everyone whose name begins with B”, etc. and points to the part of the room where the participants wearing orange/ having 3 brothers/ having B names have to move to. All participants who are wearing orange/ having 3 brothers/ having B names move to the respective part of the room; the ones who are not , have to go to the other part. Questions have to be constructed so that the class does not divide in groups having comparatively equal number of students, i.e. one of the groups should consist (in most cases) of one, two or few students. Debriefing: Participants are asked to share how they felt when they were part of a big group; and when they were standing alone (or were part of a very small group); what did they feel of themselves (as part of a small/ big group), and what their feelings were towards the group they were not part of. | ||||||||||||||||||||||||||||||||||||||||
| Relaxing Exercises | 19 - Massage ball One ball is given to each participant and, following the rhythm of a soft music, they place the ball between their back and a wall. They bend their knees slightly to relax the legs and better place their back. Then they move their body from top to bottom and from right to left and vice versa, moving the ball around their back. When making movements of their body, they will notice some more tense (and sometimes painful) spots. When they notice this they should stop and stay quiet keeping their back against the wall, making the desired pressure and holding for a while. Variation: Do not use the wall. Participants work in pairs and one holds 1 or 2 balls in their hands and makes the massage to the other and then they switch. | ||||||||||||||||||||||||||||||||||||||||
| Objectives |
| ||||||||||||||||||||||||||||||||||||||||
| Preparation | Equipment – laptop, projector Print outs – Handout 1 (for each student) | ||||||||||||||||||||||||||||||||||||||||
| Work Flow | Step 1 (5 min.): Introduction Start the lesson by asking students about what their rights and responsibilities are, so that you can relate the topic to the experiences and observations from their everyday life. What does it mean to be entitled to something? What rights do you have at school? What are your duties at school? Is it possible to have only obligations? What about having only rights? Step 2 (15 min.) „In the school library“ Make use of video resource 1 “In the library” Play the video to the students. Give them the opportunity to freely share their impressions and react to the presented situation. Ask students to comment whether they think the student should get another book to read. Note that rights go hand in hand with the obligations that we need to comply with. Step 3 (10 min.) Discussion Encourage reflection on students' experiences:
Continue the discussion with the question why it is important to know our rights, but also our responsibilities. What if everyone required their rights to be respected but wouldn’t respect other people's rights? How do we show our respect for others? Step 4 (5 min.) The Wheel of Rights and Obligations Make use of video resource 2 “The Wheel of Rights and Obligations”. If necessary, explain some of the rights and obligations included in the video. Step 5 (20 min.) Activity „My Rights and Obligations“ Students receive copies of the printout “Rights and Obligations” for individual work. First, instruct students to match each right from the left column with its corresponding obligation from the right column. Then have each student fill in the blanks in the chart by writing examples of their rights and responsibilities at home. Step 6 (10 min.) Presentation Students volunteer to read how they matched the rights and the obligations. Other students share 1 or 2 examples of the rights and responsibilities they have at home. Step 7 (5 min.): Conclusions If we want our rights to be respected, we must respect the rights of others and fulfill our responsibilities. | ||||||||||||||||||||||||||||||||||||||||
| Feedback | In random order, students are directed to name "Two things I learned today" or "Two things I will remember from this class." | ||||||||||||||||||||||||||||||||||||||||
| Adaptations | Step 2: If necessary, the video resources can be played twice. The teacher could pause it at certain points for clarification or for intermediate questions. Step 4: Considering the age and abilities of students, the teacher could modify the suggested use of the video resource by pausing at each (or some) rights and obligations and asking students to talk about what it means, discuss if some relevant aspects, e.g. the right to gain knowledge - the talk could be linked to the right to education; students could be challenged to think about living in a place where you don’t have the chance to go to school, etc. In this case Step 4 will need more time, so the timing of the lesson needs to be modified and some steps could be implemented during another session. Step 5: Students’ individual work with the printouts can be done in pairs at the teacher's discretion to help students with learning difficulties. | ||||||||||||||||||||||||||||||||||||||||
| Teacher Skills | 1. Communication - Ability to lead a discussion - asking clear and precise questions; - Ability to give understandable instructions for completing tasks; - Listening skills – supporting students to speak through verbal and non-verbal expression of listening and attention to what they share. 2. Patience and enthusiasm When discussing the topic of responsibilities it is possible that students express resistance to complying with demands on them and show doubt as to why they need to have so many responsibilities at home and at school. The teacher must be able to keep calm, be patient with students' emotions and show enthusiasm about the fact that rights go hand in hand with duties and responsibilities. His enthusiasm for the subject will infect students to think about their behavior and to stand up for their rights, but also to fulfill their obligations. | ||||||||||||||||||||||||||||||||||||||||
| Digital Resources | |||||||||||||||||||||||||||||||||||||||||
| 42 | |||||||||||||||||||||||||||||||||||||||||
| | |||||||||||||||||||||||||||||||||||||||||
| 8 | .gif) CIVIC Awareness topics / C.B2 - Respect others rights CIVIC Awareness topics / C.B2 - Respect others rights | ||||||||||||||||||||||||||||||||||||||||
| Developed by | IPSantarem - Ana Da Silva, Ana Torres, Maurício Dias | ||||||||||||||||||||||||||||||||||||||||
| Duration | 60 | ||||||||||||||||||||||||||||||||||||||||
| Energizers | 46 - Find the colour The children are placed in a semi-circle. The educator stands in front of them and says the name of a fruit or vegetable and the children have to try to touch something that has that colour in the room where they are (it could be the clothes they are wearing or those of other people, objects, equipment, etc.). If they don't know the fruit or vegetable, they can't move and wait to see the colour.. Before moving on to the next fruit/vegetable, the educator shows a colour picture of the vegetable or fruit. Then moves on to another vegetable or fruit. This energiser helps to develop motor coordination; spatial-temporal orientation; (re)cognition of food and colours. Use some food items that are going to be used to make paint, in the activity described below. If there are children with hearing impairment, the educator can show the drawing of the fruits and vegetables while orally mentioning them. If there are children with visual impairment, they can use plasticine to model the shape of some fruits or vegetables that are suggested. (5 minutes). | ||||||||||||||||||||||||||||||||||||||||
| Relaxing Exercises | 45 - What fruit/veg am I? The educator places a sheet of paper on each child's back with the image and name of a fruit/vegetable (orange, lemon, apple, carrot, tomato, etc.), asking the children to move around the room slowly and not to say what is on each other's backs. As they move around the room for 3 minutes, they ask each other yes/no questions to try to guess which fruit/legume they are. They can only ask one question to each child they pass by (like "am I green?", “am I round?”, "am I sweet?", "am I used to make soup?", "am I used to make fruit salad?", etc.) and move to the next colleague. | ||||||||||||||||||||||||||||||||||||||||
| Objectives | Recognize that enjoying and creating art are rights to all children considering particular specificities of disabled children; Develop sustainable artistic expression with disabled children and youngsters; Promote the understanding of the impact on the environment of the materials that cause pollution and of the actions needed to reduce it; Promote pro-climate action by using recyclable materials and painting with raw materials and natural pigments. | ||||||||||||||||||||||||||||||||||||||||
| Preparation | Suggested Reading
Children can make their own paints by saving food leftovers or by walking in nature and collecting raw materials like all types of soil, instead buying mass-produced paints in hypermarkets or art supply stores, that have an impact on the environment during the manufacturing process and afterwards. The chemicals used in the mass-produced paints carry risks and they are toxic to human health and environment. https://www.lostincolours.com/foraging-for-pigments-from-local-rocks/
It is possible to use the food or raw materials to make paint but also as a tool for a tactile experience. For instance, a bit of charcoal can be used to make black, but it can also be used as a pencil for visual impairment children. Touch, explore, create – Perkins School for the Blind Materials and Equipment
| ||||||||||||||||||||||||||||||||||||||||
| Work Flow | Step 1 - Introduction: For children with disabilities painting can be difficult. Adaptive art tools and materials help to remove barriers so as they can express their artistic personality and ideas. For example, shrink wrap to apply paint to canvas to create unique bold textures: https://momentum4work.org/adaptive-art-techniques-help-to-empower-creativity-for-all/ Start a conversation on the activity to explain the activity (3 minutes). - Ask children what is art, according to each one, and discuss about characteristics of art in general and different arts in particular, and characteristics of an artist (5 minutes). - Check if some of the participants are used to creating art and what art they do (painting, music, dance, drama, etc.) (3 minutes). Step 2: Show 2 minutes of a film on disabled fine arts artist painting work of art and technique, from minute 11:45 to 13:45: Disabled artist uses mouth to paint | Divyang | Joyal K Biju | Art Mantram (youtube.com). Step 3: Invite children to think about the specificity of the technique he uses according to his disability and how the disability may influence his art. (5 minutes) Step 4: Invite children to fill in the template about what colours they could make with each type of food waste or natural materials. See below (5 minutes). Step 5: Children crush, grind and filter the food leftovers to make their own paints using also recyclable materials as tools to explore different textures. (20 minutes) Step 6: Children share the paints and make a collective watercolour painting by sticking together all their paintings (10 minutes). Step 7: They are invited to exhibit it in the school to promote social and cultural inclusion ecological awareness in the whole school. (2 minutes) | ||||||||||||||||||||||||||||||||||||||||
| Feedback | Use Human Graphic Technique (15 minutes) The children are at the back of the room, in a line parallel to the wall, and on the other side, the teacher places 5 pieces of paper with the numbers 1 to 5, arranged in a line parallel to the children's line. He explains that he is going to ask them for their opinion on the learning activity, saying that 1 corresponds to the most negative evaluation and 5 to the most positive evaluation. He then goes on to say one evaluation parameter at a time and invites the group to line up behind one of the numbers on the scale according to the value that corresponds to their opinion of each parameter. For example, if you select learning as an evaluation parameter, if some of them had never made paints with food scraps and raw materials before and learnt a lot, they line up behind number 5, but if they already knew how to do it and didn't learn anything new, they can line up behind 1, and they can choose intermediate values on the scale. Seen from above, the children's rows look like a graph. The educator asks them to count out loud (the first child in each row says 1; the second says 2, and so on until the last child in the row) and records the number of children in each row of the scale. It's important not to limit yourself to collecting quantitative data and, in each parameter, after the children have positioned themselves in row(s), you should ask questions to get feedback on the activity. For example, you could ask the children why they are in number 5 or 3 rows, etc. Ask what they have learnt, etc. At the end of this verbal interaction for the quantitative assessment, the educator asks the group to go back to the initial position and presents another parameter. The children are again invited to stand in a row behind one of the values on the scale from 1 to 5. As there isn't much time for all the children to speak, you can ask 1 or 2 questions on each parameter and let 2 or 3 children speak, then ask if anyone else has anything to add. You can choose 2 or 3 evaluation parameters: learning, fun, quality of paintings, diversity of materials, etc. | ||||||||||||||||||||||||||||||||||||||||
| Adaptations | Use tactile experience for children with visual impairment (colourful, sound and textured objects to paint, use larger paper size on the ground). In case of physical disability, you may attach the brush to the child's hand or adapt wheelchair (Artist Invents Tools That Enable Kids With Disabilities To Paint (youtube.com) | ||||||||||||||||||||||||||||||||||||||||
| Teacher Skills | Communication: Effectively explaining the activity and guiding discussions about art, disability, and adaptive techniques. Listening and Adaptability: Understanding each child’s abilities and needs, especially for those with disabilities, and adapting the materials and approach accordingly. Creativity and Passion: Inspiring students to explore their creativity through non-traditional art methods and tools, especially using food waste and recyclable materials. Patience: Supporting students as they experiment with making their own paints and complete the group artwork, which may require extra time and care. Technical Skills: Familiarity with adaptive art tools and techniques to help children with disabilities engage in the activity. Enthusiasm: Keeping the children motivated and excited about art and the collective project. | ||||||||||||||||||||||||||||||||||||||||
| Digital Resources | |||||||||||||||||||||||||||||||||||||||||
| 43 | |||||||||||||||||||||||||||||||||||||||||||||||
| | |||||||||||||||||||||||||||||||||||||||||||||||
| 9 | .gif) CIVIC Awareness topics / C.C1 Kindness Rocks CIVIC Awareness topics / C.C1 Kindness Rocks | ||||||||||||||||||||||||||||||||||||||||||||||
| Developed by | APDNE | ||||||||||||||||||||||||||||||||||||||||||||||
| 1 | |||||||||||||||||||||||||||||||||||||||||||||||
| Duration | 60 | ||||||||||||||||||||||||||||||||||||||||||||||
| Energizers | 25 - The mirror game The game begins with the room cleared of tables and chairs. The students start by team up in pairs and stand in front of each other. They agree who starts the game, who plays the mirror and who plays the person. The game begins to the sound of a song chosen by the leader. The person will start to move and the "mirror" will have to follow him/her, immediately repeating the person's movements. When the leader stops the music, they swap places and the person who was the "mirror" becomes the person and vice-versa. | ||||||||||||||||||||||||||||||||||||||||||||||
| Relaxing Exercises | 14 - Give me your energy Students stand in a circle. The teacher launches the activity pretending he/she is holding a ball in his/her hands and passes it to the student on his/her right; the student does the same, passing it to his/ her neighbour, etc. The game continues until the ball comes back to the teacher. The ball needs to be passed in a gentle way, as it is very precious. In the second round, the teacher passes the ball to the students on the left making a gesture and a sound. Students are expected to do the same until everyone has touched the ball at least once. The ball can be passed around in different ways (with a kick, or a kiss, or a blow, etc.), pretending it becomes bigger or smaller depending on the will of the students. | ||||||||||||||||||||||||||||||||||||||||||||||
| Objectives |
| ||||||||||||||||||||||||||||||||||||||||||||||
| Preparation |
Print outs: Annex 3 | ||||||||||||||||||||||||||||||||||||||||||||||
| Work Flow |
| ||||||||||||||||||||||||||||||||||||||||||||||
| Feedback |
| ||||||||||||||||||||||||||||||||||||||||||||||
| Adaptations |
| ||||||||||||||||||||||||||||||||||||||||||||||
| Teacher Skills |
| ||||||||||||||||||||||||||||||||||||||||||||||
| Digital Resources | |||||||||||||||||||||||||||||||||||||||||||||||
| 44 | |||||||||||||||||||||||||||||||||||||||||
| | |||||||||||||||||||||||||||||||||||||||||
| 10 | .gif) CIVIC Awareness topics / C.C2 Projects implemented by students CIVIC Awareness topics / C.C2 Projects implemented by students | ||||||||||||||||||||||||||||||||||||||||
| Developed by | FEE | ||||||||||||||||||||||||||||||||||||||||
| 1 | |||||||||||||||||||||||||||||||||||||||||
| Duration | 80 | ||||||||||||||||||||||||||||||||||||||||
| Energizers | 48 - Musical chairs Arrange the chairs in a circle, with the backs facing outwards. Make sure there's enough space between the chairs for people to walk around comfortably. Choose upbeat and lively music for the game. Once the music starts, players walk or jog around the circle of chairs. When the music stops abruptly, everyone needs to find a chair to sit on as quickly as possible. The player who doesn't find a seat is eliminated from the game. After each round, remove one chair from the circle. The game continues with the remaining players and one chair less, making it more challenging to find a seat as the game progresses. The last player remaining who manages to find a seat when the music stops is the winner of the game! | ||||||||||||||||||||||||||||||||||||||||
| Relaxing Exercises | 48 - “Feeling Time in Stillness: A Relaxing Activity with Closed Eyes” Get comfy in your chair, with your back straight and feet on the floor. Now, gently close your eyes. Breathe in deeply through your nose, filling your belly with air. Let it all out slowly through your mouth, like blowing out a birthday candle. Do this a few times, letting any worries float away with each breath. The world around you might have some sounds – maybe a hum from the lights, leaves rustling outside, or even just your own breathing. That's okay, just listen quietly. Imagine you're like a big, beautiful sundial, feeling the time pass by. Maybe you get a little warmer, shift in your seat a tiny bit, or even blink once or twice. Don't worry about counting seconds or minutes. Just relax and let yourself be here, now. When you feel like a whole minute has gone by, open your eyes again. It might be a little more or a little less, that's okay! The important part is feeling calm and peaceful. | ||||||||||||||||||||||||||||||||||||||||
| Objectives |
| ||||||||||||||||||||||||||||||||||||||||
| Preparation | Board games created by students in the lesson E.A7 "What is biodiveristy and how it affects our life?" Materials: Worksheet Supplies: pencils, paper, markers, chartboard or whiteboard. | ||||||||||||||||||||||||||||||||||||||||
| Work Flow | Step 1 (30 minutes):
Step 2 (10 minutes):
Step 3 (10 minutes): Each group brainstorms and comes up with one idea for how to promote and use their board game in a meaningful way within the school or community (e.g. lunchtime game club, family game night event). Each group then presents their idea to the class. Step 4 (20 minutes): From each group, one representative is asked to voluntarily join the "Planning Group." The remaining members stay to work on the implementation plan for their chosen idea. Task for the Planning Group: Students in this group work together in their workbooks to create a detailed project implementation plan for the chosen promotion/use approach. This plan should outline:
Task for the Advertising Group: The teacher shows examples of effective board game advertisements using videos or websites (e.g. the provided YouTube links on promoting board games with visuals.
Step 5 (5 minutes): Showcase and wrap-up:
| ||||||||||||||||||||||||||||||||||||||||
| Feedback | Quick Mid-game Check-in:
| ||||||||||||||||||||||||||||||||||||||||
| Adaptations | A1. Adapt the time for game testing for your needs. A2. In case you don't have enough time, advertising group can create one - poster or video. | ||||||||||||||||||||||||||||||||||||||||
| Teacher Skills | Patience and Enthusiasm: Maintaining a positive and energetic attitude to keep young students engaged. Clear and Simple Instructions: Explaining rules and procedures in a way that is easy understandable. | ||||||||||||||||||||||||||||||||||||||||
| Digital Resources | Worksheet with tasks for eacg of the groups. Let the students create a digital poster! Use digital tools - for example "Canva" | ||||||||||||||||||||||||||||||||||||||||
| 45 | |||||||||||||||||||||||||||||||||||||||||
| | |||||||||||||||||||||||||||||||||||||||||
| 11 |  CIVIC Awareness topics / C.C3 Family/school/environment as whole. CIVIC Awareness topics / C.C3 Family/school/environment as whole. | ||||||||||||||||||||||||||||||||||||||||
| Developed by | FEE | ||||||||||||||||||||||||||||||||||||||||
| 1 | |||||||||||||||||||||||||||||||||||||||||
| Duration | 80 | ||||||||||||||||||||||||||||||||||||||||
| Energizers | 42 - Create a word! Ask seven people from the first row to come to the front of the room and stand in a straight line facing the audience. Distribute the letter cards, one to each participant. Ask each person to hold their letter card above their head, so that the audience can read it easily. Explain that the letters spell a seven-letter word. Ask members of the audience to call out directions to the letter holders to rearrange them in the correct order to spell the word. (Examples: The person with the letter E, please move to the beginning of the word. The person with the letter D, move to the end.) Ask the letter holders to follow the directions from the audience. Give some hints to speed up the process, if necessary. When the word is correctly formed, ask everyone to read it aloud at the count of three. Thank the letter holders, collect the cards, and send them back to their seats. Lead a round of applause for the entire group for solving the anagram quickly. | ||||||||||||||||||||||||||||||||||||||||
| Relaxing Exercises | 43 - Who's where in the circle? The children form a circle holding hands and check who is on their right and on their left. The educator plays some calm music and the children let go of their hands and move randomly around the space, within a delimited perimeter. The educator stops the music and the children have to do the same circle again, making sure they hold hands with the same colleagues who were on their right and left in the circle. (5 minutes) | ||||||||||||||||||||||||||||||||||||||||
| Objectives | After the lesson students will:
| ||||||||||||||||||||||||||||||||||||||||
| Preparation |
| ||||||||||||||||||||||||||||||||||||||||
| Work Flow | Step 1 (5 min): Greet students and review the importance of recycling. Briefly discuss the materials students brought from home and help them separate any unusable items. You can use some visual materials to demonstrate it. Step 2 (10 minutes): Ask students about special occasions they celebrate with their families. Discuss the idea of gift-giving and how it expresses care and appreciation. Questions for discussion:
Step 3 ( 6 minutes): Project a presentation with images of different gifts. Use a thumbs-up/thumbs-down system for students to vote on whether each gift is eco-friendly. Briefly explain why each gift is or is not environmentally friendly. Step 4 (40 minutes): Divide students into small groups or have them work individually. Provide each group/student with recycled paper and craft materials. Show the video (or specific parts) to demonstrate card creation techniques and explain how to transform their cards into plantable gifts by incorporating seeds. (how to create a paper mixture and how to incoorporate the seeds). Encourage students to be creative and personalise their cards. Suggest using natural materials like dried flowers or leaves for embellishments. After work guide students through cleaning up the classroom. Step 5 ( 15 minutes): Introduce the concept of seed planting and benefits of growing plants. Have students participate in a short quiz about the role of plants in nature. Discuss the answers, highlighting the importance of plants for food, oxygen, and the environment. Question for quiz are attached in the annex. | ||||||||||||||||||||||||||||||||||||||||
| Feedback | Ask students to write down the benefits of their eco-friendly gifts in 3 categories:
Invite some volunteers to share their ideas with the class. | ||||||||||||||||||||||||||||||||||||||||
| Adaptations | A1. Provide pre-cut shapes or templates for younger students. A2. Offer a variety of seeds with different difficulty levels for growing. A3. Allow students with advanced skills to create more complex card designs. | ||||||||||||||||||||||||||||||||||||||||
| Teacher Skills | Cultural Sensitivity:
Craft Skills:
| ||||||||||||||||||||||||||||||||||||||||
| Digital Resources | Presentation with gift ideas Worksheet with tasks for students Questions for quiz Video "I made my own handmade paper!" | ||||||||||||||||||||||||||||||||||||||||
| 46 | |||||||||||||||||||||||||||||||||||||||||
| | |||||||||||||||||||||||||||||||||||||||||
| 12 |  CIVIC Awareness topics / C.C4 I can be a part of change for the better. CIVIC Awareness topics / C.C4 I can be a part of change for the better. | ||||||||||||||||||||||||||||||||||||||||
| Developed by | FEE | ||||||||||||||||||||||||||||||||||||||||
| Duration | 80 | ||||||||||||||||||||||||||||||||||||||||
| Energizers | 40 - Word chain relay race Divide students into two or more teams and have them line up facing the front of the class. Choose a starting word (e.g., "apple"). On your signal, the first person in each team shouts out a new word that starts with the last letter of the previous word (e.g., "elephant"). The race continues with each team member taking turns to call out a new word that follows the chain. The team that gets stuck or repeats a word is out. The team that keeps the chain going the longest wins! | ||||||||||||||||||||||||||||||||||||||||
| Relaxing Exercises | 39 - Sensory scavenger hunt This activity helps students de-stress, use their senses, and connect with their surroundings. Materials: A list of sensory prompts for each student (see below) Instructions: Prepare a list of prompts that engage different senses (e.g., "Find something soft,", "Smell something sweet,", "Listen to a quiet sound"). Distribute the list to each student and instruct them to find something in the classroom or outside (depending on time and space) that fits each prompt. Encourage them to explore the space slowly and mindfully. Once everyone has completed the list, come back together as a class and ask a few students to share your findings. Sensory Prompt Ideas: Sight: Find something red, something shiny, something with stripes. Touch: Find something smooth, something rough, something cold. Smell: Find something that smells like flowers, something that smells like books, something that smells like fresh air. Hearing: Find a quiet place, find a sound outside the window, find a sound you make with your body. Taste (optional): If appropriate, have students bring in a small piece of fruit or another snack to share and describe its taste (sweet, sour, etc.). | ||||||||||||||||||||||||||||||||||||||||
| Objectives | At the end of the lesson students will:
| ||||||||||||||||||||||||||||||||||||||||
| Preparation | Teacher prepares the craft materials for the collage making at the beginning of the lesson: magazines, papers, paper, recyclable materials, crayons, markers, glue, scissors, A3 sheet per group. Worksheet with the tasks. Cut out and laminate 12 picture cards of different situations that can cause changes in the environment. | ||||||||||||||||||||||||||||||||||||||||
| Work Flow | Introduction (7 minutes) Students are divided in pairs. Each pair of students randomly draw one picture from 12 cards provided. The pair has to create a description in of what they see in the picture (task 1). Step 2 (12 minutes) Each pair reads their story and pins the drawn picture onto the board. After each story, the other students are asked the question: "Is this situation (problem) relevant in school?" Step 3 (3 minutes)- Students vote for actions they contribute to. Voting takes place by marking the picture with a "PLUS" sign. Students can use coloured markers. Step 4 (5 minutes) - Class discuss the problems and choose 6 - the ones which are most most relevant in their school. Students are divided into as many groups as there are problems identified. Each group chooses or draws one of the described problems. Step 5 (5 minutes) - Group Discussion and Problem Selection - Encourage students to discuss why they chose that particular problem and why it is important for them. (task 2) Step 6 (10 minutes) - Brainstorming Solutions - Guide each group in brainstorming solutions to the problem they have chosen. Encourage them to think creatively and consider various approaches, such as behavioural changes, technological solutions, or community initiatives. Ask them to share their ideas on a piece of a paper or whiteboard. (task 3) Step 7 (8 minutes) Planning the Collage - Ask each group to plan their collage, considering the following: Encourage them to use visual elements like drawings, cut-outs of magazine pictures to represent different aspects of the problem and its solution. (task 4) Step 7 (20 minutes) Creating the Collage: Provide each group with materials such as construction paper, scissors, glue, markers, crayons, and any other relevant craft supplies. Allow them to work together to create their collages, incorporating their ideas and visual elements. Conclusion (7 minutes) Sharing and Discussion - Ask each group to prepare a short presentation of their collage to the class. To prepare for the presentation, students have to answer to 3 questions (task 5):
The teacher randomly picks up 2 groups that will present their work. | ||||||||||||||||||||||||||||||||||||||||
| Feedback |
After the presentation, ask students to put all of the collages on the wall. Ask students to look at the collages and think about actions that can help to create positive changes! | ||||||||||||||||||||||||||||||||||||||||
| Adaptations | A1. Simplify Picture Cards: Use fewer picture cards (around 6-8) with more easily identifiable environmental issues like littering, overflowing rubbish bins, or unplugged electronics. A2. Shorter Brainstorming: Reduce brainstorming time to 5-7 minutes. Provide teacher prompts or question starters to guide younger students (e.g. "How can we use less paper in class?"). A3. Collaborative Collage: Instead of individual group collages, consider creating one large class collage where each group contributes a section based on their chosen problem. | ||||||||||||||||||||||||||||||||||||||||
| Teacher Skills | Heuristics: Familiarity with various problem-solving techniques, such as trial and error, working backward, or analogy. Real-world applications: The ability to connect problem-solving skills to real-life situations. Positive attitude: The ability to create a supportive and encouraging learning environment. Active listening: The skill to attentively listen to students' ideas and provide constructive feedback about pschool environment. Teacher should do a small research in school before this particular lesson. | ||||||||||||||||||||||||||||||||||||||||
| Digital Resources |
Worksheet for classroom discussion and planning the collage. | ||||||||||||||||||||||||||||||||||||||||
| 47 | |||||||||||||||||||||||||||||||||||||||||
| | |||||||||||||||||||||||||||||||||||||||||
| 13 |  CIVIC Awareness topics / C.C5 How to build cooperation outside of school CIVIC Awareness topics / C.C5 How to build cooperation outside of school | ||||||||||||||||||||||||||||||||||||||||
| Developed by | FEE | ||||||||||||||||||||||||||||||||||||||||
| Duration | 80 | ||||||||||||||||||||||||||||||||||||||||
| Energizers | 41 - Human knot Have students stand in a circle with their arms outstretched. Instruct them to grab the hand of someone not directly next to them. This will likely lead to a tangled mess of arms! The challenge is for the students to work together, without letting go of hands, to untangle themselves and form a circle again. Encourage communication and problem-solving as they work through the knot. In case of lack of time, give them a time frame, for example, 3-5 minutes. | ||||||||||||||||||||||||||||||||||||||||
| Relaxing Exercises | 40 - Group story building Ask students to sit in a circle. Start a story with a sentence or two. Then, have students take turns adding one sentence each to continue the story. Finish the activity with the last students and ask them to return in their seats. | ||||||||||||||||||||||||||||||||||||||||
| Objectives | At the end of the lesson students will:
| ||||||||||||||||||||||||||||||||||||||||
| Preparation | Essential: Sample Play: use the annexed play or create your own by using AI tools. Writing Supplies: Paper, markers, pens, and pencils. Display Tools: Whiteboard or flipchart with markers. For self-assessment: 15-20 beans for each student Empty jars or containers labelled with the following criteria: Listen and respect: "I actively listened to and respected my group members' opinions." Idea sharing: "I actively shared my ideas and suggestions with the group." Following rules and deadlines: "I followed the task instructions and met deadlines." Considering feedback: "I listened to and considered feedback and suggestions from other groups." Problem-solving: "I contributed to solving problems that arose within the group." Optional : Playwriting Tools: Sticky notes for brainstorming ideas. Creative Spark: Simple props and costumes (hats, scarves, recycled materials) for brainstorming character roles (optional). Feedback Tools: Online tools like Padlet for group feedback (requires internet access), notecards for anonymous feedback (optional). Performance Boost (Optional): Simple props and costumes for the final performance (can be created from recycled materials). | ||||||||||||||||||||||||||||||||||||||||
| Work Flow | Step 1 (10 minutes) Begin by introducing the lesson topic and objectives. Explain that students will be working together to create a performance that promotes environmental protection. Ask students to read the descriptions of the play in their student books or worksheets: Have students read the play together as a class. Discuss the main characters, roles, and plot. Teacher can use these questions: a. Who are the different people (or animals) in the play? What are their jobs or what do they like to do?b.What kind of problem do the characters face in the play? c.How do the characters try to fix the problem? Do they work together? d.What lesson do you think the play is trying to teach us? e. Did you like the way the characters solved the problem? Why or why not? f. Did any part of the play remind you of something you see in our school or neighbourhood? g. What are some things we can do at school or at home to take care of the environment? i. How many people do you think you need in your group's play? j. Where could your play take place? Maybe in a park, at school, or even in a forest! k. What kind of outfits could the characters wear to make them look like they belong in the play? Step 2 (5 minutes) Divide the class into 4 or more groups. Inform the class that each group will be responsible for writing one segment of the play. Step 3 (30 minutes) Ask students to begin developing a detailed script. The script should include character actions, dialogue, and stage directions. Students create the script in the forms designed in the students’ books. Encourage students to brainstorm ideas for props and costumes that will enhance their performance. Step 4 (20 minutes) Group Presentations: Each group presents their segment to the class. They can use props, costumes. Use an online tool like Padlet to gather feedback from other groups. Students should provide comments on the strengths, weaknesses, and suggestions for improvement of each segment. If the internet access is limited, use sticky notes and ask students to attach them to the whiteboard. Step 5 (10 minutes) Have each group review the feedback they received and make any necessary revisions to their script. Step 6 (5 minutes) Provide each student with 15-20 beans. Ask students to take a moment to reflect on their participation and performance in the group activity. Encourage them to consider their strengths and contributions as well as areas for improvement. Instruct students to distribute their beans among the labelled jars based on their self-assessment. They should place the number of beans that represent their level of contribution to each criterion. Labels on the jars:
| ||||||||||||||||||||||||||||||||||||||||
| Feedback | Once all students have distributed their beans, facilitate a class discussion. Encourage students to share their reasons for placing the beans in each jar and to discuss their overall assessment of their group work experience. Invite students to compare the number of beans in different jars. Discuss what these comparisons might reveal about the group's overall strengths, weaknesses, and dynamics. Conclude the discussion by summarising the key insights gained from the activity. Encourage students to reflect on how they can apply these insights to future group work scenarios. Encourage students to be honest and reflective in their self-assessment. | ||||||||||||||||||||||||||||||||||||||||
| Adaptations | A1. Consider dividing the play into even shorter segments for smaller groups (2-3 students) to manage. A2. Offer sentence starters or a script template to guide younger students in writing their dialogue. | ||||||||||||||||||||||||||||||||||||||||
| Teacher Skills | Content knowledge Environmental Awareness: A basic understanding of environmental issues and potential solutions. Instructional Delivery Clear and Concise Explanations: Effectively introduce the lesson topic and objectives (Step 1). Questioning Techniques: Utilize open-ended questions to promote discussion and critical thinking (Step 1). (e.g.,"Did any part of the play remind you of something you see in our school or neighbourhood?" Assessment Self-Reflection: Facilitate student self-assessment through the bean counting activity (Step 6). Peer Feedback: Utilize Padlet or sticky notes to gather feedback from other groups (Step 4). Additionally Creativity and Enthusiasm: Foster a fun and creative learning environment that encourages students to express themselves through theatre. | ||||||||||||||||||||||||||||||||||||||||
| Digital Resources | Worksheet with the script. Padlet to create a wall for student feedback. | ||||||||||||||||||||||||||||||||||||||||
| 48 | |||||||||||||||||||||||||||||||||||||||||
| | |||||||||||||||||||||||||||||||||||||||||
| 14 | 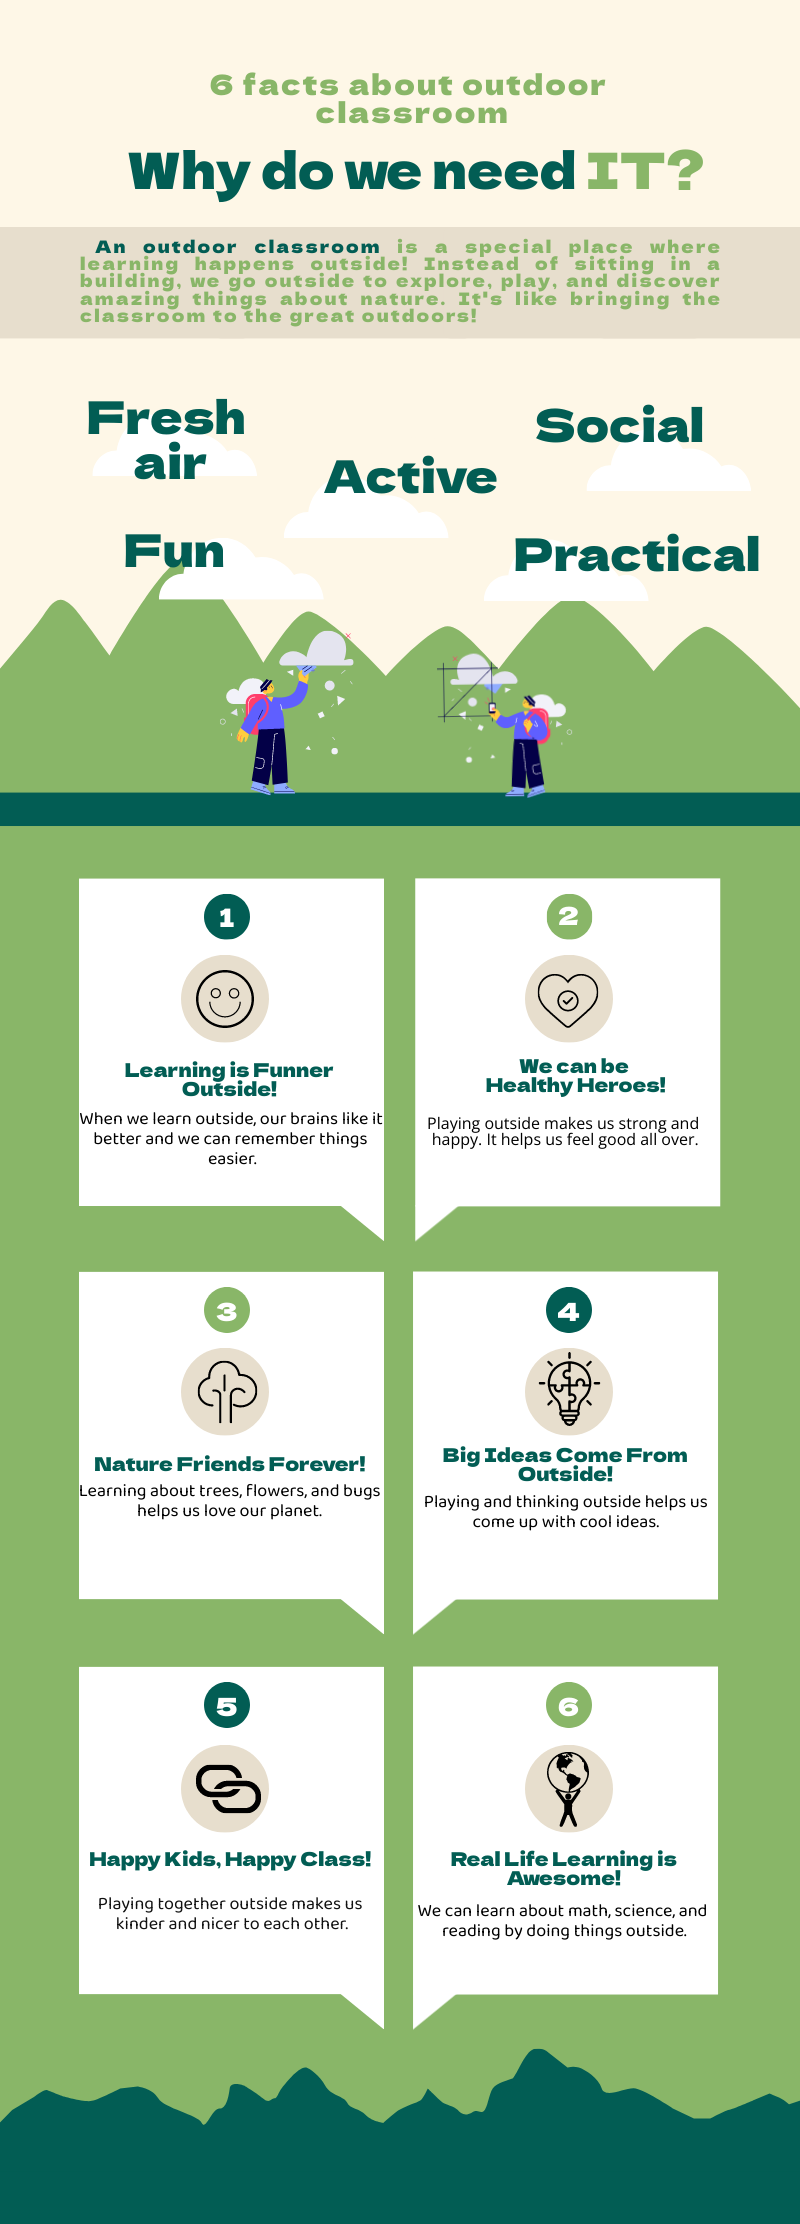 CIVIC Awareness topics / C.C6 Why change is important for me? CIVIC Awareness topics / C.C6 Why change is important for me? | ||||||||||||||||||||||||||||||||||||||||
| Developed by | FEE | ||||||||||||||||||||||||||||||||||||||||
| Duration | 80 | ||||||||||||||||||||||||||||||||||||||||
| Energizers | 42 - Create a word! Ask seven people from the first row to come to the front of the room and stand in a straight line facing the audience. Distribute the letter cards, one to each participant. Ask each person to hold their letter card above their head, so that the audience can read it easily. Explain that the letters spell a seven-letter word. Ask members of the audience to call out directions to the letter holders to rearrange them in the correct order to spell the word. (Examples: The person with the letter E, please move to the beginning of the word. The person with the letter D, move to the end.) Ask the letter holders to follow the directions from the audience. Give some hints to speed up the process, if necessary. When the word is correctly formed, ask everyone to read it aloud at the count of three. Thank the letter holders, collect the cards, and send them back to their seats. Lead a round of applause for the entire group for solving the anagram quickly. | ||||||||||||||||||||||||||||||||||||||||
| Relaxing Exercises | 41 - Silent colouring of a drawing. Ask kids to colour the mandala in the corner of the worksheet. Give them time of 3 minutes and play a peaceful music in the background. | ||||||||||||||||||||||||||||||||||||||||
| Objectives | After this lesson students will:
| ||||||||||||||||||||||||||||||||||||||||
| Preparation | When going outside with the class, the students collect various natural materials to create the interior of the room (pebbles, branches, leaves, wood fragments, sand, cones, etc.). In addition, glue, paints, etc. are also prepared. Building materials. Blackboard, projector; Markers, paints; Paper; Pencils; Worksheet with pictures of outdoor classroom and educational items. | ||||||||||||||||||||||||||||||||||||||||
| Work Flow | Step 1 (3 minutes) Students are asked the question: "What do you think about studying outside?". Pupils' answers are collected on the board. Step 2 (5 minutes) Students are presented with several pictures of different outdoor classroom settings. Students choose and mark which class they would like to study in. Do task 1 in the worksheet. The teacher asks some students to explain why they chose this arrangement. Step 3 (8 minutes) Students are divided into small groups. Each group should come up with 3-5 recommendations that would be changed in the existing classrooms, explaining why. (Task 2 in the worksheet.) Step 4 (15 minutes) Pupils do the 3rd task on the worksheet - create a sketch of their ideal outdoor classroom, in which they indicate the following details: What items, and furniture will be used for furnishing? What materials could the elements be made of? What activities will take place in this outdoor classroom? The teacher can use some of these questions: What items, and furniture will be used for furnishing? What materials could the elements be made of? What can we draw/count/describe/observe there? How to protect yourself from adverse weather conditions (sun, wind, rain, etc.)? Step 5 (5 minutes) Before making the model, the students divide the work: each of the group members has to undertake one of the model development tasks: composition maker, gluer, carpenter, painter, time manager. Step 6 (30 minutes) Using the previously prepared materials, students create a model of their outdoor classroom. After completing the work, the students place them in the exhibition, together with a sketch and a description. Step 7 (10 minutes) Students go to see the works created by other groups. At each station, the teacher places an evaluation form in which students evaluate the work of another group by answering the given questions.
| ||||||||||||||||||||||||||||||||||||||||
| Feedback | The groups return to their models, introducesfamiliarise themselves with the evaluations and make 3 conclusions, according to the given questions:
| ||||||||||||||||||||||||||||||||||||||||
| Adaptations | A1. If building physical models isn't feasible, students can create digital models using online design tools or even drawing apps. A2. Encourage students to use recycled materials like cardboard boxes, paper tubes, and bottle caps for their models. A3. For younger students, consider simpler roles in model building like decorator or materials manager instead of carpenter or gluer. A4. If some students have difficulty presenting their models, allow them to create a short video showcasing their design. A5. It is important to implement the ideas as far as possible - create an outdoor classroom or improve the existing one. Students can present their ideas to the school administration and receive their feedback. | ||||||||||||||||||||||||||||||||||||||||
| Teacher Skills | Content Knowledge: Environmental Awareness: A basic understanding of outdoor learning spaces and their benefits. Curriculum Integration: Ability to connect the outdoor classroom to various subjects and learning objectives. Classroom Management: Group Formation: Strategically form diverse groups to maximize interaction and learning. Time Management: Ensure activities stay within allocated timeframes . Active Monitoring: Circulate around the classroom and provide timely support to groups S. | ||||||||||||||||||||||||||||||||||||||||
| Digital Resources | |||||||||||||||||||||||||||||||||||||||||
| 49 | ||||||||||||||||||||||||||||||||||||||||||
| | ||||||||||||||||||||||||||||||||||||||||||
| 15 |  CIVIC Awareness topics / C.D1 My unique me: Celebrating what makes me special CIVIC Awareness topics / C.D1 My unique me: Celebrating what makes me special | |||||||||||||||||||||||||||||||||||||||||
| Developed by | APDNE | |||||||||||||||||||||||||||||||||||||||||
| Duration | 30 | |||||||||||||||||||||||||||||||||||||||||
| Energizers | 12 - Body spelling - Body geometric shapes Option 1 The teacher asks students to write their names in the air using different parts of their body, for example, using their hand, leg, lbow, or nose, etc. Optional: If time allows the teacher could ask to the class to spell out some words reproducing the letters with their bodies. Students can collaborate all together or can create different groups. Option 2 Task: Draw a geometric shape in the air using different parts of your body - hands, legs, elbows, noses, etc. Option 3: Task: Work in groups of 2, 3 or more students to make a geometric shape with your bodies. | |||||||||||||||||||||||||||||||||||||||||
| Relaxing Exercises | 13 - Body massage The students stand in a circle: they need to follow all the movement the teacher does and massage themselves. The teacher starts to massage different parts of his/her body, starting from the head till the feet (it’s better if they take off their shoes). The teacher explains how the massage needs to be done, if delicate or more energetic. Optional: The teacher can also ask to the students to massage another classmate. | |||||||||||||||||||||||||||||||||||||||||
| Objectives | -Understand the importance of themselves. -Recognize the features of themselves. -Learn what they can do | |||||||||||||||||||||||||||||||||||||||||
| Preparation | ||||||||||||||||||||||||||||||||||||||||||
| Work Flow |
| |||||||||||||||||||||||||||||||||||||||||
| Feedback | -The teacher places the pre-printed emojis (Annex 5) in different corners of the classroom. The teacher asks the students to go to the corner with the emoji that reflects their feelings about this lesson. | |||||||||||||||||||||||||||||||||||||||||
| Adaptations | Pair students with mixed abilities during the Pair-Work Activity to encourage peer learning and support. Ensure that students who may need help are paired with understanding peers who can assist them in expressing their thoughts. - For students who may struggle with verbal expression, allow them to draw or write about their superpowers instead of sharing them verbally during the "Throwing Ball" game. | |||||||||||||||||||||||||||||||||||||||||
| Teacher Skills |
| |||||||||||||||||||||||||||||||||||||||||
| Digital Resources | ||||||||||||||||||||||||||||||||||||||||||
| 50 | |||||||||||||||||||||||||||||||||||||||||
| | |||||||||||||||||||||||||||||||||||||||||
| 16 |  CIVIC Awareness topics / C.D2 My Identity CIVIC Awareness topics / C.D2 My Identity | ||||||||||||||||||||||||||||||||||||||||
| Developed by | Prosveta - Silvia Tsvetanska | ||||||||||||||||||||||||||||||||||||||||
| Duration | 80 | ||||||||||||||||||||||||||||||||||||||||
| Energizers | 23 - Emotions Games Materials required:
Move the tables and chairs around the classroom, so the students can sit in a circle. The game begins with a ball being thrown to a student, at this point the leader who has got the 5 cards (one for each emotion), raises a card; the child who has received the ball must talk about a situation that triggers the emotion that the leader has raised. The ball is then thrown to another classmate and so on until all the students have received the ball and all of them have had a chance to talk about an emotion. The ball can only be thrown once to each student. The game ends when all students have received and thrown the ball and all of them have spoken about an emotion. | ||||||||||||||||||||||||||||||||||||||||
| Relaxing Exercises | 31 - Triangle of friendship Students work in pairs to draw a triangle to represent their friendship. Before starting the work, the teacher demonstrates the steps with one of the children. The two persons in the pair place their hands down with the palms facing the surface of the paper sheet; student 1 uses his/her right hand, and student 2 uses his/her left hand. They join the tips of the thumbs and the forefingers of the left hand of one of the pair with the tips of their thumbs and forefingers and outline the shape of the triangle between the fingers. After that, they can draw eyes, a nose, a mouth and whatever they want to, in order to design a personal symbol of their relationship. | ||||||||||||||||||||||||||||||||||||||||
| Objectives | Through the activities in the lesson, students:
| ||||||||||||||||||||||||||||||||||||||||
| Preparation | Materials – felt-tip pens or coloured pencils Equipment – laptop, projector | ||||||||||||||||||||||||||||||||||||||||
| Work Flow | Step 1 (10 min.): Introduction Introduction to the topic through the questions:
After the students' free answers, the teacher summarizes and points to the idea of identity: Every person is unique and unrepeatable. No one else is like you. Appearance alone is not enough to understand what kind of person we see. The invisible features are also important; they contribute substantially to our uniqueness. Step 2 (15 min.) The essence of identity Play the video (Resource 1) to the students. Discuss the characteristics of identity. Usually, students are well versed in the idea that external marks reflect identity. So, you can firstly discuss them (gender, height, hair colour, eye colour, etc.). Secondly, pay more attention to values and personal qualities as components of identity. If necessary, go back to the video and replay the screens which are linked to values and qualities. Discuss with students that what we believe in (including religion, lifestyle, foods we like, traditions) also defines our identity and helps us answer the questions Who am I? What person am I? What makes me different from others? What do I like about myself? Step 3 (10 min.) Reflection and personal experience Ask students to share:
Step 4 (10 min.) Case study Play the video (Resource 2: My Identity) which contains guidelines for exercises on the theme of identity. Begin by discussing the story of Anna and Semra. Discuss with students how we can get to know other people and introduce ourselves. Step 5 (30 min.) Group work – Good Friends’ Scrapbook Use Resource 2 to do an activity in which students ask different questions to discover identity and become aware of their own uniqueness. Divide students into small groups. Within the group students have the task to design a page from a Good Friends’ Scrapbook. They can:
Give students time to draw something on the page and shape it as they choose. After completing the task, the groups exchange their sheets and in each group answers the questions from the Good Friends’ Scrapbook they received. Step 6 (5 min.): Conclusions This is a topic about the importance of the inner world of a person. Knowing who I am and what makes me different from others is the foundation of knowing yourself better and building a self-image. Through the activities, students develop skills to:
It is important to respect other people, even though they are not like us and we may not like something about their behavior. But, it is equally important to respect ourselves and our own uniqueness, as well as to strive to become a better version of ourselves. | ||||||||||||||||||||||||||||||||||||||||
| Feedback | What did we learn in this lesson? Name 3 distinguishing characteristics to describe what makes the classmate next to you unique. | ||||||||||||||||||||||||||||||||||||||||
| Adaptations |
| ||||||||||||||||||||||||||||||||||||||||
| Teacher Skills |
- the ability to ask questions - to stimulate the discussion on the topic, to direct the students to think about themselves and their identity, as well as to make a transfer to other situations; - listening skill – active listening, reflecting and summarizing what the students shared when looking at the learning resources in step 3, step 4 and step 5. - reflective skills - reflecting feelings, experiences, personal experience, turning to oneself. The teacher becomes a role model in the discussion and reflection in step 3 to guide students in thinking about self-image. - interpersonal skills - when talking about differences and self-perception, it is necessary to maintain a respectful tone of expression and the teacher’s role is to help students build good relationships, tolerance and understanding of differences. 2. Building trust The topic implies a high degree of sensitivity to the personal world of the participants and to the way they perceive themselves. There may be students in the class who do not like traits in their image or are worried about sharing something related to their identity and values. To encourage them to share, the teacher must be able to create an atmosphere of trust and positive acceptance in the student community so that everyone feels at ease that they will not be offended, attacked or misunderstood. It is possible to talk about identity, self-esteem and self-image only in the environment of psychological security. 3. Flexibility This skill is crucial for the teacher when developing this topic, because it will allow him/ her to respond to unexpected turns, sharing, questions or hesitations of students. Flexibility refers to the ability to quickly change a lesson plan or implement an activity differently to meet the needs of students in the best way. | ||||||||||||||||||||||||||||||||||||||||
| Digital Resources | Resource 1: Wellbeing For Children_ Identity And Values https://www.youtube.com/watch?v=om3INBWfoxY&ab_channel=ClickView Resource 2: My Identity https://youtu.be/DXAE5k1RahE | ||||||||||||||||||||||||||||||||||||||||
| 51 | |||||||||||||||||||||||||||||||||||||||||
| | |||||||||||||||||||||||||||||||||||||||||
| 17 |  CIVIC Awareness topics / C.E1 Our colorful classroom: Embracing diversity in friendship CIVIC Awareness topics / C.E1 Our colorful classroom: Embracing diversity in friendship | ||||||||||||||||||||||||||||||||||||||||
| Developed by | APDNE | ||||||||||||||||||||||||||||||||||||||||
| Duration | 30 | ||||||||||||||||||||||||||||||||||||||||
| Energizers | 12 - Body spelling - Body geometric shapes Option 1 The teacher asks students to write their names in the air using different parts of their body, for example, using their hand, leg, lbow, or nose, etc. Optional: If time allows the teacher could ask to the class to spell out some words reproducing the letters with their bodies. Students can collaborate all together or can create different groups. Option 2 Task: Draw a geometric shape in the air using different parts of your body - hands, legs, elbows, noses, etc. Option 3: Task: Work in groups of 2, 3 or more students to make a geometric shape with your bodies. | ||||||||||||||||||||||||||||||||||||||||
| Relaxing Exercises | 13 - Body massage The students stand in a circle: they need to follow all the movement the teacher does and massage themselves. The teacher starts to massage different parts of his/her body, starting from the head till the feet (it’s better if they take off their shoes). The teacher explains how the massage needs to be done, if delicate or more energetic. Optional: The teacher can also ask to the students to massage another classmate. | ||||||||||||||||||||||||||||||||||||||||
| Objectives | -Understand the importance of friendship. -Recognize the features of friendship. -Learn what affects or does not affect friendship. | ||||||||||||||||||||||||||||||||||||||||
| Preparation | |||||||||||||||||||||||||||||||||||||||||
| Work Flow | Step 1: Introduction (10 minutes)
Step 2: Discussion Game Time (20 minutes) 1. Show the Cards and Record Responses (10 minutes)
2. Discuss and Conclude the Profile of a Good Friend (10 minutes)
Step 3: Pair-work Activity (10 minutes)
Step 4: Creative Activity (20 minutes)
Step 5: Group Reflection (10 minutes)
Conclusion (10 minutes)
| ||||||||||||||||||||||||||||||||||||||||
| Feedback | The teacher places the pre-printed emojis (Annex 4) in different corners of the classroom. The teacher asks the students to go to the corner with the emoji that reflects their feelings about this lesson. | ||||||||||||||||||||||||||||||||||||||||
| Adaptations | In step 4 teacher can make students share ideas with each other about what they can draw. | ||||||||||||||||||||||||||||||||||||||||
| Teacher Skills | Facilitation: Guiding discussions and activities to explore concepts of friendship and diversity. (Introduction, Step 2, Step 3, Step 5) Questioning Techniques: Using questions to provoke critical thinking and reflection about friendship and diversity. (Introduction, Step 2, Step 3) Creativity: Encouraging students to express themselves creatively through drawing and sharing their thoughts visually. (Step 4) Reflection: Facilitating reflective discussions to help students consolidate their learning about friendship and diversity. (Step 5, Conclusion) Empathy and Encouragement: Building a supportive classroom atmosphere by encouraging respect for differences and promoting understanding in friendships. (Introduction, Step 5, Conclusion) | ||||||||||||||||||||||||||||||||||||||||
| Digital Resources | |||||||||||||||||||||||||||||||||||||||||
| 52 | |||||||||||||||||||||||||||||||||||||||||
| | |||||||||||||||||||||||||||||||||||||||||
| 18 |  CIVIC Awareness topics / C. E2 My Dream Class CIVIC Awareness topics / C. E2 My Dream Class | ||||||||||||||||||||||||||||||||||||||||
| Developed by | Prosveta - Silvia Tsvetanska | ||||||||||||||||||||||||||||||||||||||||
| Duration | 80 | ||||||||||||||||||||||||||||||||||||||||
| Energizers | 25 - The mirror game The game begins with the room cleared of tables and chairs. The students start by team up in pairs and stand in front of each other. They agree who starts the game, who plays the mirror and who plays the person. The game begins to the sound of a song chosen by the leader. The person will start to move and the "mirror" will have to follow him/her, immediately repeating the person's movements. When the leader stops the music, they swap places and the person who was the "mirror" becomes the person and vice-versa. | ||||||||||||||||||||||||||||||||||||||||
| Relaxing Exercises | 11 - Breathing exercise Teacher asks students to make a circle and do the following exercises, repeating each one few times and alternate them. Teacher can also add new ones. Breathing in raise your arms above your head and say “Elevator Up!” Breathing out, float your arms back down to your sides, saying “Elevator Down.” Repeat. Take three quick breaths in while wiggling your nose. Wiggle your nose on each breath in. Then wiggle your nose on each breath out. Hold your hand in front of your nose and hiss hiss hiss while breathing out. | ||||||||||||||||||||||||||||||||||||||||
| Objectives | Students will:
| ||||||||||||||||||||||||||||||||||||||||
| Preparation | Materials: Markers, white board, flip chart paper Equipment: laptop and projector Classroom arrangement: Tables and chairs are arranged in a circle; rearrange them for the group work task. | ||||||||||||||||||||||||||||||||||||||||
| Work Flow | Step 1 (5 min.): Introduction Show the picture to the students.
Introduce them to the topic of diversity in the classroom using introductory questions, for example:
Step 2 (10 min.) Similar and different Ask students to stand up in a circle and say one after the other the colours green and blue. As a result each student is assigned to one of the colours. (if the students are an odd number, the teacher could join the group). Each green student makes a pair with the blue student standing on the right. Within the pairs, each student comes up with one characteristic he/she shares with his/her partner, and one thing in which they differ, e.g. Blue student "I have blonde hair whereas yours is brown"; "I like to draw, so do you."; Green student “I have a sister whereas you have a brother.”, “I like cartoons about superheroes, and so do you.” Then, set the task to have a free conversation (2 min.) aimed at discovering something new that they didn't know about each other. Finally, the pairs report their findings. Step 3 (15 min.) Discussion: What are the characteristics that the students in our class share and what makes every student unique (different)? Students are encouraged to list:
The listed differences are recorded with one key word on the board or on a flip chart. Firstly, the teacher records everything the students list as differences, and then, sets the task to split the differences into groups, for example, differences linked to appearance, or interests, or abilities; preferences for food and drinks; place of birth, gender, etc. The discussion continues with the questions:
Step 4 (15 min.) “Touch” Play the video to the students. Explain that it was created by 3rd grade students in Bulgaria (9 years old). They created the script themselves and filmed it (with the support of an external expert within an educational project related to cinema production). Their task was to show interesting aspects of life in their class. Discuss the students' impressions after watching the video. Guide them with supporting questions:
Step 5 (20 min.) Screenplay for a video "Our Different Class" - group work Divide students into small groups (teams) of 4-5 students. Let them think about the task: Imagine that a competition for students’ videos is announced. The topic is "Our Different Class". And you have decided to take part in it. Discuss the following aspects of your video production:
Allow students to use different means of expressing their ideas for the scenarios: they might:
Step 6 (10 min.): Presentations and conclusions Students present the final products of the group work from step 5. The teacher sums up the characteristics of the class that make it the most remarkable class in the world. | ||||||||||||||||||||||||||||||||||||||||
| Feedback | Students stand in a circle. The teacher formulates short statements, and students express in a non-verbal way whether they agree with them: they raise their hands up for "agree", squat when they disagree or don’t change their posture if they cannot decide if they agree or disagree. Example statements:
| ||||||||||||||||||||||||||||||||||||||||
| Adaptations | In the group work in step 5, it is appropriate to adapt the task in difficulty considering students' abilities. At the discretion of the teacher, in some groups, the task can be done in writing, in others, in drawing or expressing ideas using elements from a Lego constructor, or pre-cut images from old magazines, etc. If students are struggling to generate an idea for a movie, provide an example, guide them to recall an interesting incident from their daily school life, for example something that caused laughter; a story of something that happened when they were on a nature trip, camping or some other joint activity. Challenge them to think about what this story would look like in a movie – who are the characters e, where the action takes place, what they want to show with their movie. The task will be easier if they first draw an episode from a movie. Another option for this exercise is for the teacher to lead a short discussion in response to the question: If you had to describe your class to a friend from another city, what would you tell him? The activity can also focus on just the dream classroom - students sharing what they want to have in their classroom every day. | ||||||||||||||||||||||||||||||||||||||||
| Teacher Skills | 1. Communication - Listening skills – supporting students to reflect and express different points of view by actively listening carefully; - Interpersonal skills – using project activities to bring the class together and deepen mutual recognition between students. 2. Creativity Applying techniques to divide students into pairs and groups to spark their interest and keep attention on learning activities. 3. Novelty Using films and elements of cinema production to develop the topic. Encouraging students to come up with ideas and express them through the means of art (cinema). | ||||||||||||||||||||||||||||||||||||||||
| Digital Resources | Movie Touch https://youtu.be/Ab3TNQc-DI4 The resource is part of the international program "Cinema, one hundred years of youth" with coordinator for Bulgaria Ralitsa Asenova and mentor Maria Dancheva (Association "Arte Urbana Collective". | ||||||||||||||||||||||||||||||||||||||||
| 53 | |||||||||||||||||||||||||||||||||||||||||
| | |||||||||||||||||||||||||||||||||||||||||
| 19 |  CIVIC Awareness topics / C.E3 Body diversity CIVIC Awareness topics / C.E3 Body diversity | ||||||||||||||||||||||||||||||||||||||||
| Developed by | IPSantarem - Ana Da Silva, Ana Torres, Maurício Dias | ||||||||||||||||||||||||||||||||||||||||
| Duration | 70 | ||||||||||||||||||||||||||||||||||||||||
| Energizers | 4 - Human chain Everybody stands up in a circle. They close their eyes and start moving towards the middle of the circle, holding their hands up. Whoever they touch with their hands, they hold and do not let go, so they make a knot. Then the facilitator asks the students to open their eyes and try to untangle themselves (make a circle) without letting go of their hands. | ||||||||||||||||||||||||||||||||||||||||
| Relaxing Exercises | 13 - Body massage The students stand in a circle: they need to follow all the movement the teacher does and massage themselves. The teacher starts to massage different parts of his/her body, starting from the head till the feet (it’s better if they take off their shoes). The teacher explains how the massage needs to be done, if delicate or more energetic. Optional: The teacher can also ask to the students to massage another classmate. | ||||||||||||||||||||||||||||||||||||||||
| Objectives |
| ||||||||||||||||||||||||||||||||||||||||
| Preparation | Extra reading National Geographic. The idea of beauty is always shifting. Today, it’s more inclusive than ever. Materials
| ||||||||||||||||||||||||||||||||||||||||
| Work Flow | Step 1 Introduction: Over the years, societal pressure has expanded definitions of beauty to include diverse ethnicities, body types, ages, driven by social movements. This shift marks a move towards inclusivity and acceptance, reflecting broader cultural changes in perceptions of beauty. Social media have amplified calls for representation, pushing the fashion industry towards greater diversity and accountability, but is this the experience children have around them? (5 minutes) Step 2: Ask the children to previously collect and bring magazines that show photos of “common people”, celebrities, models, persons in the culture business, etc., and, in small groups, invite them to look at body diversity, and make a poster with as many different body types as they can find. (15 minutes) Step 3: The groups display their posters on the ground so everyone has the chance to see all the posters. (5 minutes) Step 4: Ask them to work again in small groups and distribute one of the following questions for each group to reflect upon, inviting them to make another poster where they show their conclusions for an oral presentation to the big group:
Step 5: One minute oral presentations of the posters and debate on the value of diversity (10 minutes). | ||||||||||||||||||||||||||||||||||||||||
| Feedback | Distribute an A4 paper to each group. Ask the groups to divide the paper in three (as they wish). Then, in one part, they write or draw the best of the activity; in another part, the worst; in the third part, suggestions for improving what they evaluated as the worst. (10 minutes) | ||||||||||||||||||||||||||||||||||||||||
| Adaptations | It is possible, in a later session, to use the posters to prepare a campaign on the subject | ||||||||||||||||||||||||||||||||||||||||
| Teacher Skills |
| ||||||||||||||||||||||||||||||||||||||||
| Digital Resources | |||||||||||||||||||||||||||||||||||||||||
| 54 | |||||||||||||||||||||||||||||||||||||||||
| | |||||||||||||||||||||||||||||||||||||||||
| 20 |  CIVIC Awareness topics / C.E4 Religious diversity CIVIC Awareness topics / C.E4 Religious diversity | ||||||||||||||||||||||||||||||||||||||||
| Developed by | IPSantarem | ||||||||||||||||||||||||||||||||||||||||
| Duration | 80 | ||||||||||||||||||||||||||||||||||||||||
| Energizers | 47 - The orquestra leader The children make a queue. When the music starts playing, the "leader" of the queue starts walking, making sounds/rhythms that are imitated by the whole queue. When the music stops, the the child in front moves to the tail of the queue and the next child takes over. The group can be divided in 2 queues. (5 minutes) | ||||||||||||||||||||||||||||||||||||||||
| Relaxing Exercises | 46 - Follow my hand (Hypnosis) In pairs, one child (the hypnotized) follows the hand of the other child (the hypnotizer) around the room (with calm slow music). Then they switch roles. (5 minutes) | ||||||||||||||||||||||||||||||||||||||||
| Objectives |
| ||||||||||||||||||||||||||||||||||||||||
| Preparation | Extra reading Western Educatiional Assistance Center - https://msudenver.yuja.com/V/Video?v=3482166&node=11586119&a=376076832&autoplay=1 Materials and equipment
| ||||||||||||||||||||||||||||||||||||||||
| Work Flow | Step 1 Introduction: Approaching religious diversity is crucial in fostering a more inclusive education to promote understanding and enhance social cohesion, encouraging critical thinking, open-mindedness and empathy. It's important for educators to know about their students' different cultures and religions. This helps them talk about different religions in a friendly way. Educators should learn about where their students come from and what they believe, noticing what makes them different and what they share. Step 2: Ask children what religion is and write a definition with their proposals. (10 minutes) Step 3: Divide the big group into 6 small groups, handle to each group the World festivals and celebrations calendar of Buddhism, Christianity, Hinduism, Islam, Judaism and Sikhism, and draw which group gets which religion. (5 minutes) Step 4: Invite them to make an online search for information about one of the religious celebrations that are on the calendar for the religion. It is possible to ask them to have a child in each group who takes some notes on a worksheet (10 minutes) Step 5: Ask them to make a comic strip (with a maximum of 6 squares) about the celebration with the info they found. (20 minutes) See worksheet for the comics Step 6: Exhibit the comic strips on the ground or on tables. (5 minutes) Step 7: Each group has to make a question about each comic and the authors explain what they tried to represent. (15 minutes) Step 8: Conclusions -This activity successfully introduced students to religious diversity by engaging them in learning about various religions and their celebrations. Through group work, they explore cultural traditions, fostering inclusion and empathy. The use of creative comic strips allows students to express their understanding in a fun and engaging way, while the group discussions enhance critical thinking and communication skills. By reflecting on the similarities and differences between religious practices, students develop a more open-minded and inclusive perspective on religious diversity, which contributes to social cohesion. | ||||||||||||||||||||||||||||||||||||||||
| Feedback |
| ||||||||||||||||||||||||||||||||||||||||
| Adaptations | It is important for the quality of this activity in terms of inclusion that educators add to the World festivals and celebrations calendar the religious celebrations of the religions of the children they are working with. It is possible, in a later session, to discuss the possibility of publishing the comic strips in the school journal. | ||||||||||||||||||||||||||||||||||||||||
| Teacher Skills | Communication: Clearly explaining the concepts and guiding discussions on religious diversity. Listening and Adaptability: Being attentive to students' input and adapting the activity based on the dynamics of the group. Critical Thinking: Encouraging students to think critically about religious celebrations and the significance behind them. Creativity and Passion: Inspiring students to express their understanding of religious celebrations through comic strips. Patience: Supporting students as they conduct research, create their comic strips, and present their findings. Enthusiasm: Maintaining student engagement and interest throughout the activity. Flexibility: Adjusting to different group dynamics and pacing based on students' needs and progress. | ||||||||||||||||||||||||||||||||||||||||
| Digital Resources | World festivals and celebrations calendar: | ||||||||||||||||||||||||||||||||||||||||
| 55 | ||
| | ||
| ECO Awareness topics
| ||
| 56 | |||||||||||||||||||||||||||||||||||||||||
| | |||||||||||||||||||||||||||||||||||||||||
| 1 | |||||||||||||||||||||||||||||||||||||||||
| Developed by | IPSantarém - Bento Cavadas | ||||||||||||||||||||||||||||||||||||||||
| 2 | |||||||||||||||||||||||||||||||||||||||||
| Duration | 80 | ||||||||||||||||||||||||||||||||||||||||
| Energizers | 53 - Guess the animal Students should be organized in pairs. One student from each pair observed a card with an image of an animal. That student should mimic movements and sounds of the animal while the other student tries to identify the animal. Then, the students should switch roles. Preparation: The teacher should prepare cards, each featuring a different animal. Choose animals that are familiar to the students. Two animal cards are distributed to each pair of students, by the teacher. Teacher can also use an app, such as Wheel Decide®, to distribute the animals to the students. | ||||||||||||||||||||||||||||||||||||||||
| Relaxing Exercises | 52 - Relaxing nature For a few minutes, students should listen to nature relaxing sounds with their eyes closed, arms crossed on the tables, and heads resting on their arms. Suggestion of nature relaxing sounds: Relaxing Sleep Sounds | Our Green Planet | BBC Earth. Then the teacher should ask students to identify the sounds that they have heard (birds, wind, etc.). | ||||||||||||||||||||||||||||||||||||||||
| Objectives | At the end of the lesson, students should be able to:
| ||||||||||||||||||||||||||||||||||||||||
| Preparation | Preparation
Print outs – Worksheets 1 and 2 (One copy for each student) | ||||||||||||||||||||||||||||||||||||||||
| Work Flow | Step 1 (10 min.): Introduction Small group activity aimed to raise students’ understanding about the biodiversity concept.
Step 2 (20 min.) Biocube creation Small group activity with a hands-on task component.
Figure 1. Example of a cube structure (biocube). Step 3 (40 min.) Biocube observation Small group outdoor activity of observation of biodiversity within the cube.
To identify the living beings, they can use identification guides, such as: Invertebrate – Identification Guide. They can also use applications, such as Seek by iNaturalist®.
“What biodiversity is observable within the biocube?” “What relationships among organisms and between organisms and their environment can be observed?” Figure 2. Example of a biocube, captured during Spring, in Santarém, Portugal. The cube structure has edges measuring 30 cm in length. Step 3 (20 min.) Share my biocube
Step 4 (10 min.) Conclusions
| ||||||||||||||||||||||||||||||||||||||||
| Feedback | Ask students to give feedback about the following elements:
| ||||||||||||||||||||||||||||||||||||||||
| Adaptations |
| ||||||||||||||||||||||||||||||||||||||||
| Teacher Skills |
| ||||||||||||||||||||||||||||||||||||||||
| Digital Resources |
Relaxing Sleep Sounds | Our Green Planet | BBC Earth. Seek by iNaturalist®, or other similar app can be used for identifying biodiversity. Invertebrate – Identification Guide. Flaticon® for icons. Video What is biodiversity? | ||||||||||||||||||||||||||||||||||||||||
| 57 | |||||||||||||||||||||||||||||||||||||||||
| | |||||||||||||||||||||||||||||||||||||||||
| 2 | |||||||||||||||||||||||||||||||||||||||||
| Developed by | Instituto Politecnico de Santarem | ||||||||||||||||||||||||||||||||||||||||
| 2 | |||||||||||||||||||||||||||||||||||||||||
| Duration | 80 | ||||||||||||||||||||||||||||||||||||||||
| Energizers | 24 - I need more space! Split students in groups of 5 (or 6). In each group assign consecutive numbers to its members. Ask the groups to make circles and randomly pick a number – all students who have been assigned to this number have to step in the circle and squat. The other members of the group are clustered tightly around the squatting student. He/she tries to stand up and make the others let him have more space around him, but they stand very close and do not allow him/her to have more space and move freely around. | ||||||||||||||||||||||||||||||||||||||||
| Relaxing Exercises | 22 - Relaxing Song Use of mimed song accompanied by a musical backing, sung/recorded by the pupils themselves. (cf. video on .https://youtu.be/9TEdEKKkUWw ) | ||||||||||||||||||||||||||||||||||||||||
| Objectives | At the final of the lesson, students should be able to:
| ||||||||||||||||||||||||||||||||||||||||
| Preparation | Preparation
Print outs: Worksheets 1 and 2 | ||||||||||||||||||||||||||||||||||||||||
| Work Flow | Step 1 (10 min.): Your Ideas about bees Small group activity aimed to raise students’ conceptions about bees.
Step 2 (30 min.): Facts about bees Small group activity aimed to promote students' understanding about bees’ facts.
Solutions:
Step 3 (30 min.): Finding Flowers Game Group activity aimed to promote students' understanding about bees’ communication to find the flower location. Waggle dance Bees use this special dance inside the hive to indicate each other where to find the best flowers. The direction and length of the dance convey precise information about the location of flowers in the field. The angle of the dance relative to the reference direction inside the hive indicates the direction of the flowers relative to the sun.
Fig. 3. Waggle dance scheme inside the hive (Credits: Authors).
Solution:
Fig. 4. Organization of the gameboard elements (Credits: Authors).
Fig. 5. Waggle dance cards (Credits: Authors).
Step 4 (10 min.): Reflection about the impact of bees disappearing in nature Small group activity aimed to promote students reflects about the impact on nature of bees disappearing.
Suggestion of questions:
80 min | ||||||||||||||||||||||||||||||||||||||||
| Feedback | Ask students to give feedback about the following elements:
| ||||||||||||||||||||||||||||||||||||||||
| Adaptations | Other videos can be used about the same themes, if available in the students’ native language. | ||||||||||||||||||||||||||||||||||||||||
| Teacher Skills |
| ||||||||||||||||||||||||||||||||||||||||
| Digital Resources | Waggle dancing honey bee! (Credits: Flow Hive!) 10 facts about bees! (Credits: National Geographic kids) What if all bees disappear? (Credits: Peekaboo Kidz) The way of the waggle dance” (Credits: Arizona State University) | ||||||||||||||||||||||||||||||||||||||||
| 58 | |||||||||||||||||||||||||||||||||||||||||
| | |||||||||||||||||||||||||||||||||||||||||
| 3 | |||||||||||||||||||||||||||||||||||||||||
| Developed by | Instituto Politecnico de Santarem | ||||||||||||||||||||||||||||||||||||||||
| 2 | |||||||||||||||||||||||||||||||||||||||||
| Duration | 80 | ||||||||||||||||||||||||||||||||||||||||
| Energizers | 29 - Brain Gym 1. Ask students to rub their stomach with their left hand in a clockwise direction and at the same time rub the top of their head with their right hand in a counter clockwise direction. 2. After a few seconds ask them to keep going and to begin tapping their right foot. 3. Ask students to close their eyes and imagine that they are eating ice-cream. 4. Have them imagine they see a monkey riding a bike. 5. Finally have them say “Save our planet!” | ||||||||||||||||||||||||||||||||||||||||
| Relaxing Exercises | 27 - Alternate nostril breathing Instructions for students:
The activity helps you to quiet and still your mind. | ||||||||||||||||||||||||||||||||||||||||
| Objectives | At the end of the lesson, students should be able to:
| ||||||||||||||||||||||||||||||||||||||||
| Preparation | Preparation
Print outs - Worksheets 1 and 2 | ||||||||||||||||||||||||||||||||||||||||
| Work Flow | Step 1 (5 min.): Introduction In small working groups, the students will carry out an inquiry to answer the following questions:
Step 2 (20 min.): All about snails! 1. Students should fill worksheet 1 - with the characteristics of snails and their behaviour, according to the information found in the research carried out. Step 3 (30 min.) Investigate snails!
Note: For this hands-on activity the teacher must: a) have snails on a terrarium in the classroom; or b) take the students to an outdoor environment to collect the snails.
Step 4 (15 min.) Human impacts and extinction of freshwater snails
| ||||||||||||||||||||||||||||||||||||||||
| Feedback | Ask students to give feedback about the following elements:
| ||||||||||||||||||||||||||||||||||||||||
| Adaptations | Step 1 - With 7-year-olds the discussion could be about live observation of snails. Students could get a task one month prior to the lesson to be watchful and look for snails when they are outdoors; and take pictures and remember what they see. In class everybody shares their observations. Step 4 - For students aged 6 or 7, the teacher can write on board several actions with which humans can harm the snails (actions described in the video conversation), and add several ones which are not mentioned (and possibly have nothing to do with harming the snails, e.g. people watching too much television). The task for the students could be to check which actions are mentioned in the video. An interdisciplinary activity that integrates the Arts subject could be proposed. Students could unleash their creativity by illustrating the shells of snails. They can explore various artistic techniques such as drawing, painting, or even sculpting to depict the intricate details and diverse patterns found in snail shells. This activity not only fosters artistic expression but also deepens students' understanding of biology and the natural world. Creation of a terrarium for snails To create a terrarium for snails (see Figure 1), please follow these steps: • As the terrarium, you can use an aquarium with a lid, a transparent plastic box, or a 5-litre water jug. • Outside the school, use a small shovel to collect some soil, rocks, and dead leaves. Line the bottom of the terrarium with this material. • With the sprayer, mist the material with water. • Next, collect snails and place them inside the terrarium. Remember that snails should be respected like any other living being. Handle the snails carefully and do not harm them. Figure 1. Example of a terrarium for snails. Additional research activities about snails Consider organise additional experiments to explore the following research questions:
Outreach
| ||||||||||||||||||||||||||||||||||||||||
| Teacher Skills |
| ||||||||||||||||||||||||||||||||||||||||
| Digital Resources | ll about land snails - Welcome Wildlife Exploring Invertebrates – How do sails move? Factual information about snails Human impacts and extinction of fresh water snails Snails reproduction Things you need to know about garden snails! Snails’ free icons retrieve from FLATICON®: | ||||||||||||||||||||||||||||||||||||||||
| 59 | |||||||||||||||||||||||||||||||||||||||||
| | |||||||||||||||||||||||||||||||||||||||||
| 4 | |||||||||||||||||||||||||||||||||||||||||
| Developed by | Instituto Politecnico de Santarem | ||||||||||||||||||||||||||||||||||||||||
| 2 | |||||||||||||||||||||||||||||||||||||||||
| Duration | 80 | ||||||||||||||||||||||||||||||||||||||||
| Energizers | 20 - Chief of clan Everyone stands in a circle. One participant closes his/her eyes or steps out of the room. He/She will have to guess who is the chief of the clan. One participant volunteers to be the secret Chief (quietly, so the "guesser" can't hear anything). The chief begins an action such as snapping fingers, patting the tummy, or slapping knees, and everyone in the circle imitates him/her. The guesser returns to the room and tries to figure out who the chief is. As the guesser looks around, the chief changes the action avoiding being detected. | ||||||||||||||||||||||||||||||||||||||||
| Relaxing Exercises | 14 - Give me your energy Students stand in a circle. The teacher launches the activity pretending he/she is holding a ball in his/her hands and passes it to the student on his/her right; the student does the same, passing it to his/ her neighbour, etc. The game continues until the ball comes back to the teacher. The ball needs to be passed in a gentle way, as it is very precious. In the second round, the teacher passes the ball to the students on the left making a gesture and a sound. Students are expected to do the same until everyone has touched the ball at least once. The ball can be passed around in different ways (with a kick, or a kiss, or a blow, etc.), pretending it becomes bigger or smaller depending on the will of the students. | ||||||||||||||||||||||||||||||||||||||||
| Objectives | At the end of the lesson, students should be able to:
| ||||||||||||||||||||||||||||||||||||||||
| Preparation | Preparation
Print outs - Worksheets 1 and 2 | ||||||||||||||||||||||||||||||||||||||||
| Work Flow | Step 1 (10 min.): The biodiversity of the snail Cepaea. In small working groups, the students will carry out an inquiry to answer the following question:
Step 2 (20 min.): Action of natural selection. In small working groups, the students will carry out an inquiry to answer the following question:
Step 3 (20 min.): Action of human action on snails. One major impact on snails is soil and water pollution. In small working groups, the students should reflect and answer the following question:
| ||||||||||||||||||||||||||||||||||||||||
| Feedback | Ask students to give feedback about the following elements:
| ||||||||||||||||||||||||||||||||||||||||
| Adaptations | |||||||||||||||||||||||||||||||||||||||||
| Teacher Skills |
| ||||||||||||||||||||||||||||||||||||||||
| Digital Resources | |||||||||||||||||||||||||||||||||||||||||
| 60 | ||||||||||||||||||||||||||||||||||||||||||
| | ||||||||||||||||||||||||||||||||||||||||||
| 5 | ||||||||||||||||||||||||||||||||||||||||||
| Developed by | Antalya Directorate Of Education | |||||||||||||||||||||||||||||||||||||||||
| Duration | 60 | |||||||||||||||||||||||||||||||||||||||||
| Energizers | 40 - Word chain relay race Divide students into two or more teams and have them line up facing the front of the class. Choose a starting word (e.g., "apple"). On your signal, the first person in each team shouts out a new word that starts with the last letter of the previous word (e.g., "elephant"). The race continues with each team member taking turns to call out a new word that follows the chain. The team that gets stuck or repeats a word is out. The team that keeps the chain going the longest wins! | |||||||||||||||||||||||||||||||||||||||||
| Relaxing Exercises | 37 - Lungs of the world The teacher explains the activity by asking students to imagine that the world has lungs, just like humans. Due to air pollution, these lungs were struggling, but now the pollution has been cleared, and the world can breathe freely again. and this is a moment of relief, happiness, and satisfaction. Students are instructed to imagine they are the world’s lungs and the air is clean. They stand up and start moving freely around expressing how they are feeling (for instance, taking a deep breath, stretching arms wide, smiling, and showing relaxation. | |||||||||||||||||||||||||||||||||||||||||
| Objectives | - Students will be able to categorize the five groups of animals (mammals, fish, birds, reptiles, and amphibians). - Students will identify characteristics from each of the five categories of vertebrates. - Students will group animals by categories. - Students will develop an awareness of what is required for survival. - Students will become aware of different habitats and the importance of protecting them. - Students will understand the threats to wildlife and explore ways to protect animal habitats. | |||||||||||||||||||||||||||||||||||||||||
| Preparation | Equipment : Worksheets, crayons, paper, Zoo Catalogue(magazines) Classroom arrangement: groups of maximum five students should be formed. | |||||||||||||||||||||||||||||||||||||||||
| Work Flow | Step 1 (5 min): Introduction to the Topic
Step 2 (2 min): Group Formation
Step 3 (10 min): Animal Picture Activity
Step 4 (10 min): Group Discussion
Step 5 (10 min): Class Discussion
Step 6 (5 min): Student Ideas and Worksheet
Step 8 (8 min): Survival Skills Activity
Step 9 (5 min): Consolidation Activity
Step 10 (5 min): Polar Bears Activity
Step 11 (10 min): Importance of Habitats
-Teacher Instructions: Explain that a habitat is a place where animals and plants live, providing them with the essential elements they need to survive: food, water, shelter, and space. -Key Points to Cover:
Step 12 (10 min): Habitat Protection Poster Activity
Step 13 (5 min): Reflection and Conclusion
| |||||||||||||||||||||||||||||||||||||||||
| Feedback | Ask students What was your favorite part of today's lesson? What new thing did you learn about wildlife protection? Was there anything you found difficult to understand? | |||||||||||||||||||||||||||||||||||||||||
| Adaptations | -In step 12 of the lesson, students who do not want to draw can use the animal pictures they cut out from magazines in step 2. | |||||||||||||||||||||||||||||||||||||||||
| Teacher Skills | Introduction to the Topic: Engaging students with an exciting introduction about wildlife protection and its importance. (Step 1) Engagement: Capturing students' interest and attention right from the start of the lesson. (Step 1) Group Formation: Organizing students into small groups to facilitate collaborative learning. (Step 2) Group Work: Promoting teamwork and cooperation among students throughout the activities. (Step 2) Activity-based Learning: Using hands-on activities like the animal picture sorting and discussion to reinforce learning. (Step 3, Step 4) Hands-on Activity: Engaging students actively in sorting and discussing animal pictures to deepen their understanding. (Step 3, Step 4) Discussion Facilitation: Leading class and group discussions to encourage participation and sharing of ideas. (Step 5, Step 11). Guiding discussions effectively to ensure understanding and engagement among students. | |||||||||||||||||||||||||||||||||||||||||
| Digital Resources | ||||||||||||||||||||||||||||||||||||||||||
| 61 | |||||||||||||||||||||||||||||||||||||||||
| | |||||||||||||||||||||||||||||||||||||||||
| 6 | |||||||||||||||||||||||||||||||||||||||||
| Developed by | FEE | ||||||||||||||||||||||||||||||||||||||||
| Duration | 80 | ||||||||||||||||||||||||||||||||||||||||
| Energizers | 49 - Room full of insects Students circle up and the teacher stands in the middle. Teacher shows all of the given movements and students have to repeat and memorize them. Movements: Butterfly flight: Raise your arms gently above your head and slowly flap them forward and back. Grasshopper jump: Bend your knees and jump into the air, extending your arms forward. Ant crawl: Crawl on the floor on your hands and knees. Bee flight: Run in a circle, flapping your arms like wings. After that teacher calls out an insect and everyone has to repeat them. If some of the students make a mistake, they have to take the seat. | ||||||||||||||||||||||||||||||||||||||||
| Relaxing Exercises | 47 - My insect maze The main part of the worksheet will be a maze with a starting point (perhaps an anthill or a flower) and an ending point (maybe a delicious leaf or a cozy cocoon).The maze can be simple with wide paths for younger children or more complex with twists and turns for older children.You can even incorporate insect-themed obstacles like spiderwebs or winding paths through flowers. Briefly explain what a maze is and the goal of finding the way from start to finish. Distribute the maze worksheets and crayons/pencils. Encourage students to start their maze journey. For younger children, demonstrate how to trace the path slowly and carefully, staying within the lines. Explain that it's okay to encounter dead ends. They can simply retrace their steps and try another path. Acknowledge and celebrate each student who completes the maze. | ||||||||||||||||||||||||||||||||||||||||
| Objectives |
| ||||||||||||||||||||||||||||||||||||||||
| Preparation | 4 images from the lesson plan; A video material "Come in the meadow! episode 1 "Pollination"" for demonstration of plant pollination process; Worksheets with tasks; Visual material (a video or a photo) to demonstrate the pollination process (examples in the digital resources); European Parliament infographics about pollinators (links are in the digital resources section); Materials for making insect houses (empty cans/jars, dry bundles of reeds, thin rope); Flower pots and soil (corresponding to the number of groups); Seeds and plants (optional); | ||||||||||||||||||||||||||||||||||||||||
| Work Flow | Step 1 (5 minutes) At the beginning of the lesson, the teacher projects four pictures onto the whiteboard. While looking at the pictures, students are asked to consider how these pictures are connected. Students then write their ideas down on a worksheet. After 3 minutes, 3-4 students are chosen to share their ideas with the class.
Step 2 (5 minutes) The teacher and the students watch a short video about pollinators "Come in the meadow! Episode 1 "Pollinators"". Step 3 (10 minutes) Teacher invites students to complete the scheme about the role of insects in the process of plant pollination in the worksheet. Teacher explains how does the insects pollinate the flowers, by filling in the task 3 in worksheet. Step 4 (15 minutes) To spark a thoughtful discussion and explore the film's content, the teacher asks students to fill in 3 mind maps in the worksheet. The mind maps are focusing on these topics: a. The importance of insects in nature b. Threats to insect populations c. What can be done to protect insects? In this step have students spend a minute individually reflecting on their mind maps before group discussion. This allows them to solidify their understanding before sharing. Step 5 (10 minutes) Teacher invites students to round up in the circle. Everyone is asked to join in the game of “Web of life”. This game simulates the interaction of different organisms in an ecosystem, including pollinators. (You can read the instructions of the activity in the digital resources.) Step 6 (5 minutes) Students are asked to share their ideas of what each of us could do to protect insects and biological diversity. Students' ideas are written on the whiteboard. Step 7 (30 minutes) In the last part of the lesson everybody is asked to create their own “insect hotel”. You can see an easy insect hotel that consists of empty can and bundles of reeds. Students can decorate them as insects like bees or others. Beforehead let students create a sketch of the insect hotel in the task 4 in worksheet. These insect houses can be easily added to the school garden or nearby areas. The teacher, along with the students, can prepare flower pots with soil. Students can plant the seeds of native meadow plants in the pots. Each pot can have 1-2 insect houses inserted. Each group of students will take care of their own mini-garden and insect hotel.
| ||||||||||||||||||||||||||||||||||||||||
| Feedback | At the end of the lesson, provide a short, anonymous survey with a few multiple-choice questions and an optional open-ended prompt. Questions could include: a.How well did the activities help you understand the importance of insects? (Very well, Somewhat well, Not well) b.What was the most interesting thing you learned today? c.Is there anything you'd like to learn more about? | ||||||||||||||||||||||||||||||||||||||||
| Adaptations | A1. Offer a variety of recycled and natural materials for students to choose from to cater to different insect preferences. A2. Pre-cut some of the materials for students who might have difficulty handling tools. A3. Consider the location of the insect hotels within the school grounds. Placing them in sunny areas with some protection from rain and wind would be ideal. A4. You can build a larger insect house as a class project. Below you can find an example that will be suitable for different insects. | ||||||||||||||||||||||||||||||||||||||||
| Teacher Skills | Environmental Awareness: A basic understanding of pollinators, biodiversity, and conservation efforts. Specific Skills for Each Activity: Visual Analysis: Ability to guide students in analyzing images and identifying patterns or relationships. Media Literacy: Skill in evaluating the content and credibility of the film. Critical Thinking: Ability to encourage students to think critically about the importance, threats, and conservation of pollinators. Scientific Inquiry: Skill in guiding students through the process of observing, analyzing, and comparing information. Collaborative Learning: Ability to facilitate group work, promote teamwork, and ensure that all students participate. Critical Thinking: Skill in encouraging students to think critically about their own actions and the impact they can have on the environment. Creativity and Practical Skills: Ability to guide students in designing and constructing insect hotels, as well as planting native meadow plants. | ||||||||||||||||||||||||||||||||||||||||
| Digital Resources | Worksheet with the tasks. Infographics from European parliament about the importance of pollinators: https://www.europarl.europa.eu/topics/en/article/20191129STO67758/what-s-behind-the-decline-in-bees-and-other-pollinators-infographic Example of video for plant pollination process: https://www.youtube.com/watch?v=Ozf2ERxudPU Instruction of the game “Web of life”: https://www.amnh.org/explore/ology/biodiversity/web-of-life/activity-instructions | ||||||||||||||||||||||||||||||||||||||||
| 62 | |||||||||||||||||||||||||||||||||||||||||
| | |||||||||||||||||||||||||||||||||||||||||
| 7 | |||||||||||||||||||||||||||||||||||||||||
| Developed by | FEE | ||||||||||||||||||||||||||||||||||||||||
| Duration | 80 | ||||||||||||||||||||||||||||||||||||||||
| Energizers | 32 - Animal fact hunt Write down facts about endangered species and their habitats on separate index cards. Include a mix of positive and negative facts (e.g. "The giant panda eats mostly bamboo." or "Polar bear population is threatened by melting sea ice.") Hide index cards around the classroom or outside in a designated area (depending on weather and space). Divide students into 2 teams. Explain that they are going on a scavenge hunt to learn about endangered species and their habitats. When teacher gives signal, each team will work together to find one hidden index card. Set a time limit for the scavenger hunt. (around 3-5 minutes) Once a team finds a card, they must read the fact and then perform a movement that represents the fact (e.g. If the fact is about flying animal, they might flap their arms like wings.) When all of the teams come back, they present the fact and movement. | ||||||||||||||||||||||||||||||||||||||||
| Relaxing Exercises | Teach students simple yoga poses inspired by animals, focusing on gentle stretches. During this energizer, it is possible to do 4-5 poses. Each pose is held for 15-30 seconds, focusing on breathing and maintain posture. (2 minutes) | ||||||||||||||||||||||||||||||||||||||||
| Objectives | At the end of the lesson, students will:
| ||||||||||||||||||||||||||||||||||||||||
| Preparation | Whiteboard or projector Worksheet with tasks Printout of board game "Life of bird" Rolling dice and game pieces for each student 10 peaces of 5cm x 8cm cut-out paper sheets per group 10 Infographics about the animals (one per species) prepared material pdf printable Scissors Color pencils Black marker Glue White paper A3 paper or cardboard to create the gameboard | ||||||||||||||||||||||||||||||||||||||||
| Work Flow | Step 1 (5 minutes) Begin by reviewing the concept of endangered species and the importance of biodiversity. Teacher can use infographics that are attached to this lesson plan! After that explain that students will work in groups to create a board game raising awareness about the most endangered species in Europe. Step 2 (15 minutes) To introduce students with the board game concept. Invite students to play board game “Life of bird” . Divide students into equal groups of 4-5 people. To play the game, each group needs a printout of the game, rolling dice and game pieces for each player. Here are the description and the game rules: Description: Migratory birds spend a lot of time and energy every spring, not only on thousands of kilometers long flights, but also on building nests, laying and hatching eggs, caring for the young, and feeding them. Remember, if you want to take care of the birds and protect their nests, leave them alone in peace and safety. Watch them from a distance! Play the game and become a bird in feathers, surviving the nesting season! Rules: 1)The game starts from the first (start) square by rolling a 1 or a 6. 2)Players take turns rolling the dice. On each turn, move your figure forward as many spaces as the rolled die shows. 3)After rolling a 6, you can roll again. 4)If a figure stops on a square with a bird's egg, it must be moved along the indicated arrow to the end of the arrow. 5)The winner is the one who reaches the last (finish) field first.! Step 3 (10 minutes) Research assigned species and identify threats and positive factors. Present each group with an infographic about different protected animal. Each group has to research their assigned species, identifying 5 facts about factors that threaten its survival and 5 facts about factors what help sustain the species. Encourage students to take notes and organize their findings in the worksheet. Step 4 (20minutes) Provide each group with colored pencils, markers, scissors, and their set of 10 5cm x 8cm white paper sheets. Ask each group to brainstorm how they will represent each of the 10 facts they gathered visually (drawings, diagrams, symbols, etc.). Students create 10 small drawings or visual representations on the square-shaped sheets, one for each fact. Step 5 (20 minutes) Each group receives an A3 sheet for their game board. Students can use recycled materials like cardboard or other suitable items. Encourage students to discuss the arrangement of their drawings on the board. Explain that they should add extra fields that are empty. Each group works on their assigned game board layout. Provide students with glue and have them carefully paste their drawings onto their designed game board. Explain that arrows will be added to indicate whether a factor promotes or threatens the species' survival. Distribute black markers. Instruct students to draw arrows next to each drawing: a forward arrow for positive factors and a backward arrow for threats. Encourage students to decorate their game boards with additional drawings, symbols, or colors to make it visually appealing. | ||||||||||||||||||||||||||||||||||||||||
| Feedback | Bring the class together for a brief reflection on the activity. Discuss what students learned about endangered species and the challenges they face: a.What did you learn about endangered animals? (What you didn't know but now you do?) b.What surprised you the most? c.What would you do, to save species? This lesson plan is connected with the lesson plan C.C6 "Projects implemented by students" | ||||||||||||||||||||||||||||||||||||||||
| Adaptations | A1. The class selects one animal. Together with the teacher they research animals and the factors. Each student makes an individual card. After that class makes one large-sized board game. A2. You can use a documentary or other audio-visual materials to introduce kids to endangered species and their natural habitats. | ||||||||||||||||||||||||||||||||||||||||
| Teacher Skills | Content Knowledge: Environmental Awareness: A basic understanding of endangered species, biodiversity, and conservation efforts. Instructional Delivery: Engaging Introductions: Use infographics and thought-provoking questions to spark student interest. Collaborative Learning: Facilitate effective group work and promote teamwork. Classroom Management: Group Formation: Strategically form diverse groups to maximize interaction and learning. Active Monitoring: Circulate around the classroom and provide timely support to groups. Additional Skills: Creativity: Foster a creative and imaginative atmosphere that encourages students to develop unique game concepts. Problem-Solving: Guide students through the process of overcoming challenges during the game design process. | ||||||||||||||||||||||||||||||||||||||||
| Digital Resources | |||||||||||||||||||||||||||||||||||||||||
| 63 | |||||||||||||||||||||||||||||||||||||||||
| | |||||||||||||||||||||||||||||||||||||||||
| 8 |  ECO Awareness topics / E.B1 Air and climate ECO Awareness topics / E.B1 Air and climate | ||||||||||||||||||||||||||||||||||||||||
| Developed by | Antalya Directorate Of Education | ||||||||||||||||||||||||||||||||||||||||
| Duration | 60 | ||||||||||||||||||||||||||||||||||||||||
| Energizers | 29 - Brain Gym 1. Ask students to rub their stomach with their left hand in a clockwise direction and at the same time rub the top of their head with their right hand in a counter clockwise direction. 2. After a few seconds ask them to keep going and to begin tapping their right foot. 3. Ask students to close their eyes and imagine that they are eating ice-cream. 4. Have them imagine they see a monkey riding a bike. 5. Finally have them say “Save our planet!” | ||||||||||||||||||||||||||||||||||||||||
| Relaxing Exercises | 35 - Peaceful Playtime Visualization Have the children find a comfortable position to sit or lie down. Begin by guiding them through a few calming breaths to relax. Start describing a peaceful playground scene—mention the gentle sway of the trees, the softness of the grass, and the laughter of friends. Narrate how every child at the playground is playing freely and safely, without any fears or worries. Emphasize that in this place, every child is included in games, and there a sense of happiness and freedom. Allow the children a few minutes to immerse themselves in this visualization, then gently guide them back to the classroom, feeling refreshed and content. | ||||||||||||||||||||||||||||||||||||||||
| Objectives | At the end of the lesson students will:
| ||||||||||||||||||||||||||||||||||||||||
| Preparation | Equipment A large world map or a globe (for step 3) | ||||||||||||||||||||||||||||||||||||||||
| Work Flow | Step 1: (5 minutes)
Step 2: Define Weather and Climate (5 minutes)
Step 3: (15 minutes) Begin by showing a large world map or a globe to the students.
Step 4: Explain Global Warming (20 minutes)
To teach students what global warming is and how it relates to the greenhouse effect the teacher says: Global warming is the gradual increase in the Earth's average temperature. This increase is mainly due to human activities that release greenhouse gasses into the atmosphere. Question to Students: Have you ever seen or been inside a greenhouse? (show Annex 1) Explanation: Greenhouses are structures made to create a controlled environment for plants to grow. Sunlight enters the greenhouse through the glass or plastic panels, warming the air inside. However, the heat is trapped inside and cannot escape easily, leading to a warmer environment inside the greenhouse. Link to the Greenhouse Effect: Similarly, Earth's atmosphere acts like the glass of a greenhouse. Greenhouse gasses in the atmosphere trap heat that is radiated from the Earth's surface, preventing it from escaping into space. This trapped heat causes the Earth to warm, a phenomenon known as the "greenhouse effect." The burning of fossil fuels (coal, oil, natural gas), deforestation, and industrial activities release greenhouse gasses (carbon dioxide, methane, nitrous oxides) into the atmosphere. Present Annex 2 These gasses accumulate in the atmosphere, enhancing the greenhouse effect and leading to an increase in the Earth's average temperature. Step 5: (10 minutes)
· Discuss the main effects of global warming: Explain that there are many effects of glabal warming : rising temperatures, melting ice caps, rising sea levels, and extreme weather events. Present Annex 3
Step 6 : (20 minutes)
Group Discussion:
Step 7: Review and Conclusion (5 minutes)
| ||||||||||||||||||||||||||||||||||||||||
| Feedback | At the end of the lesson, give each student a small piece of paper where they can write one thing they learned, one thing they found interesting, and one question they need more information about. This will help the teacher to have a quick snapshot of students' understanding and engagement in the topic. | ||||||||||||||||||||||||||||||||||||||||
| Adaptations | Hands-On Activities: To understand better what greenhouse is, you can do two experiments and compare the data: No1. – you put a lamp in an open space, turn it on and measure the temperature after 1 hour (or 30 min). No.2 – you put the same lamp in a closed glass (plastic) container for the same time (1 hour or 30 minutes) and measure the temperature. | ||||||||||||||||||||||||||||||||||||||||
| Teacher Skills | · Explanation: Ability to explain complex concepts in a simple and understandable manner. (Step 2, Step 4) · Visualization: Using visual aids like maps or globes to illustrate concepts. (Step 3) · Facilitation: Facilitating small group discussions and encouraging student participation. (Step 6) · Discussion: Leading interactive discussions with students and gathering diverse viewpoints. (Step 5, Step 6) · Recap and Review: Summarizing key points of the lesson and reinforcing student learning. (Step 7) | ||||||||||||||||||||||||||||||||||||||||
| Digital Resources | |||||||||||||||||||||||||||||||||||||||||
| 64 | ||||||||||||||||||||||||||||||||||||||||||
| | ||||||||||||||||||||||||||||||||||||||||||
| 9 | ||||||||||||||||||||||||||||||||||||||||||
| Developed by | Antalya Directorate Of Education | |||||||||||||||||||||||||||||||||||||||||
| Duration | 60 | |||||||||||||||||||||||||||||||||||||||||
| Energizers | 17 - Toaster or Rock Star The group starts in a circle with one person in the center. The person in the center points at someone in the circle and says “Toaster” or “Rock star”.
| |||||||||||||||||||||||||||||||||||||||||
| Relaxing Exercises | 34 - Mindful Breathing Invite the children to sit comfortably in a circle, either on the floor or in chairs. Instruct them to close their eyes and take deep breaths in through the nose and out through the mouth. As they breathe deeply, guide them to visualize a place where they feel happy and safe to play—this could be a playground, a field, or even their own backyard. Encourage them to think about the sounds, smells, and sights in this safe place, reinforcing the calming effect. Continue for several minutes, allowing the children to fully engage with their peaceful play space in their minds. Gradually bring them back to the present moment, reminding them that they can visit this safe place in their minds whenever they need to feel calm and secure. | |||||||||||||||||||||||||||||||||||||||||
| Objectives | Students will understand what renewable energy is. Students will identify different types of renewable energy sources. Students will recognize the importance of using renewable energy for the environment. | |||||||||||||||||||||||||||||||||||||||||
| Preparation | Materials:
Equipment : Computer, projector or smart board (Annex 1) | |||||||||||||||||||||||||||||||||||||||||
| Work Flow | Step 1: Introduction (10 minutes)
Main Lesson (15 minutes)
Step 2: Cut and Paste (15 minutes)
Step 3: Group Discussion and Poster Creation (15 minutes)
Step 4: Worksheet Writing (15 minutes)
Step 5: Conclusion (10 minutes)
| |||||||||||||||||||||||||||||||||||||||||
| Feedback | -At the end of the lesson, give each student a small piece of paper where they can write one thing they learned, one thing they found interesting, and one question they still have. This will give you a quick snapshot of their understanding and engagement | |||||||||||||||||||||||||||||||||||||||||
| Adaptations | Pair students with reading buddies for the group discussion and poster creation activities to ensure they receive support in reading and understanding the fact sheets. | |||||||||||||||||||||||||||||||||||||||||
| Teacher Skills |
| |||||||||||||||||||||||||||||||||||||||||
| Digital Resources | ||||||||||||||||||||||||||||||||||||||||||
| 65 | |||||||||||||||||||||||||||||||||||||||||
| | |||||||||||||||||||||||||||||||||||||||||
| 10 | |||||||||||||||||||||||||||||||||||||||||
| Developed by | Prosveta Foundation - Petya Yordanova | ||||||||||||||||||||||||||||||||||||||||
| 2 | |||||||||||||||||||||||||||||||||||||||||
| Duration | 60 | ||||||||||||||||||||||||||||||||||||||||
| Energizers | 27 - Power ON – Power OFF Play any relaxing piece of music and instruct students: Sit back and rest. You can sit on the floor with your legs out straight and your back - leaning against something. Or you can sit in your chair, with your legs long, your feet flat on the floor while you lean against the back of your chair. Or stand up. Get comfortable. We’re going to turn on the energy in our bodies. And then we’re going to turn it off. Let’s begin with the toes. Wiggle your toes to wake them up. Ready? Tighten your toes, like you’re making a fist with them. Try to only turn on the power in your toes, and let all other areas of your body rest. Breathe in while they are tight. And then when you breathe out, turn the energy off. Let your toes rest. Again. Breathe in and turn the energy on in your toes...just your toes. Breathe out to turn it off and let the tightness go. Now, let’s give your legs a chance. Turn on the energy in your legs, straighten them. Make tight, tense muscles. Now breathe in to add even more energy. Exhale and let go. Legs go soft. Power goes off. Let’s do one more round with legs. Ready? Start breathing in, turn the energy on, legs are working hard, tight, tense. Then turn that energy off, breathe out, relax, soften the muscles. You’re in control. Now your hands. Make fists and inhale as you turn your energy on, and then let’s exhale and rest. Turn it all off. Add your arms this time. They can be straight or bent. Make fists, arms get tight, energy ON, breathe in. Breathe out and let go. Energy OFF. Arms and hands one more time. Turn it on while you breathe in, and turn it off with an outbreath. And finally, we’re going to try the whole body. If you want, add your face muscles too - crinkle up your eyes, your lips, your cheeks. Ready? Breathe in and turn on your whole body’s energy...toes, feet, legs, hands, arms, face. Feel the energy in your body. It’s ON! And now turn it all off while you breathe out slowly. Relax. The energy’s off. See if you can stay still, just for a while. Energy’s off. Notice how the different parts of your body feel, now that you’ve practiced being in control of your own on and off switch. | ||||||||||||||||||||||||||||||||||||||||
| Relaxing Exercises | 28 - Feelings in one word Students are asked to close their eyes (if comfortable) for 30 seconds and think of a word that describes best their feelings/thoughts after finishing the lesson. Then, the teacher asks them to open their eyes and share the word describing their feeling one by one. *Another option is to ask student express the way they feel through a live statue or facial expression. | ||||||||||||||||||||||||||||||||||||||||
| Objectives | At the end of the lesson students will:
| ||||||||||||||||||||||||||||||||||||||||
| Preparation | Preparation Cut the vocabulary cards from Annex 2 separately and arrange them in 2 packs: Pack 1 – words; Pack 2 – explanations. Equipment Laptop and projector (for step 1) 6 laptops for the 6 groups of students exploring the different energy sources. If this is not possible, the presentations could be printed and distributed among the groups. Classroom arrangement – tables could be arranged in a circle for better contact among students during plenary sessions. During group work (steps 3 and 4) the tables are rearranged so that the groups are located in different locations of the classroom where they research the respective energy source assigned to the group and discuss the group’s presentation at the meeting in the town hall (step 5) Print outs | ||||||||||||||||||||||||||||||||||||||||
| Work Flow | Step 1 (5 min.): Introduction Play the video Climate Change | Educational Video for Kids Ask students to remember what they know about the topic or to share what they learned from the video about renewable and non-renewable energy. Step 2 (2 min.) Split students in 6 groups to explore the different types of energy. Each group needs a laptop to see the video assigned to them, or a printed copy of the presentation (available in pdf format). Step 3 (10 min.) Students work in groups researching the 6 sources of energy through watching the videos (in case a laptop is available of each group), or read the information from the print-outs.
Step 4 (15 min. Students work individually to answer the questions in Annex 1 considering the information from the presentation assigned to their group. After the individual work, they choose a group leader who sums up everybody’s answers filling in Annex 1 as a group. This document is to be used by the group to provide arguments in favour of using the assigned source of energy in step 5. The teacher explains what will happen in Step 5: Each group will be given the floor to talk at a meeting of the town council which is about making investments in different types of energy sources. The groups need to present their type of energy source and its benefits trying to persuade the others that it is the one that should be funded. Step 5 (22 min.) Part 1 (10 min.): Students work within their groups rehearsing their speeches – the arguments in favour of their energy source and the way they will present it in the plenary. They plan their public presentations answering the quests:
Part 2 (12 min) Teacher announces: “We are attending a meeting of the town council which is meant to make a decision about the prospective investments of our town in different types of energy sources. And because this is a really important question for all citizens, it is you, all the citizens of our town, who will decide which type of energy will get the funding. Now, you will hear the different groups who will lobby for their type of energy. And then, you will vote for the one in which our town should invest in.” Each group has 2 minutes to present their energy source and persuade the others to vote for it. Step 6 (5 min.)
Step 7 (10 min.)
| ||||||||||||||||||||||||||||||||||||||||
| Feedback | Discuss the following questions with the students:
Are you more confident now to speak about the causes for climate change? | ||||||||||||||||||||||||||||||||||||||||
| Adaptations |
It is important for students to understand the advantages and disadvantages of different energy sources but also to know the meaning of the words from the glossary related to energy. For this purpose they can play a game with the cards from Annex 2. The cards in the left column read a specific word from the glossary; the cards from the right column read the corresponding explanation. Prior to the lesson, the teacher prints the file, cuts the cards separately and splits them in two packs: terms (pack 1) and explanations (pack 2). Students are organized to sit in a circle. Two students volunteer to be in the center and they are provided with Pack 1 (the terms). The cards from Pack 2 (the explanations) are distributed among the students in the circle. The two students in the middle take turns to pick up one card and read the specific term from the card. The students from the circle read the explanation on the card they have received, and, if a student thinks that his/her explanation corresponds to the term which has been read, he/she stands up, reads the explanation from the card and shows it to the rest of the class – if everybody agrees that the term and the explanation match, the student goes to the middle of the circle to pick up the term and match it with the explanation. The game continues with the rest of the terms.
| ||||||||||||||||||||||||||||||||||||||||
| Teacher Skills |
Communication: Listening and adaptability - as suggested in section Adaptations. Classroom management: maintain an organised environment, maintain rules and routines, especially in steps 4 and 5. Adaptability: you could consider making modifications to the described steps prior to the lesson considering the students’ age and potential. The Adaptations section offers you numerous ideas for extra activities. However, you should be prepared to make changes during the delivery of the topic. Fostering student engagement: the delivery of the topic builds on students’ active participation as suggested in steps 4 and 5. The lesson provides ideas for interactive activities, discussions, and projects. Technical skills: teachers’ ability to use various technical tools and programs as suggested in steps 1 and 3, and section Adaptations. | ||||||||||||||||||||||||||||||||||||||||
| Digital Resources | |||||||||||||||||||||||||||||||||||||||||
| 66 | |||||||||||||||||||||||||||||||||||||||||
| | |||||||||||||||||||||||||||||||||||||||||
| 11 | |||||||||||||||||||||||||||||||||||||||||
| Developed by | Prosveta Foundation - Petya Yordanova | ||||||||||||||||||||||||||||||||||||||||
| Duration | 60 | ||||||||||||||||||||||||||||||||||||||||
| Energizers | 29 - Brain Gym 1. Ask students to rub their stomach with their left hand in a clockwise direction and at the same time rub the top of their head with their right hand in a counter clockwise direction. 2. After a few seconds ask them to keep going and to begin tapping their right foot. 3. Ask students to close their eyes and imagine that they are eating ice-cream. 4. Have them imagine they see a monkey riding a bike. 5. Finally have them say “Save our planet!” | ||||||||||||||||||||||||||||||||||||||||
| Relaxing Exercises | 25 - Flower and Candle This is a simple relaxation technique that encourages deep breathing. Pretend you have a nice smelling flower in one hand and a slow burning candle in the other.
| ||||||||||||||||||||||||||||||||||||||||
| Objectives | At the end of the lesson students should be able to:
| ||||||||||||||||||||||||||||||||||||||||
| Preparation | Materials:
Equipment:
Print outs: Worksheet 1, Worksheet 2, Worksheet 3 and Worksheet 4 for each student | ||||||||||||||||||||||||||||||||||||||||
| Work Flow | Step 1: (5 min) Introduction Step 2: (5 min) Environmental/Ecological Footprint (EF) Step 3: (5 min) Time for action Step 4: (20 min) Individual work: worksheet 1 Have a class discussion about the activities that have the biggest impact on their footprint. Step 5: ( 5 min) Environmental Handprint (EH) The concept of the ecological handprint has different meanings, including:
Step 6: (15 min) - Individual work: Worksheet 2 2. Once students have designed their handprints, discuss what positive impacts students already have, and what they would like to do in the future. 3. Organize the environmental handprints as a wall display. Step 7: (20 min) Time for action/Conclusions Working in groups ask students to think up 5 things that the school can do to reduce its environmental footprint. In another activity they can create a poster or an eco-code describing these things as well as what the Environmental footprint is. | ||||||||||||||||||||||||||||||||||||||||
| Feedback | Students are invited to complete the chart from worksheet 4 about environmental footprint and handprint. | ||||||||||||||||||||||||||||||||||||||||
| Adaptations | The described activities works best with the age range 9-11. Optional activities provided that adaptations are needed due to students’ age or abilities:
Students are given a copy of the IAC3_Questionnaire and stand in a line. Teacher reads one question at a time - students mark their answers on the printed questionnaire and take the required steps forward. When all questions have been read, students can observe where they are the line. * Optional: Students can sum up their results, either in the classroom or at home with their parents. The calculation can be done in two ways. 1st option is to calculate the corresponding points which are shown right next to the steps. The result is the ecological footprint. 2nd option is to calculate the number of steps and multiply by 10 in order to get the final result which is the ecological footprint. The teacher explains the meaning of the numbers and allows students to compare their results with the global average. For results, kindly consult p. 26 of the Handbood for Action against Climate Change
Younger students could cut out their handprints and every time they do something for the planet, they could stick it and make a Tree of good actions. | ||||||||||||||||||||||||||||||||||||||||
| Teacher Skills |
| ||||||||||||||||||||||||||||||||||||||||
| Digital Resources | The Ecological Footprint Explained https://www.youtube.com/watch?v=xEvOr2im3KY | ||||||||||||||||||||||||||||||||||||||||
| 67 | |||||||||||||||||||||||||||||||||||||||||
| | |||||||||||||||||||||||||||||||||||||||||
| 12 | |||||||||||||||||||||||||||||||||||||||||
| Developed by | FEE | ||||||||||||||||||||||||||||||||||||||||
| Duration | 80 | ||||||||||||||||||||||||||||||||||||||||
| Energizers | 50 - “This or that” All students stand in a column one behind the other. The teacher makes an offer to the students: "Zero waste or gardening?". Those students who support the "Zero Waste" movement go to the right, and those who are passionate about gardening go to the left. After that, the teacher invites one to two students to explain why they made that choice. After they have given their explanations, everyone forms a column again. The teacher asks the next question and the students again make their choice and stand on the appropriate side. Other options: Cooking class or gardening class? Herb gardening or vegetable gardening? Plant a tree or set up a bird feeder? Private car or take public transportation? Nature walk or go by bike? Host a clothes swap or set up a neighborhood compost bin? Shop in bulk or shop at a local farmer’s market? Buy second-hand clothing or buy new sustainable clothing? | ||||||||||||||||||||||||||||||||||||||||
| Relaxing Exercises | 49 - Breathing exercise “My hand” With the index finger of the right hand, start to pull from the bottom of the thumb of the left hand to the tip of the thumb (parallel the breath is drawn in), then continue to pull the finger down the thumb (exhale), continue until all fingers are covered. Then they switch hands and pull the index finger of the left hand over the finger of the right hand. Inhale when pulling (driving) the finger up, exhale when pulling down. | ||||||||||||||||||||||||||||||||||||||||
| Objectives | At the end of this lesson students will: 1. Understand how the three main areas – agriculture/food, transport and energy consumption – are affecting climate change. 2. Commit to a habit to reduce the human impact on climate change. | ||||||||||||||||||||||||||||||||||||||||
| Preparation | 24 picture cards with human activities; tickets with questions for classmates; worksheet with tasks for students; Post it notes in 3 different colours A4 white paper sheets; pen or pencil; coloring pencils; glue; Cutouts of silouettos for the commitment wall. | ||||||||||||||||||||||||||||||||||||||||
| Work Flow | Step 1 (10 minutes) Start the lesson by asking students what they know about climate change. Explain that climate change is a drastic long-term change in the average weather patterns that have come to define Earth's local, regional and global climates that affect the entire Earth and its inhabitants. Explain that we are going to introduce a video about climate change and how it has affected the Earth over the past 30 years. The teacher plays the video to demonstrate the changes on earth during last 30 years: https://www.youtube.com/watch?v=uFlLDcppwpI. After watching the video, the teacher invites the students to do the task 1 and task 2 in the worksheet, where the students have to write down the changes in nature seen in the video and color the natural processes that could have caused them. Step 2 (5 minutes) The teacher explains that such transformations are caused by climate change. As we all know climate changes are caused by human activities. 3 words are written on the board: "food", "transport", "energy". Teacher can miss some of the letters and ask students to guess the names on the board. After completing the activity, discuss with the class how each of the words ("food", "transport", "energy") could be related to climate change. Step 3 (6 minutes) The teacher informs class, that there has been placed 24 printable cards of human activities around the classroom. Students are asked to move around and look for those cards. The teacher explains that if the card is found, students have to describe the action in task 3 in the worksheet. At last students link them to food, transportation, or energy. At the end of this activity, the class has gathered and grouped different causes of climate change on the whiteboard in front of the classroom. Step 3 (15 minutes) Ask students to participate in an activity called “The people speak” to engage in discussions about climate change solutions through pre-assigned questions focused on food, transportation, and energy. The teacher asks each student to draw one pre-cut sheet with questions about the impact of food , transportation and energy on climate and then introduces them with further instructions: a. Within 10 minutes, students ask their questions to five classmates, encouraging thoughtful answers about solutions. The answers are written on the same page where the question is. b. After five minutes, students are asked to find their group based on the group number provided in the corner of their question sheet. Groups consist of students who have drawn questions related to the same topic (transportation, food, or energy) and who have the same group number. At the end you will have 9 groups, 3 on each topic. c. In each group, students have to discuss the answers and identify actions that are already being implemented to minimize climate change. These actions are highlighted in green. Actions that are not yet being implemented are highlighted in red. Step 4 (5 minutes): Discuss existing efforts to combat climate change and identify areas for improvement. Students are asked to answer to 3 questions based on their discussion. This activitie is describet in te worksheet task 5:
Each group recieves 3-6 post it notes in different colours. On each of the post it notes students have to write down the answer to given questions. Then all of the answers are pinned to the wall or on the wite board. Step 5 (15 minutes) Using the answers collected from classmates and the additional information from provided materials, each group have to come up with 2-3 recomendation to class/school or society. On A4 sheet, each group will have to design a poster showcasing actions individuals can take in their daily lives to fight climate change. These actions should be relevant to the group's assigned topic (transportation, energy, or food). Each group has to be ready to present their poster to the class, highlighting the recommended actions for protecting the Earth from climate change within their assigned area. Step 6 (10 minutes): The teacher will invite each group to create a gallery of the posters wit sugestions. Then groups will rotate through the classroom, visiting each poster. Each group will have 1 minute by each poster. They have to read the information and suggestions. As students rotate through the gallery, they should consider which recommendations from other groups they might choose to implement in their own lives. They have to write them inside the table in task 7. Step 7 (5 minutes): Building a Commitment Wall: After the gallery each student receives three small silhouettes . Students will then have to choose one of suggestions in each topic they could implement in their daily life. Then they visit the chosen posters and attach their silhouettes to the specific habits they commit implementing in their daily lives. This creates a visual "commitment wall" in the classroom. | ||||||||||||||||||||||||||||||||||||||||
| Feedback | Exit Tickets: Provide students with sticky notes or small pieces of paper at the end of the lesson. Ask them to write down one thing they learned about climate change and one suggestion for improvement. This is a quick and easy way to gather immediate feedback. | ||||||||||||||||||||||||||||||||||||||||
| Adaptations | If there is no time to present the posters: A1 Students can present the remaining posters in other classes. A2. Students of that class are given 3 silhouettes of people (found in the appendix), which they must attach to the habits on the poster that they could implement in the future. As a result, this created wall serves as a commitment wall in other classrooms as well. | ||||||||||||||||||||||||||||||||||||||||
| Teacher Skills | Effective Communication: Clearly explain the concept of climate change and its long-term implications. Encourage students to analyze the changes observed in the video and connect them to broader environmental issues. Active Learning: Facilitate a discussion about how food, transport, and energy can impact climate change. Critical Thinking: Promote critical thinking by asking students to evaluate the impact of different human activities on climate change. Active Listening: Encourage students to listen attentively to their classmates' ideas and provide constructive feedback. Foster teamwork and cooperation among students in their groups. Creativity: Encourage students to design visually appealing and informative posters. Visualization: Use the commitment wall to create a visual representation of the class's collective commitment to addressing climate change. | ||||||||||||||||||||||||||||||||||||||||
| Digital Resources | 24 picture cards with human activities tickets with questions worksheet with tasks Cutouts of silouettes | ||||||||||||||||||||||||||||||||||||||||
| 68 | |||||||||||||||||||||||||||||||||||||||||
| | |||||||||||||||||||||||||||||||||||||||||
| 13 | |||||||||||||||||||||||||||||||||||||||||
| Developed by | Foundation for Environmental Education | ||||||||||||||||||||||||||||||||||||||||
| Duration | 80 | ||||||||||||||||||||||||||||||||||||||||
| Energizers | 12 - Body spelling - Body geometric shapes Option 1 The teacher asks students to write their names in the air using different parts of their body, for example, using their hand, leg, lbow, or nose, etc. Optional: If time allows the teacher could ask to the class to spell out some words reproducing the letters with their bodies. Students can collaborate all together or can create different groups. Option 2 Task: Draw a geometric shape in the air using different parts of your body - hands, legs, elbows, noses, etc. Option 3: Task: Work in groups of 2, 3 or more students to make a geometric shape with your bodies. | ||||||||||||||||||||||||||||||||||||||||
| Relaxing Exercises | 13 - Body massage The students stand in a circle: they need to follow all the movement the teacher does and massage themselves. The teacher starts to massage different parts of his/her body, starting from the head till the feet (it’s better if they take off their shoes). The teacher explains how the massage needs to be done, if delicate or more energetic. Optional: The teacher can also ask to the students to massage another classmate. | ||||||||||||||||||||||||||||||||||||||||
| Objectives | At the end of the lesson students will:
| ||||||||||||||||||||||||||||||||||||||||
| Preparation | Task at home for students: Conduct a week-long study at home about the operating time and energy use of various electrical devices. Students gather information in task 1. Materials:
| ||||||||||||||||||||||||||||||||||||||||
| Work Flow | Step 1 ( 5 minutes) Briefly discuss with students the importance of electricity in our daily lives. Ask them to name some appliances or devices they use that require electricity. Step 2 ( 5 minutes) Show a picture on the board that depicts different types of electricity generation (e.g., a power plant, wind turbines, solar panels). Do task 2 in worksheet. Discuss these questions with students:
Step 3 (10 minutes) Game of “How I use electricity?” and discussion of daily electricity usage habits. Task 2 in worksheet. Divide students into groups of 3. In each round, one student starts by describing their routine from the previous day (e.g., "I woke up at 7:00 am"). The other two students listen carefully. When they hear something that involves using electricity, they shout "Stop!" The third student records this activity in the workbook (e.g., "Woke up - turned on the light"). After a few rounds, each group creates a list of all the ways electricity was used in the scenarios. After each group has created its list, ask them to share it. As a class, compile a master list on the board or chart paper of all the ways electricity is used daily. Discuss whether this seems like a lot or a little electricity consumption. Ask students: "Could you give up something? Why or why not? Would it be easy?" Guide a discussion about ways to reduce electricity consumption without significantly impacting daily life. Step 4 (15 minutes) Introduce Research Data: Briefly explain that students will use their research on the operating time of various devices to calculate energy consumption in the task 3 in the worksheet. Calculations: Guide students through the following calculations in their workbooks: Operating time per day: (Daily usage time in hours) x (Number of days used per week) Daily electricity consumption: (Operating time per day) x (Device wattage) Weekly electricity consumption: (Daily electricity consumption) x (Number of days used per week) Estimated cost: (Weekly electricity consumption) x (Cost of electricity per unit) [The teacher has to provide current electricity cost information or students should ask the parents about the cost of one-kilowatt hour.] Step 5 (5 minutes) Group Work: Divide students into groups of 3 again. Instruct students to brainstorm and write down 8 suggestions for reducing electricity consumption in their daily lives. Encourage them to consider strategies for reducing appliance usage times, using energy-efficient alternatives, and adopting better habits. Step 6 (25 minutes): Project Selection: Students choose whether to create a poster, presentation or short video (optional) to showcase their recommendations for reducing electricity consumption. Students work within their groups to create their chosen media format, incorporating their suggestions and relevant visuals. Step 7 ( 10 minutes): Each group displays their work on the wall. All of the groups shortly present their posters. Step 8 (5 minutes): In their worksheets in task 5, each student selects 1-3 habits from the class suggestions or their group's recommendations that they can realistically implement in their daily lives to reduce electricity usage. Students can briefly write a sentence or two explaining their choices and why they are important. | ||||||||||||||||||||||||||||||||||||||||
| Feedback | Briefly summarize the key points of the lesson, including the different types of electricity generation, the importance of responsible electricity use, and strategies for reducing consumption. Encourage students to continue thinking about ways to conserve electricity beyond the classroom and to share their chosen habits with their families. | ||||||||||||||||||||||||||||||||||||||||
| Adaptations | A1. For advanced students, provide additional research opportunities on specific types of electricity generation or the environmental impact of different methods. A2. For struggling students, offer modified versions of the calculations or provide support during group activities. | ||||||||||||||||||||||||||||||||||||||||
| Teacher Skills | Effective Communication: Clearly explain the importance of electricity and engage students in discussion. Use videos or pictures to enhance understanding and interest. Questioning Techniques: Pose thought-provoking questions to stimulate critical thinking and discussion. Facilitation: Guide the game and discussion, ensuring everyone participates. Mathematical Skills: Demonstrate and guide students through the calculations clearly. Assist students in understanding and applying the formulas correctly. Creativity: Encourage students to think creatively and come up with innovative suggestions. Feedback: Provide constructive feedback and guidance during the creation process. Public Speaking: Help students develop confidence in presenting their work. Encourage students to evaluate and learn from other groups' presentations. Reflection: Guide students in reflecting on their choices and the potential impact of their actions. Help students set realistic and achievable goals for reducing electricity consumption. | ||||||||||||||||||||||||||||||||||||||||
| Digital Resources | |||||||||||||||||||||||||||||||||||||||||
| 69 | |||||||||||||||||||||||||||||||||||||||||
| | |||||||||||||||||||||||||||||||||||||||||
| 14 |  ECO Awareness topics / E.C1 The Three Rs: Reduce, Reuse, Recycle ECO Awareness topics / E.C1 The Three Rs: Reduce, Reuse, Recycle | ||||||||||||||||||||||||||||||||||||||||
| Developed by | Antalya Directorate Of Education | ||||||||||||||||||||||||||||||||||||||||
| Duration | 60 | ||||||||||||||||||||||||||||||||||||||||
| Energizers | 12 - Body spelling - Body geometric shapes Option 1 The teacher asks students to write their names in the air using different parts of their body, for example, using their hand, leg, lbow, or nose, etc. Optional: If time allows the teacher could ask to the class to spell out some words reproducing the letters with their bodies. Students can collaborate all together or can create different groups. Option 2 Task: Draw a geometric shape in the air using different parts of your body - hands, legs, elbows, noses, etc. Option 3: Task: Work in groups of 2, 3 or more students to make a geometric shape with your bodies. | ||||||||||||||||||||||||||||||||||||||||
| Relaxing Exercises | 13 - Body massage The students stand in a circle: they need to follow all the movement the teacher does and massage themselves. The teacher starts to massage different parts of his/her body, starting from the head till the feet (it’s better if they take off their shoes). The teacher explains how the massage needs to be done, if delicate or more energetic. Optional: The teacher can also ask to the students to massage another classmate. | ||||||||||||||||||||||||||||||||||||||||
| Objectives | - Students will be able to give examples of reducing, reusing, and recycling. - Students will be able to explain the benefits of reducing, reusing, and recycling. - Students will be able to create 3-6 images using a medium of their choice | ||||||||||||||||||||||||||||||||||||||||
| Preparation | Materials: Recyclable materials (paper, plastic, glass, etc.), Magazines for cutting out pictures, Scissors, glue, and construction paper, Bins or boxes for sorting recyclables -paper, plastic bottles, aluminum cans, glass jars ,old clothing, reusable shopping bags (reusable), and single-use plastic items like straws or styrofoam containers | ||||||||||||||||||||||||||||||||||||||||
| Work Flow | Step 1 (10 min): Introduction
Step 2 (20 min): Identifying the Three Rs
Step 3: Sorting Game (20 minutes)
Step 4: Craft Time (15 min)
Step 6 (10 min): Real-Life Applications
Step 7 (5 min): Conclusion and Reflection
Encourage students to share one thing they will do differently to help the environment. | ||||||||||||||||||||||||||||||||||||||||
| Feedback |
-What was your favorite part of today's lesson? -What new thing did you learn about reducing, reusing, and recycling? -Was there anything you found difficult to understand? | ||||||||||||||||||||||||||||||||||||||||
| Adaptations | - In step 4 Students who prefer not to draw can use pictures cut out from magazines to make their posters. | ||||||||||||||||||||||||||||||||||||||||
| Teacher Skills | Introduction: Engaging students with a captivating introduction and setting the stage for learning about the Three Rs. (Step 1) Engagement: Capturing students' interest and attention from the beginning of the lesson. (Step 1) Explaining Concepts: Providing clear definitions and explanations of Reduce, Reuse, and Recycle using simple language and visuals. (Step 1) Explanation: Ensuring that students understand the meanings of Reduce, Reuse, and Recycle clearly. (Step 1) Group Work: Facilitating group discussions and activities where students collaborate to generate examples and ideas. (Step 2) Collaboration: Encouraging teamwork and cooperative learning among students. (Step 2) Hands-on Activity: Conducting a sorting game with materials to reinforce understanding of recycling concepts practically. (Step 3) Activity-based Learning: Engaging students in hands-on activities to enhance comprehension and application of knowledge. (Step 3) Reflection and Application: Discussing real-life applications of the Three Rs and encouraging students to reflect on their own practices. Guiding students to think critically about how they can apply what they've learned to their daily lives. (Step 6, Step 7) | ||||||||||||||||||||||||||||||||||||||||
| Digital Resources | |||||||||||||||||||||||||||||||||||||||||
| 70 | |||||||||||||||||||||||||||||||||||||||||
| | |||||||||||||||||||||||||||||||||||||||||
| 15 |  ECO Awareness topics / E.C2 Pollution Awareness ECO Awareness topics / E.C2 Pollution Awareness | ||||||||||||||||||||||||||||||||||||||||
| Developed by | Antalya Directorate Of Education | ||||||||||||||||||||||||||||||||||||||||
| Duration | 60 | ||||||||||||||||||||||||||||||||||||||||
| Energizers | 15 - Animal roundup The teacher tells to the class to silently think of an animal. Then he/she tells to the group that without talking, they need to arrange themselves on a line from largest to smallest animals. Group members can only make gestures and the noise of their animal. After they have finished, teacher ask to the students to say the animal they were supposed to be to see if the order is correct. | ||||||||||||||||||||||||||||||||||||||||
| Relaxing Exercises | 18 - Making room Participants are asked to raise their arms with palms facing up, imagining that they are pushing up the ceiling and are asked do a lot of strength in that direction to increase the space of the room where they are. Then they are asked to turn the arms down with palms facing down thinking that they are pushing down the floor. They are asked to push away the walls turning their left arm and palm to the wall on their left and their right arm and palm to the wall that’s on their right. | ||||||||||||||||||||||||||||||||||||||||
| Objectives | -Student will be able to know the meaning of pollution and the reasons of it -Students will be able to know the difference of the pollution tips and how to stop it | ||||||||||||||||||||||||||||||||||||||||
| Preparation | Materials: worksheets Classroom arrangement: classic design | ||||||||||||||||||||||||||||||||||||||||
| Work Flow | Step 1: Introduction and Student Input (15 minutes) -Write "Pollution" on the board and ask students what they know about it. -Have students share what they know about pollution, even if it’s just a word or idea. Write all students’ contributions on the board. -Summarize their answers and clarify the concept of pollution: Explain that pollution is when harmful or toxic substances are introduced into our environment, causing damage to the air, water, and soil, and affecting the health of living organisms, including humans. Step 2 (5 min.): Discussion
Step 3 (5 min.): Types of Pollution
Step 4 (10 min.): Air Pollution
Step 7 (10 min.): Water Pollution
Step 6 (10 min.): Soil Pollution
Step 7 (10 min.): Noise Pollution
Step 8 (10 min.): Impact of pollution on our health and the environment
Step 9: Conclusion (5 minutes)
| ||||||||||||||||||||||||||||||||||||||||
| Feedback | -The teacher asks students to share their thoughts on the lesson, what they learned, and what they found interesting or challenging. This feedback helps the teacher understand the students' perspectives and improve future lessons. | ||||||||||||||||||||||||||||||||||||||||
| Adaptations | For Larger Classes: Use group activities to ensure all students are engaged and participating. Assign group leaders to facilitate discussions and activities within smaller groups. | ||||||||||||||||||||||||||||||||||||||||
| Teacher Skills | Questioning: Skillfully asking questions to stimulate student thinking and participation. (Step 1, Step 4, Step 5, Step 7, Step 8) Explanation: Providing clear explanations of concepts using simple language and examples. (Step 3, Step 6, Step 7, Step 8, Step 9) Facilitation: Guiding discussions and activities to ensure active student engagement. (Step 4, Step 6, Step 7, Step 8, Step 9) Visual Aids: Using visual aids such as charts, maps, and diagrams to enhance understanding. (Step 5, Step 7, Step 8, Step 9) Recap and Review: Summarizing key points and reviewing concepts to reinforce learning. (Step 6, Step 7, Step 8, Step 9, Step 10) | ||||||||||||||||||||||||||||||||||||||||
| Digital Resources | |||||||||||||||||||||||||||||||||||||||||
| 71 | |||||||||||||||||||||||||||||||||||||||||
| | |||||||||||||||||||||||||||||||||||||||||
| 16 |  ECO Awareness topics / E.C3 Circular Economy ECO Awareness topics / E.C3 Circular Economy | ||||||||||||||||||||||||||||||||||||||||
| Developed by | Prosveta Foundation - Petya Yordanova | ||||||||||||||||||||||||||||||||||||||||
| Duration | 80 | ||||||||||||||||||||||||||||||||||||||||
| Energizers | 31 - Racing for resources Part 1 Place several hula hoops on the ground (approx. one hoop for every 3 students). Hula hoops represent the natural resources available for all the Earth’s inhabitants. Explain to students that they represent all the living things on our planet. They can choose what they want to represent (a human, an animal, a plant). Students start walking around and when the teacher claps his/her hands, everybody dashes to a hula hoop so that they can survive (the hula hoops are their homes, with everything they need to survive). Only three students can be in one hula hoop (because the hula hoop provides resources for only 3 living beings). Because the hula hoops are more than needed, everyone is expected to have landed in one. The teacher could comment “Did everyone make it safely? Our planet is a wonderful place. Lots of space and room for everyone!” Part 2 Ask students to get out of the hoops and scatter in the room. Place the Racing for Resources cards (Annex 4) face down on a table and ask one of the students to pick up one card and read it aloud. All the students for whom the statement is true have to raise their hands. Possible scenarios for the next steps Scenario 1 (all the green cards): the card reads “You use your own grocery bags when you go shopping in the supermarket.” The students who do that raise their hands and the teacher counts them. If the number is more than 50% of the students, no further actions follow, and the teacher asks somebody to pick up another card. Scenario 2 (all the yellow cards): the card reads “You leave the lights on when you leave the room.” The students who do that raise their hands and the teacher counts them. If the number is more than 50% of the students, the teacher takes away one hula hoop because this is an example of a human action that depletes natural resources or is bad for the Earth. Continue the game in the same way until all cards have been read, removing a hula hoop each time if more than 50% of the students have raised their hands when the yellow cards have been read. Finally, the teacher claps his/her hands and students have to fit in the available hula hoops. If the number is the same, everything is fine, and this is the result of the responsible behaviour of the students. If the number of the hoops is smaller, some students will stay outside because their habitats have disappeared due to the bad habits. | ||||||||||||||||||||||||||||||||||||||||
| Relaxing Exercises | 32 - Great job Students form a circle. Then everyone turns right and with the right hand pats the shoulder of the child standing in front saying “You did a great job”. Then all students turn left and do the same with the child standing in front of them. Final step: students stand in a circle facing each other. They put their right hand on their own left shoulder, and their left hand - on their right shoulder; they pat their shoulders saying “I did a great job”. | ||||||||||||||||||||||||||||||||||||||||
| Objectives | Through various materials and videos, the students can reach the essence of the concepts of linear economy, circular economy. Students will understand the importance of the circular economy concept for reducing waste and protection of nature. | ||||||||||||||||||||||||||||||||||||||||
| Preparation | Equipment
Print outs: | ||||||||||||||||||||||||||||||||||||||||
| Work Flow | Step 1 ( 5 min.): Brainstorming Look around you. We are surrounded by different things - the objects in the classroom, our clothes, the cars we see through the window, the school building, etc. All the things we see are made of different materials. Let’s try to make a list of all the materials you can think of. Expected independent answers or prompted by the teacher: plastic, metal, wood, glass, various fibers and fabrics, nylon, polyester, wool, cotton, etc. The materials are written on the board. Step 2 (15 min.) Group work
Step 3: (8 min.)
Step 4: (15 min.) Watching a movie Students watch the movies and formulate definitions of linear and circular economy: Circular economy: what it is and why it is important https://www.europarl.europa.eu/topics/en/article/20151201STO05603/circular-economy-definition-importance-and-benefits https://www.youtube.com/watch?v=tCJNikTz1sA (auto-generated translation available in all languages) Take - Make (produce) - Use - Dispose (throw away). We call this cycle linear economy. We take our natural resources, turn them into products, use the products, and then throw them away when we no longer need them, and they become waste. The economy has been working this way for many, many years - since the Industrial Revolution when people first figured out how to mass produce things. But now the tipping point is being reached – this is no longer good for businesses, people or the environment. This way of doing things leads to high levels of waste and pollution that damage our planet and our health. It's time for a new system. Do you remember how this new organization of producing and using things is called? Yes, this is the circular economy. Step 5: (10 min.) Group work Each team receives an envelope with the following words (Annex 2) TAKE x2, MAKE x2, USE x2, DISPOSE, REUSE, REFUSE, REPAIR, RETHINK, RECYCLE which have been cut separately. Each group has to arrange the words in 2 diagrams explaining (1) the linear and (2) the circular economy. The teacher should fix the attention of the students on the new words not mentioned in the video or the tasks before. A discussion could be launched about how students understand the meaning of the words rethink and refuse related to consumption. Students complete the task and present the result. Expected arrangement of the provided words: Linear economy cycle: TAKE (raw materials) - MAKE (produce items) - USE - DISPOSE. Circular economy cycle: TAKE (raw materials) - MAKE (produce items) - USE - RETHINK (whether you need to buy a new item) - REFUSE (to buy a new item) - REPAIR (it needed in order to use the item again) - REUSE (the item) - RECYCLE (if possible)
Step 6: (12 min) Individual work in Student’s worksheet (Annex 3). The worksheet provides a template which students can use to present the stages in the life cycle of a T-shirt. Instruct them to cut the images separately and place them in the diagram (template) to present the linear economy cycle of the production and the use of a cotton T-shirt. Expected arrangement of the provided pictures (considering the numbers on the template boxes): Linear economy:
Circular economy
7. Product used and placed for recycling Step 7: (5 min) Time to check what students learned in the lesson. The teacher could choose one of the indicated ways to log into the Wordwall platform.
Students have to read the text and fill in the blanks with the colored words. | ||||||||||||||||||||||||||||||||||||||||
| Feedback |
| ||||||||||||||||||||||||||||||||||||||||
| Adaptations | Follow-up activities: 1. Students research and present interesting facts about the circular economy. They can present their findings in another lesson (play the videos they have found, or tell their classmates what they have learned, or make a drawing or poster and bring it to the classroom) 2. Younger students can organize a workshop demonstrating in practice the model of circular economy by remodeling and giving second life to objects. Here are some ideas: | ||||||||||||||||||||||||||||||||||||||||
| Teacher Skills |
| ||||||||||||||||||||||||||||||||||||||||
| Digital Resources |
Circular economy explained for kids Annex 1: Group worksheet (Step 2) Annex 2: Words (Step 5) Annex 3: Student worksheet (Step 6) Annex 4: Racing for Resources Cards (Energizer) | ||||||||||||||||||||||||||||||||||||||||
| 72 | |||||||||||||||||||||||||||||||||||||||||
| | |||||||||||||||||||||||||||||||||||||||||
| 17 |  ECO Awareness topics / E.C4 Purification of water (experimental approach) ECO Awareness topics / E.C4 Purification of water (experimental approach) | ||||||||||||||||||||||||||||||||||||||||
| Developed by | Prosveta Foundation - Petya Yordanova | ||||||||||||||||||||||||||||||||||||||||
| Duration | 60 | ||||||||||||||||||||||||||||||||||||||||
| Energizers | 35 - Water - Soil - Air Students stand in a circle as shown in the photo. When they hear the word Water, they have to make 2 jumps forward without breaking the circle; Soil is for making 1 jump backwards and Air stands for making a complete turnaround (360ᵒ). | ||||||||||||||||||||||||||||||||||||||||
| Relaxing Exercises | 6 - Bee breathing The teacher instructs the students to get in a comfortable position to practice bee breathing. They have to imagine that they are sitting on a leaf or a flower petal, to sit straight and allow the leaf or petal to gently support them. The teacher gives students the following instructions: Breathe in, allowing the air to just gently come in through your nose, filling up your lungs. As you breathe out, buzz like a bee. See how long your buzz can last. See how far your bee is going to fly before sitting down and resting again. Buzz. Buzz. Buzz. On the next breath, see if your bee can fly with a loud, strong buzz. On the next breath, see if your bee can fly with a soft buzz. When the exercise is finished, the teacher gives time for a short discussion: Does it feel different with a strong or a soft buzz? How does your body feel? Optional (use if time allows): After breathing practice, draw a picture of a bumblebee and the leaf or flower that you were “sitting on” in your imagination. This picture can be used as a relaxation practice reminder. When you see the picture, practice being like a Bee on a leaf and practice a Bee breath. | ||||||||||||||||||||||||||||||||||||||||
| Objectives | At the end of thе lesson students will:
| ||||||||||||||||||||||||||||||||||||||||
| Preparation | Materials
Classroom arrangement – the class is divided into 4 groups. There are 4 Stations for experimentation. During the lesson, the groups rotate, so that they do all the experiments. It is recommended that the experiments in the 4 stations are facilitated by an adult. Print outs
| ||||||||||||||||||||||||||||||||||||||||
| Work Flow | Step 1 (8 min.): Introduction Arouse students' attention and interest in the subject through provocative pictures and questions – Appendix А
The goal is to get the students intrigued by the theme of the lesson and to motivate them to participate actively. Step 2 (7 min.) SOS letter The teacher asks students what are the main pollutants of water. (Connection with the lesson Pollution Awareness) The described activities are related to water pollution and water purification. Station 1: Water pollutants Conclusion: Waste pollutes water. Morals: Through the experiment students will be convinced that water must be kept clean. Station 2: Water pollution and purification
Expected observations: The soap pushes the black pepper away from the finger, it retreats. Conclusion: Soap keeps dirt away from your hands. The action of the cleaning agents is demonstrated. Observations are recorded in Appendix 2. Station 3: Cleaning the beach game. Students play the game separating the waste and throwing it in the appropriate bin for recycling. Students receive the instructions (Appendix 3) and play the game. The fourth experiment is related to water filtration. It is an experiment with two glasses and paper towel. Muddy water is poured into one of the glass. The two glasses are connected with rolled paper towel. After a while, the purified water (due to the paper towel) flows into the second glass. The teacher could show the results from the same experiment that he conducted earlier so that the results can be observed quickly. Children share their impressions. Students fill in their observations in Appendix 4: Observation 1: After a while, the water starts flowing from glass A to glass B. Observation 2: The water in glass B is not muddy anymore! It has been purified with the help of the paper towel. Step 4: (5 min.) Conclusions
Why should we keep water clean? | ||||||||||||||||||||||||||||||||||||||||
| Feedback | Discussion questions:
| ||||||||||||||||||||||||||||||||||||||||
| Adaptations | Younger students can only do the experiment from Station 4, so all of them could participate actively. Being aware with the Environmental Footprint , students can calculate their Water Footprint https://watercalculator.org/ | ||||||||||||||||||||||||||||||||||||||||
| Teacher Skills | Classroom management - establishing clear expectations, maintaining discipline, and promoting positive behaviors Communication Critical thinking Flexibility – the experiments may take longer or shorter time and the teacher has to be flexible with the new organization of the rotation. Confidence building – through the practical work, the teacher could build confidence and encourage students. Facilitation - Guiding discussions and activities to ensure active student engagement. | ||||||||||||||||||||||||||||||||||||||||
| Digital Resources | |||||||||||||||||||||||||||||||||||||||||
| 73 | |||||||||||||||||||||||||||||||||||||||||
| | |||||||||||||||||||||||||||||||||||||||||
| 18 |  ECO Awareness topics / E.C5 Responsible consumption ECO Awareness topics / E.C5 Responsible consumption | ||||||||||||||||||||||||||||||||||||||||
| Developed by | Prosveta Foundation - Petya Yordanova | ||||||||||||||||||||||||||||||||||||||||
| Duration | 60 | ||||||||||||||||||||||||||||||||||||||||
| Energizers | 34 - SPELL THE WORD Ask eight people from the first row to come to the front of the room and stand in a straight line facing the rest of the class. Distribute the letter cards – E S R R C E U O (RESOURCE), one to each participant. Ask each person to hold his/her letter card above her head, so the class can see it easily, but the holder doesn’t know which letter he/ she is holding Explain that the letters spell an 8-letter word. Ask the students from the audience to give directions to the letter holders to rearrange them in the correct order in order to spell the word correctly. (Examples: Anya, (who is holding letter E) move to the end of the row; Peter, (who is holding letter R) move to the font of the row, etc.) When the word is spelled correctly, ask everyone to read it aloud. | ||||||||||||||||||||||||||||||||||||||||
| Relaxing Exercises | 33 - Colour relaxation Students are instructed to lie down or sit in a relaxed position and imagine different colours on different parts of their bodies.
Now let your whole body feel happy, peaceful and relaxed. | ||||||||||||||||||||||||||||||||||||||||
| Objectives | At the end of the lesson students will:
| ||||||||||||||||||||||||||||||||||||||||
| Preparation | Materials – letters E S R R C E U O printed on A4 paper Equipment – whiteboard or projector Print outs Appendix 1 – for each student Appendix 2 – for each student Appendix 3 – for each student | ||||||||||||||||||||||||||||||||||||||||
| Work Flow | Step 1 (10 min.): Introduction
At the beginning of the 21st century, the sad state of the situation worldwide calls out for us all.
Step 2 (12 min.)
Step 3: (15 min.)
Step 4: (13 min.) Explain the connection between the causes and the sequences providing examples from students’ everyday life, e.g. You fail your exam because you didn’t study hard enough, or Your father was tired because he worked long hours. After making sure they understand the meaning, propose the game “Chain links” in which students have to sort out the information they’ve learnt. Distribute Appendix 2 to students, ask them to cut out the pictures and place them in the provided the scheme in the correct order to represent the production of palm oil considering the connection between a cause “and its sequence(s). At the end teacher and students discuss the arrangement of the pictures. Expected arrangements or the provided pictures:
Step 5: (10 min.) Conclusions Step 5: (20 min.) Poster creation – preparation and instructions Teacher ask students to remember the video(s) and their ideas about what they, personally, could do about the palm oil topic. Considering the suggested actions, students are asked to create a poster meant to inform others about the consequences of palm oil production, about how people can avoid using it and how they can find out if palm oil is used in the production of a product. It is good if the teacher talks about the basic rules of poster creations before they start working on it (for instance not too much text, nice pictures, clear message, provide also the reasons for the suggested actions). | ||||||||||||||||||||||||||||||||||||||||
| Feedback |
| ||||||||||||||||||||||||||||||||||||||||
| Adaptations | Older students are acquainted with SDG 12 – Responsible production and consumption: https://www.youtube.com/watch?v=dn-hLQk49eA&ab_channel=SmileandLearn-English Students can record a video about their responsibility linked to palm oil usage: they could include information about the danger for the rainforest and its inhabitants. As an inspiration, they can watch a video created by children. | ||||||||||||||||||||||||||||||||||||||||
| Teacher Skills | Classroom management - establishing clear expectations, maintaining discipline, and promoting positive behaviors Communication discussions. Critical thinking - edit lesson plans and create new ones using the adaptation notes. Facilitation - Guiding discussions and activities to ensure active student engagement. | ||||||||||||||||||||||||||||||||||||||||
| Digital Resources | The secret of palm oil/Educational video for kids Protect Paradise: An Animation about Palm Oil – Greenpeace international SDG 12 – Responsible production and consumption: https://www.youtube.com/watch?v=dn-hLQk49eA&ab_channel=SmileandLearn-English | ||||||||||||||||||||||||||||||||||||||||
| 74 | |||||||||||||||||||||||||||||||||||||||||
| | |||||||||||||||||||||||||||||||||||||||||
| 19 | |||||||||||||||||||||||||||||||||||||||||
| Developed by | Foundation for Environmental Education | ||||||||||||||||||||||||||||||||||||||||
| Duration | 80 | ||||||||||||||||||||||||||||||||||||||||
| Energizers | 12 - Body spelling - Body geometric shapes Option 1 The teacher asks students to write their names in the air using different parts of their body, for example, using their hand, leg, lbow, or nose, etc. Optional: If time allows the teacher could ask to the class to spell out some words reproducing the letters with their bodies. Students can collaborate all together or can create different groups. Option 2 Task: Draw a geometric shape in the air using different parts of your body - hands, legs, elbows, noses, etc. Option 3: Task: Work in groups of 2, 3 or more students to make a geometric shape with your bodies. | ||||||||||||||||||||||||||||||||||||||||
| Relaxing Exercises | 13 - Body massage The students stand in a circle: they need to follow all the movement the teacher does and massage themselves. The teacher starts to massage different parts of his/her body, starting from the head till the feet (it’s better if they take off their shoes). The teacher explains how the massage needs to be done, if delicate or more energetic. Optional: The teacher can also ask to the students to massage another classmate. | ||||||||||||||||||||||||||||||||||||||||
| Objectives |
a. Define different types of pollution (sound, light, and heat). b. Identify the causes and effects of pollution. c. Suggest potential solutions to reduce pollution. d. Apply their knowledge to create a personal plan for promoting a peaceful learning environment. | ||||||||||||||||||||||||||||||||||||||||
| Preparation |
Presentation materials:
Materials:
Station rotation:
Quiz:
Minibook creation:
| ||||||||||||||||||||||||||||||||||||||||
| Work Flow | Step 1 (5 minutes) Beggin by walking around the classroom and asking: "Can you spot anything around us that might be making it harder to learn? What's causes can you name?" (Wait for student responses) Explain: "These misplaced items are causing a mess, making it difficult to focus. This kind of disorder in our environment is called pollution." Invite students to close their eyes and raise their hands high. Ask them: “What can you feel? What sounds can you hear?" (Wait for student responses) Explain: "We can experience things even without seeing them, like sounds and feelings. Similar to our messy classroom, there can be unseen pollution in nature that still disrupts the environment." Show a picture of a polluted environment and ask: "How do you think this kind of mess might affect the world around us?" (Wait for student responses) Explain: "Just like classroom clutter disrupts our learning, pollution in nature can harm plants, animals, and even ourselves." Step 2 (1 minute) Introduce class of key concepts: Tell them that today, we'll embark on a journey to learn about various types of pollution that is not visible – sound, light, and heat pollution. We'll explore what causes them and how they impact our environment. Step 3 (30 minutes) Station rotation activity to explore pollution types. Split students into groups of 3-4 students. Place the corresponding video and a device for viewing it at each station. Distribute an option to view worksheet packets to each group containing all three (Light, Sound, Heat). Instruct students to spend a designated amount of time (e.g., 5-7 minutes) at each station, following these steps: a. Watch the videos on the specific pollution type. b. Complete the corresponding worksheet on the pollution type they just observed in the video. c. After each time interval, have groups rotate clockwise to the next station. d. After completing all stations, gather the class for a discussion. Briefly review key points from each video and have students share their findings from the worksheets. Step 4 (10 minutes) Facilitate a class discussion about the different pollution types. Encourage students to: a. Identify common problems for each of the pollution types (e.g., sources, impacts, solutions). b. Discuss the answers with the class! While students discuss, teacher can take notes on the whiteboard using a mind map format. This visual tool can help them organize key concepts and connections learned about different pollution types. Step 5 (10 minutes) Students remain in their previous groups. Students should find a spot in the classroom where they can see the projector screen. Quiz on Physical Pollution (using Jeopardy quiz): The quiz includes 5 questions in each of 3 categories: "sound pollution," "light pollution," and "heat pollution." Each question is assigned a point value based on difficulty (e.g., easy = 10 points, medium = 20 points, hard = 30 points). Question and answers are available in PP presentation. The game begins with one team choosing a question from any category and answering within 30 seconds. Correct answers earn points for the team. If a team answers incorrectly, no points are awarded, and the next team can choose a question. The game can be played for 4-5 rounds, depending on the number of students and the time that's left. Step 6 (20 min) Students will create a personal "Peace and quiet mini Book" with 7 recommendations on how to promote a peaceful, quiet and healthy learning environment at school. This will help them think about how to focus on their studies and enjoy their school day more. Students have to create a designated space in the corner of each page (e.g., a square, star, smiley face) where students can mark their progress by indicating which recommendations they've followed throughout the day, week, or month. | ||||||||||||||||||||||||||||||||||||||||
| Feedback | These mini-books can be a springboard for student action! Students can use them to: Spread awareness: They can visit other classrooms and share their knowledge about invisible pollution and the steps we can take to reduce it. Inspire action: Students can present their ideas and mini books to other classes, encouraging them to create their pledges for a peaceful learning environment. Promote student leadership: Students can take ownership of their learning by sharing their mini-books as gifts or starting a school-wide initiative to create similar books about different environmental issues. It empowers students to use their creations as tools for spreading awareness, inspiring action, and promoting student leadership. | ||||||||||||||||||||||||||||||||||||||||
| Adaptations | A1. You can create the book in other lessons, so you don't have to create that in the classroom. A2. You can adjust the number of recommendations in the mini-book from 7-5. A3. You can modify the book content to focus on specific behaviours not only inside, but also outside and school surroundings. | ||||||||||||||||||||||||||||||||||||||||
| Teacher Skills | Building Background Knowledge: The teacher provides a brief overview of pollution to establish a foundation for further learning. Skill: Organization and Management: The teacher effectively organizes and manages the station rotation activity to ensure smooth transitions and student engagement. Critical Thinking: The teacher promotes critical thinking by guiding students to analyze the information and draw conclusions. Assessment Design: The teacher creates a well-designed quiz that accurately assesses students' understanding of the key concepts. The teacher provides feedback on the quiz results and reinforces key points as needed. Reflection and Goal Setting: The teacher guides students in reflecting on their learning and setting personal goals for promoting a peaceful environment. | ||||||||||||||||||||||||||||||||||||||||
| Digital Resources | Instruction on how to create a mini book Worksheets for the group Jeopardy quiz Videos on different types of pollution: | ||||||||||||||||||||||||||||||||||||||||
| 75 | |||||||||||||||||||||||||||||||||||||||||
| | |||||||||||||||||||||||||||||||||||||||||
| 20 |  ECO Awareness topics / E.C7 Air alert: pollution and air quality ECO Awareness topics / E.C7 Air alert: pollution and air quality | ||||||||||||||||||||||||||||||||||||||||
| Developed by | IPSantarem - Bento Cavadas e Nelson Mestrinho | ||||||||||||||||||||||||||||||||||||||||
| Duration | 80 | ||||||||||||||||||||||||||||||||||||||||
| Energizers | 54 - Pushed the balloons With this dynamic, students will understand that in real life we need to work together to keep the air clean, prevent pollution from spreading and take care of our health and well-being.
| ||||||||||||||||||||||||||||||||||||||||
| Relaxing Exercises | 53 - Tree Movements Stretching and Tree Movements - With the children distributed around the room or outside, ask them to stretch upwards as if they were tree branches growing towards the sky. Then ask them to move their bodies from side to side, gently, as if they were trees swaying in the wind. At the same time, ask them to breathe deeply during the movements. This moment of relaxation can be accompanied by background music, such as: Forest Sounds | Woodland Ambience, Bird Song: https://www.youtube.com/watch?v=xNN7iTA57jM Marvin Gaye "Mercy Mercy Me (The Ecology)" 1971: https://www.youtube.com/watch?v=VgJIp-uDIwA). At the end of the relaxation moment, talk about how important trees are for oxygen production and air quality, and therefore for our health and well-being. | ||||||||||||||||||||||||||||||||||||||||
| Objectives | At the end of the lesson, students should be able to:
| ||||||||||||||||||||||||||||||||||||||||
| Preparation | Preparation
Environment Programme UN. Pollution Action Note – Data you need to know. https://www.unep.org/interactives/air-pollution-note/ European Environment Agency. European city air quality viewer. https://www.eea.europa.eu/themes/air/urban-air-quality/european-city-air-quality-viewer NASA. Climate Kids. https://climatekids.nasa.gov/air-pollution/
| ||||||||||||||||||||||||||||||||||||||||
| Work Flow | Step 1 (20 min.): The air pollution. 1. Watch the video “Air Pollution for Kids | Learn about the Causes and Effects of Air Pollution; https://www.youtube.com/watch?v=Yjtgu2CxtEk (7min)”, and in small groups, draw up a mind map that answers the following question: What is air pollution? In this mind map, students should:
Step 2 (30 min.): What causes an area to have poor air quality?
Step 3 (10 min.): Individual and collective action Promote group reflection on ways in which society can take action to reduce air pollution:
Each group must create a digital slogan to be displayed in strategic areas of the school to raise awareness of adopting more sustainable habits related to air pollution. 60 mi | ||||||||||||||||||||||||||||||||||||||||
| Feedback | Ask students to give feedback about the following elements:
10 mi | ||||||||||||||||||||||||||||||||||||||||
| Adaptations | The implementation of this lesson plan will benefit of the use of an interactive board. | ||||||||||||||||||||||||||||||||||||||||
| Teacher Skills |
| ||||||||||||||||||||||||||||||||||||||||
| Digital Resources |
| ||||||||||||||||||||||||||||||||||||||||
| 76 | ||
| | ||
Bibliography
| ||
| | ||
| Indice | Page | |
| Credits | 3 | |
| Acknowledgements | 4 | |
| Preface | 5 | |
| Introduction | 6 | |
| Instruction to teachers | 7 | |
| Class preparation | 8 | |
| Non Formal Education | 11 | |
| Use of Digital Tools | 17 | |
| Evaluation | 18 | |
| Professional skills of teachers | 19 | |
| Bibliography | 20 | |
| Energizers | 21 | |
| Relaxing Exercises | 27 | |
| 1 - CIVIC Awareness topics / C.A1 Right to learn | 35 | |
| 2 - CIVIC Awareness topics / C.A2 My Right to play | 36 | |
| 3 - CIVIC Awareness topics / C.A3 The Right to freedom of expression | 37 | |
| 4 - CIVIC Awareness topics / C.A4 My Right to privacy and protection from unlawful attacks on my honour and reputation | 38 | |
| 5 - CIVIC Awareness topics / C.A5 My right to education | 39 | |
| 6 - CIVIC Awareness topics / C.A6 The Right to privacy | 40 | |
| 7 - CIVIC Awareness topics / C.B1 - Rights and obligations. My rights are not unlimited. | 41 | |
| 8 - CIVIC Awareness topics / C.B2 - Respect others rights | 42 | |
| 9 - CIVIC Awareness topics / C.C1 Kindness Rocks | 43 | |
| 10 - CIVIC Awareness topics / C.C2 Projects implemented by students | 44 | |
| 11 - CIVIC Awareness topics / C.C3 Family/school/environment as whole. | 45 | |
| 12 - CIVIC Awareness topics / C.C4 I can be a part of change for the better. | 46 | |
| 13 - CIVIC Awareness topics / C.C5 How to build cooperation outside of school | 47 | |
| 14 - CIVIC Awareness topics / C.C6 Why change is important for me? | 48 | |
| 15 - CIVIC Awareness topics / C.D1 My unique me: Celebrating what makes me special | 49 | |
| 16 - CIVIC Awareness topics / C.D2 My Identity | 50 | |
| 17 - CIVIC Awareness topics / C.E1 Our colorful classroom: Embracing diversity in friendship | 51 | |
| 18 - CIVIC Awareness topics / C. E2 My Dream Class | 52 | |
| 19 - CIVIC Awareness topics / C.E3 Body diversity | 53 | |
| 20 - CIVIC Awareness topics / C.E4 Religious diversity | 54 | |
| 1 - ECO Awareness topics / E.A1 Exploring biodiversity in nature: biocube | 56 | |
| 2 - ECO Awareness topics / E.A2 Threats to biodiversity: Protect the bees! | 57 | |
| 3 - ECO Awareness topics / E.A3 Snails and human impact | 58 | |
| 4 - ECO Awareness topics / E.A4 My first evolution concepts | 59 | |
| | ||
| 5 - ECO Awareness topics / E.A5 Wildlife Protection | 60 | |
| 6 - ECO Awareness topics / E.A6 Natural habitats and ecosystems: how can we sustain it? | 61 | |
| 7 - ECO Awareness topics / E.A7 What is biodiversity and how it affects our life? | 62 | |
| 8 - ECO Awareness topics / E.B1 Air and climate | 63 | |
| 9 - ECO Awareness topics / E.B2 Renewable Energy Sources | 64 | |
| 10 - ECO Awareness topics / E.B3 Energy efficiency and climate change | 65 | |
| 11 - ECO Awareness topics / E.B4 Environmental footprint and environmental handprint | 66 | |
| 12 - ECO Awareness topics / E.B5 Three areas of our life: transportation, food and energy. | 67 | |
| 13 - ECO Awareness topics / E.B6 A research of electricity usage habits and gathering of results | 68 | |
| 14 - ECO Awareness topics / E.C1 The Three Rs: Reduce, Reuse, Recycle | 69 | |
| 15 - ECO Awareness topics / E.C2 Pollution Awareness | 70 | |
| 16 - ECO Awareness topics / E.C3 Circular Economy | 71 | |
| 17 - ECO Awareness topics / E.C4 Purification of water (experimental approach) | 72 | |
| 18 - ECO Awareness topics / E.C5 Responsible consumption | 73 | |
| 19 - ECO Awareness topics / E.C6 Physical pollution - invisible and unfriendly | 74 | |
| 20 - ECO Awareness topics / E.C7 Air alert: pollution and air quality | 75 | |
| Bibliography | 76 | |
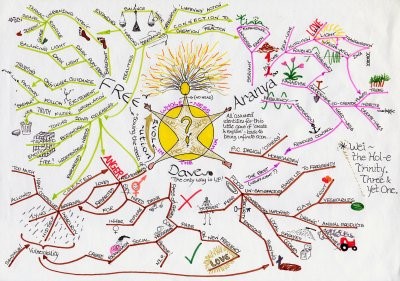
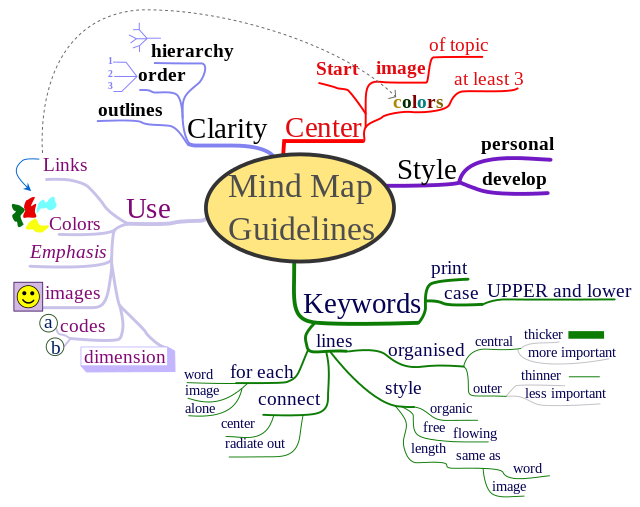


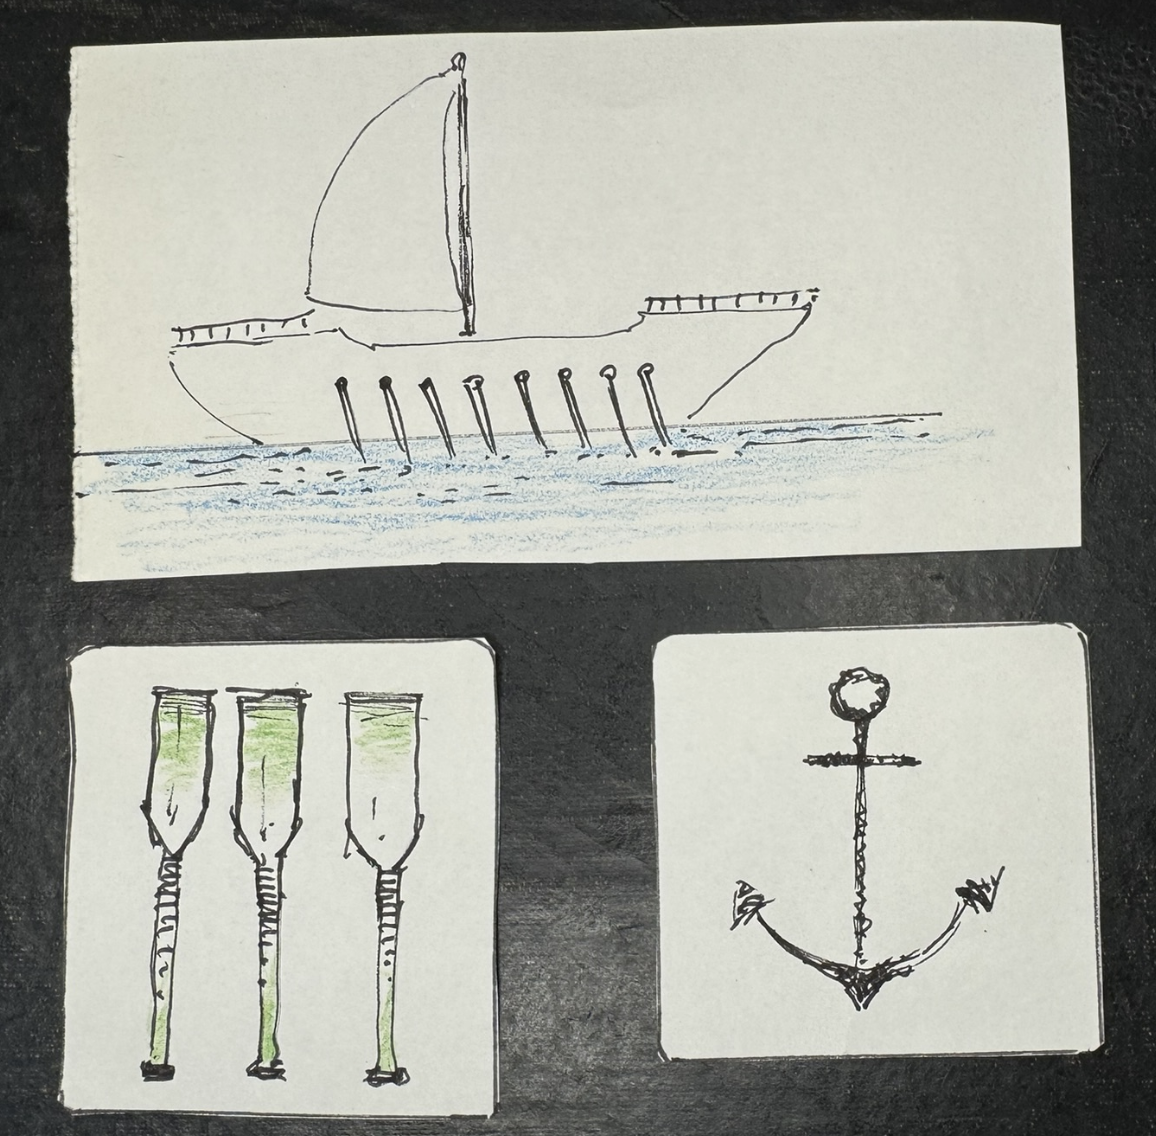


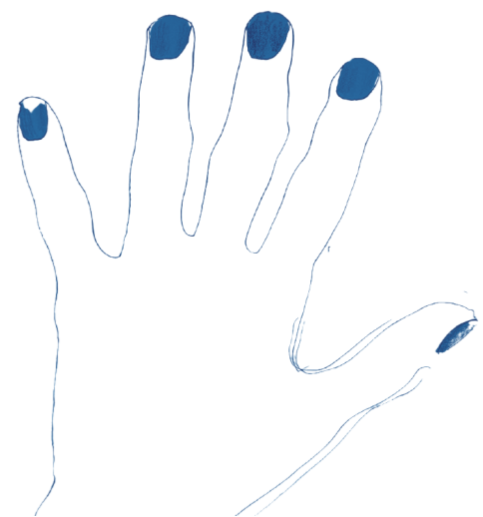 The children use their hands(one hand per small group) to evaluate the activity. In the "like" position (


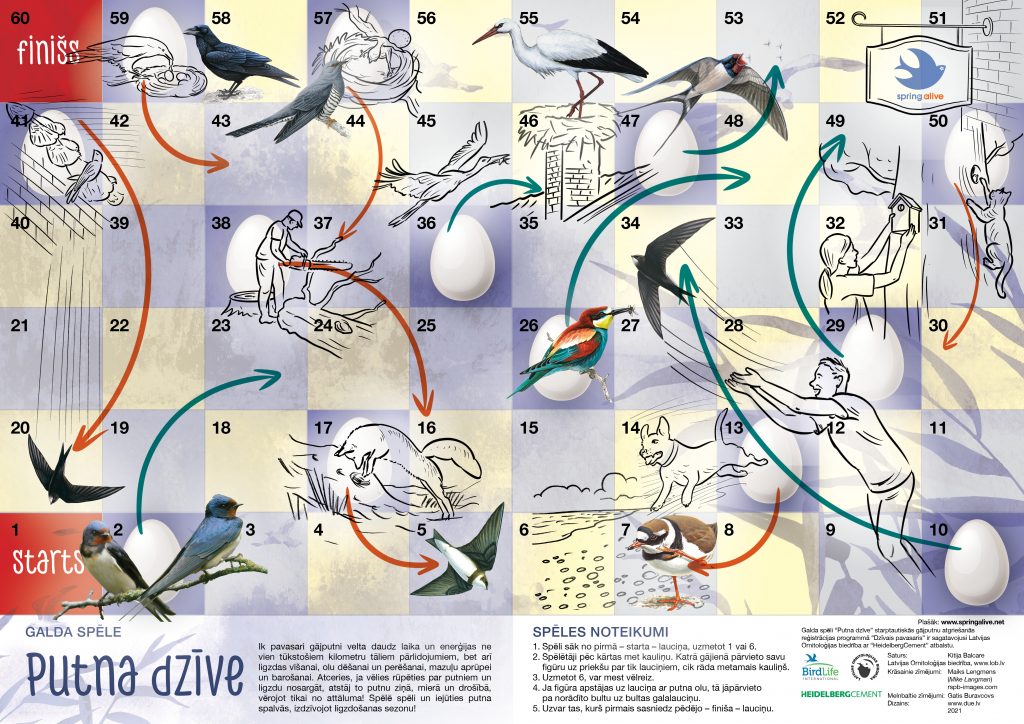
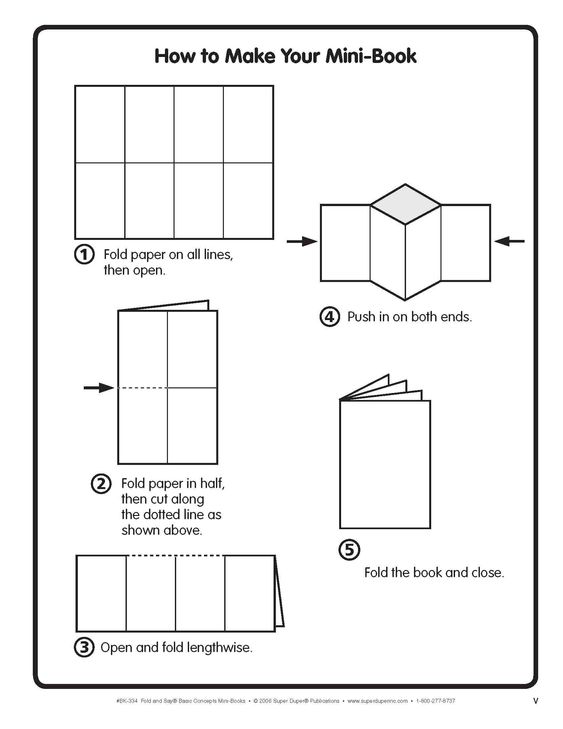